Wouldn't these be such a magical craft to make with the kids?
Showing posts with label Christmas. Show all posts
Showing posts with label Christmas. Show all posts
Tuesday, November 25, 2014
Angel Craft- Paper Cup Angel Luminaries
Ah, paper cups. They're such a great crafting material because they're versatile and cheap. We've used them to make DIY Animal Nose Paper Cups and popsicle stick ice-skating dolls. Today I'm over at MollyMoo sharing how I turned a couple of plain old clear plastic cups into cozy, glowing Paper Cup Angel Luminaries!
Happy making, friends!
Monday, November 24, 2014
Poppable Wrapping Paper (DIY Gift Wrapping Rockin' Art Mom Style!)
Are you looking for creative ways to wrap your holiday gifts? Well, today I've joined forces with fellow Rockin' Art Moms to share several imaginative and unique ways to wrap your holiday gifts! (So be sure to check out all the rockin' holiday ideas below!)
Because we always seem to have an abundance of bubble wrap lying around, I put our excess to good use and made this modern, poppable holiday wrapping paper!
I'm all about easy holiday crafts- like these paint chip Christmas Trees, easy DIY Reindeer Headbands, and mini pipe cleaner and cardboard Christmas trees. Today's wrapping paper idea is super simple, colorful, and fun! The recipient of your gift will get a kick out of popping the bubbles!
Because we always seem to have an abundance of bubble wrap lying around, I put our excess to good use and made this modern, poppable holiday wrapping paper!
Popping Holiday Wrapping Paper!
This post contains affiliate links. Thank you so much for your support!
I'm all about easy holiday crafts- like these paint chip Christmas Trees, easy DIY Reindeer Headbands, and mini pipe cleaner and cardboard Christmas trees. Today's wrapping paper idea is super simple, colorful, and fun! The recipient of your gift will get a kick out of popping the bubbles!
Friday, November 21, 2014
Candy Mosaic Art with Kids
Do you still have leftover Halloween candy? Eeek. We do. This week's Creative Preschooler theme is food! With Chuck's current aversion to painting, I thought it would be fun to use our excess candy and make art with it! So we made ourselves some lovely, colorful candy mosaic art!
It's always special to make art with non-traditional materials. Some of my favorite food-art projects include our colored salt art, tortilla art, gumdrop flowers, cornstarch sidewalk paint, and homemade watercolor paints!
Make Candy Mosaic Art with Kids!
It's always special to make art with non-traditional materials. Some of my favorite food-art projects include our colored salt art, tortilla art, gumdrop flowers, cornstarch sidewalk paint, and homemade watercolor paints!
Monday, November 17, 2014
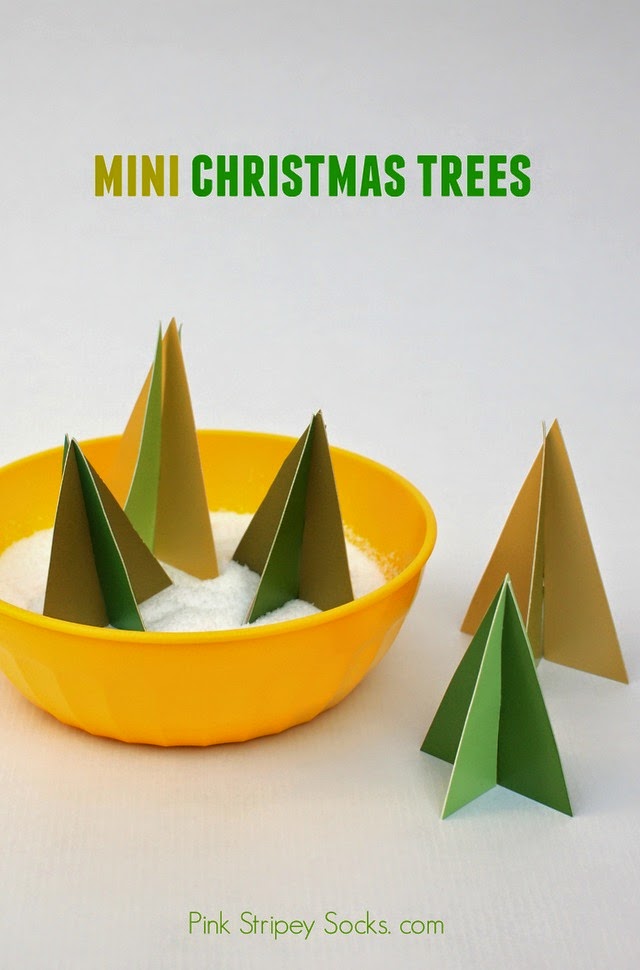
Make Mini Christmas Trees (For free!)
Here's a super easy way to decorate your home for the holidays!
Make a bunch of mini Christmas trees!
(Bonus- All the materials are free!)
Wednesday, November 12, 2014
DIY Colorful Shoelaces!
Lately I've been thinking about super simple Christmas gifts that kids could make for their friends. Last year Chuck used Sharpies to make his own Sharpie Tie-Dye Shirt. This time I thought I'd have a turn using Sharpies to turn plain white shoelaces into cute and colorful shoelaces!
This was a super fun project with colorful and unique results!
Let's get started!
DIY Colorful Shoe laces
This post contains affiliate links. Thank you for your support!
This was a super fun project with colorful and unique results!
Let's get started!
Easy Christmas Tree Advent Calendar
Christmas crafts? Christmas crafts? Ok, I haven't completely gone bonkers... it's just that the stores have started putting out their Christmas things... so I wanted to join in on the fun. Last year I had a lot of fun Christmas crafting (remember the village made from Plaster of Paris?) This year I fell in love with all of the beautiful colors of paint swatches from Home Depot... so I took a bunch home (shhhh, don't tell anyone) and made a bunch of cute paper Christmas trees with Chuck.
Then I wasn't sure what to do with our little army of trees. At first I was going to turn them into a garland of some sort, but then realized that they would make for a really simple and modern take on a DIY Christmas Advent Calendar!
Then I wasn't sure what to do with our little army of trees. At first I was going to turn them into a garland of some sort, but then realized that they would make for a really simple and modern take on a DIY Christmas Advent Calendar!
Easy Christmas Tree Advent Calendar!
This post contains affiliate links. Thank you for your support!
Tuesday, September 30, 2014
DIY Pizza Gift Box
Ha ha! I bet you saw the words pizza and gift box and thought... what is Leslie up to this time? Is she wrapping things in used pizza boxes? Eeeeh no. (Although, I would probably wrap things in new boxes.... ooh, good idea... wait.. focus, focus!) Here's what today's post is going to be about:
Isn't it cute? Chuck took an extra long nap this weekend so I had time to try out a cool craft inspired by one found in this book . It's a small gift box that looks like a pizza! Now you can make your very own unique packaging to match your cool gift. And bonus- it's made from a used envelope. Yessirree my crafty friend, this craft has it all. It's cute and good for the environment too.
Let's get started!
DIY Pizza Gift Box
This post contains affiliate links. Thank you for your support.
Let's get started!
Thursday, July 10, 2014
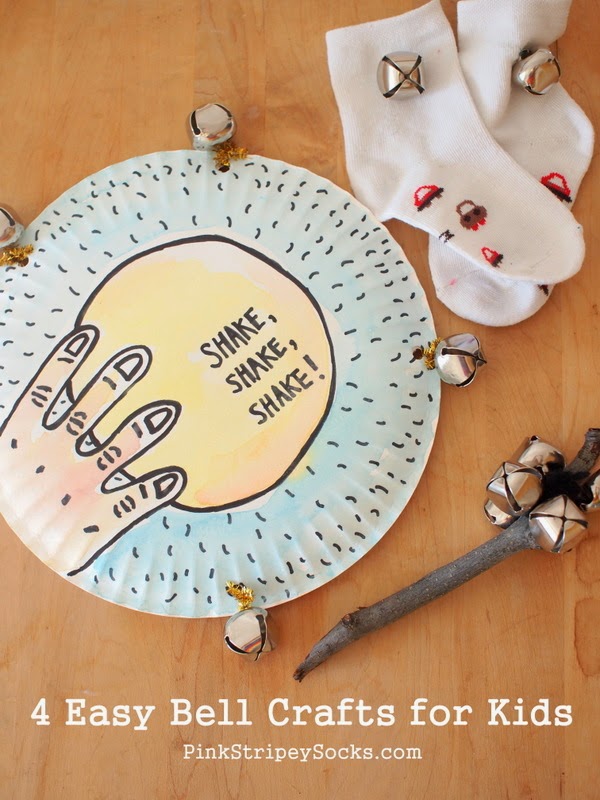
4 Easy Bell Crafts for Kids
Right now we're in the middle of packing. Not going to lie, our apartment is looking like it's inhabited by crazy people. So my posts for the next month will probably be fewer and the crafts will be much simpler. This brings me to today's topic: crafting with bells. I love the sound of jingle bells. They remind me of Christmas, the cold, and reindeer. I know it's July and Christmas is miles away... but you can craft with jingle bells all year round? Right? Right! Here's how we've crafted with jingle bells:
4 Super Easy Bell Crafts for Kids
(This post contains affiliate links. Thank you for your support!)
Friday, January 3, 2014
Sweets, Graham cracker Houses, and the Dentist (Eeek!)
So... I've got a confession.
I was looking through some holiday photos and I realized... eek I may have gonea bit WAY overboard with the sugar. Yikes. Apparently I have a tiny HUGE sweet tooth.
On top of the lovely goodies that we ate at parties, hubby and I also devoured sweets at home. Hrmm... all that sugar.... maybe we're part Elf? Here's a review of some of our homemade holiday goodies...
1. Hubby made us a couple of homemade cafe mochas. He mixed 1T cocoa, 1T hot water, and 1 T sugar in a cup. Then, he added 1 shot of espresso (or double strength coffee) and topped that with with 1/2C of warmed and frothed milk. Sweet and yurmmy...
Keep on reading to see more sweet goodies...
I was looking through some holiday photos and I realized... eek I may have gone
On top of the lovely goodies that we ate at parties, hubby and I also devoured sweets at home. Hrmm... all that sugar.... maybe we're part Elf? Here's a review of some of our homemade holiday goodies...
1. Hubby made us a couple of homemade cafe mochas. He mixed 1T cocoa, 1T hot water, and 1 T sugar in a cup. Then, he added 1 shot of espresso (or double strength coffee) and topped that with with 1/2C of warmed and frothed milk. Sweet and yurmmy...
 |
Thursday, January 2, 2014
Wreath Interpretations Exhibit
A couple of days ago, we went into the city to meet up with old friends and see "Wreath Interpretations." This exhibit showcased Christmas wreaths that were made out of nontraditional materials. After seeing all the artist's creativity, I definitely left with some ideas for next year's Christmas decorations (note to self- start saving milk caps!)
Now if you're in the city and you've got some time to spare, be sure to check the exhibit out! It's located on the 3rd floor of the Arsenal Building in Central Park. It's free (Yes!) and open from 9am-5pm, M-F until January 9th.
Here are a couple of my favorites from the exhibit:
(Psst- Wanna see what else we did in the city that day? You can find other photos from our trip on my Instagram.)
Keep reading to see more wreaths!
Friday, December 27, 2013
Christmas Photos
Warning! This post contains a lot of photos! But, I figure it's ok since Christmas only happens once a year.
This year we went to two family get-togethers. We had lunch at one aunt's place and dinner at a cousin's house. Fortunately for us, both houses were only 5 minutes apart. We had a lot of fun hanging out with family and stuffing ourselves silly. Here are some photos from our Christmas adventure:
(Thanks hubby for taking most of these while I played with the kids!)
Click below to see more photos...
This year we went to two family get-togethers. We had lunch at one aunt's place and dinner at a cousin's house. Fortunately for us, both houses were only 5 minutes apart. We had a lot of fun hanging out with family and stuffing ourselves silly. Here are some photos from our Christmas adventure:
(Thanks hubby for taking most of these while I played with the kids!)
 |
| Hubby, Chuck, and I wearing our Christmas headbands, ready to party (thanks Tito Ric for the photo!) |
Click below to see more photos...
Monday, December 23, 2013
Holiday Train Show at Grand Central Terminal
One of the best things about this Christmas is that Hubby is off the entire week. Hooray! With all of his traveling last month, it's really nice having him around. I also especially love seeing Chuck and Daddy playing like best buddies.
This past weekend we finally got a chance to visit the Holiday Train Show at Grand Central Terminal. Even though it was pretty crowded, the display itself was enchanting. Everything was meticulously crafted and I kept "oohing" and "ahhing" over all the lovely details.
Here are some photos from our trip into the city:
 |
| The miniature taxis were too adorable! Can you spot the tiny Santa? |
 |
| As you can see, this little guy really wanted to get inside |
 |
| I loved seeing the sparkly Christmas light-night sky, King-Kong, and tiny, tiny nuns |
 |
| Ack! Look at that adorable mini Christmas tree! |
 |
| We then got some yummy gluten free pizza at Two Boots Pizza. I love this little guy's sweet kisses |
 |
| Since it was such a nice day, we walked back to our bus stop. On our way across town, Daddy and Chuck posed underneath the Bryant Park Christmas tree |
 |
| It's a family portrait. Can you find all of us? |
Sunday, December 22, 2013
Four Winter Toddler Crafts and Activities
Looking for some easy toddler winter crafts and activities?
I'm officially over winter. Buh-bye shortened days! Buh-bye cold weather! Buy-bye staying inside! Oh, how I wish it were already spring. But, until warmer, sunnier days come, Chuck and I are going to persevere and have fun indoors. Here are four crafts and activities that have kept us busy, happy, and sane for the past couple of weeks.1. Cereal Box Gingerbread Men
I cut out a whole bunch of gingerbread men from my empty cereal box stash. (Yes, I'm a proud cardboard hoarder!) Then, I brought them to the library and let the kids decorate them with googly eyes and foam stickers. The older 2-year olds had fun making funny men and the babies just watched their moms do the craft.
Chuck's attention span: He probably spent about 5-10 minutes on this activity before he lost interest.
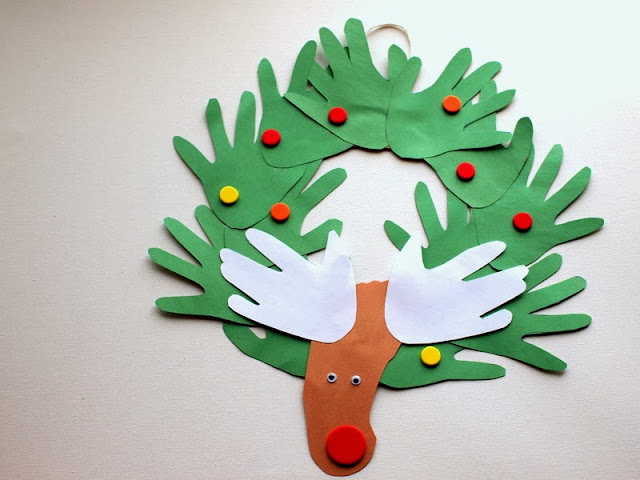
2. Hand and Foot Reindeer Wreath
Here are the different components of the wreath:
Chuck's attention span: He probably spent about 10 minutes on this activity before he lost interest.
3. Homemade Play Dough
I followed this craft clay recipe and we had tons of fun rolling, cutting, and shaping our clay. Unfortunately, our ornaments cracked when they dried. Boo. But, we had such fun manipulating the stuff that I kept leftovers in a sealed bag in the fridge. It didn't dry out and we got to play with it another day. (Right now the "play dough" is still in our fridge... so we'll try it out again this week.)
He used a blunt plastic knife, measuring spoons, measuring cup, and an olive jar (our makeshift rolling pin) to play with the dough.
Chuck's attention span: This activity was a hit! We spent about 30-45 minutes on two separate days playing with our "play dough."
4. Water Bead Play
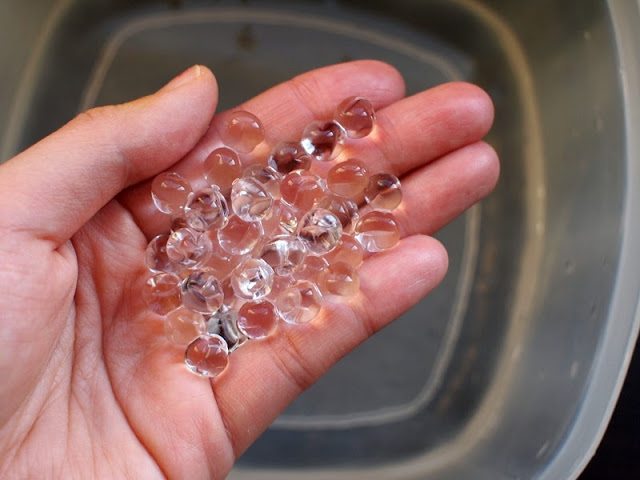
Here's what the water beads initially looked like ...
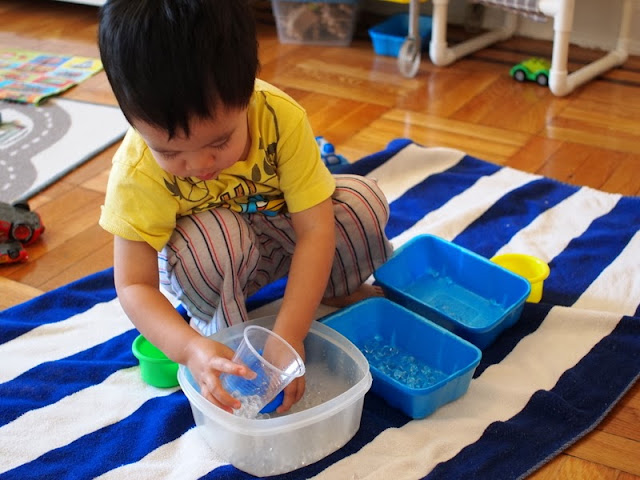
After a couple of hours, our beads grew and Chuck had a blast scooping them from container to container.
Warning: Yes, they can be a choking hazard. I repeatedly told him that the beads weren't food and I made sure to watch him while he played. Once we were done with the beads, I threw them away in the garbage can. (You can't pour them down the drain because they can clog your pipes.)
Chuck's attention span: This activity was a hit! He spent about an hour just scooping the beads from container to container.
So, for all you mamas out there who are also stuck at home with young ones... stay strong! We can make it through winter! Hopefully one of these ideas will help keep you sane this week.
Happy crafting, friends!
Thursday, December 19, 2013
Finding beauty in the everyday
Heart shaped candy canes
(bent using this tutorial)Our current car collection
Christmas tree toys
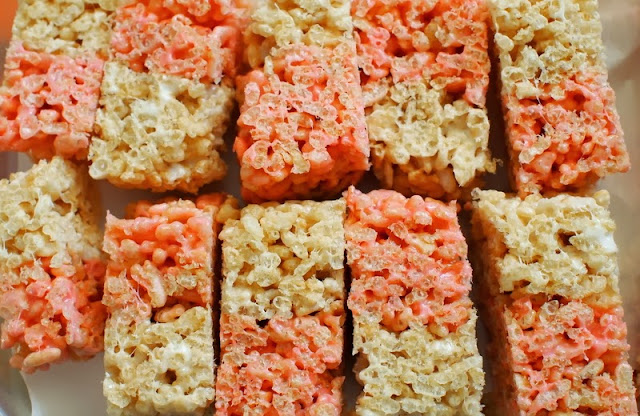
Red and white rice krispy treats
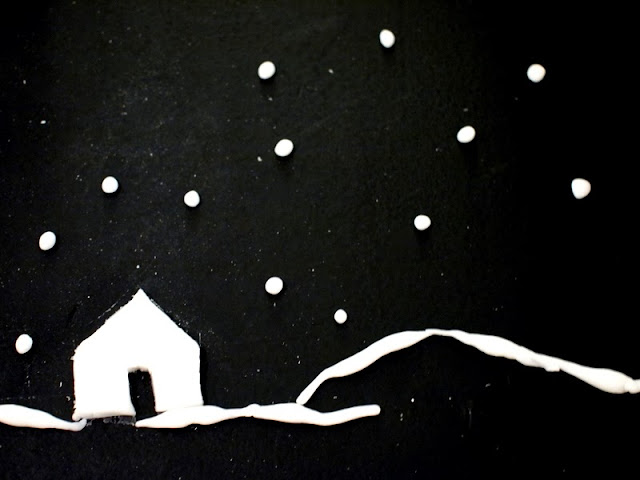
White play dough on our black table
Happy Thursday friends!
Monday, December 16, 2013
DIY Reindeer Antler Headbands
On Wednesday we're having a small holiday get-together with our toddler library group. I wanted to put Chuck in a cute holiday outfit, but I didn't get a chance to pick up anything yet. But not to worry! I had all the items needed to make these two cute reindeer antlers. I love how they came out. They're super festive, Chuck will actually wear them, (yes!) and added bonus- they were both made in one night.... my kind of craft!
DIY Reindeer Antler Headbands
Wanna see how I made them? (Or, do you wanna see cute photos of Chuck modelling them?) If so, read on!
Friday, December 13, 2013
Make a felt and cardboard gingerbread house
Today's craft was inspired by gingerbread houses. It's a little cardboard and felt "gingerbread" house with felt "candy" decorations. Pretty neat, right? All the decorations can be easily placed on and taken of, so you can decorate and re-decorate to your heart's content.
If you'd like to make your own, keep on reading!
DIY Felt and Cardboard Gingerbread House Toy
This post contains affiliate links. Thank you for your support.
Thursday, December 12, 2013
Make your own CB2 inspired Cardboard Penguins
Cardboard penguins? Who wants to make cardboard penguins?
Me! I saw these wood penguins from CB2 and thought they looked so cute. But then I saw the price tag and thought "Ha! I can crapt them for next to nothing!" So here they are... my crapted cardboard penguins.
Wanna make your own? Read on to get the template!
Me! I saw these wood penguins from CB2 and thought they looked so cute. But then I saw the price tag and thought "Ha! I can crapt them for next to nothing!" So here they are... my crapted cardboard penguins.
Wanna make your own? Read on to get the template!
Tuesday, December 10, 2013
Make Snowflake Window Clings
Tomorrow it's supposed to snow. Chuck went to bed super excited because I promised him that we'd build a snowman.
Cross your fingers that our town is dusted in snow, ok?
Although this will be the first real snowfall of the season, our apartment's windows have already been covered with snowflakes for the past couple of weeks. Every winter I cut out snowflakes from paper, but this year I tried something new and made snowflake window clings out of tulle and fabric paint. I think they make Chuck's room a bit more festive and fun.
To see how I made them, read on...
Monday, December 9, 2013
Make Homeamde Felt Milk Jug Cap Ornaments
Each year I try to make a couple of handmade ornaments for our tree. Last year, Chuck and I made these hand and feet salt dough ornaments. I would have made him a new set this year... but his feet are so big that the ornaments would end up being the size of small plates.
So instead, this year I turned a bunch of milk jug caps (gifted to me by a craft-loving aunt- thanks!) to make these mini felt ornaments. Each one has a different design and they came out so colorful and cute.... I just want to eat them up. But don't worry, I won't because they're made of felt...and glue...and plastic...
Can you guess which one is Chuck's favorite? Keep on reading to find out...
Wednesday, December 4, 2013
Homemade gift: DIY Felt Board
Do you remember playing with felt boards as a kid? (Is that too old school? Maybe kids nowadays play with fancy touch screens instead ... hrmm....) Anyway, I remember using a felt board in school and LOVING it. So I thought I'd try making a homemade felt board for Chuck. After consulting a couple of tutorials online, here's what I came up with:
Now, in full disclosure, I wish I could say that Chuck loved it and played hours and hours with it while I took a nap on the couch. Errrm..... It didn't quite turn out that way. He played with the car parts for a bit, but then seemed much more interested in rolling around real cars.
But I won't call this a craft fail just yet. I'm hoping (cross your fingers!) that he'll grow to love the felt board as much as I did. But if not, no big deal. The entire thing only cost about 4 dollars to make because I already had most of the materials lying around the apartment. Score!
Now if you have a felt-loving child in your life, you can try making your own felt board too! (I bet it would make a great Christmas gift.) Here's how I made mine:
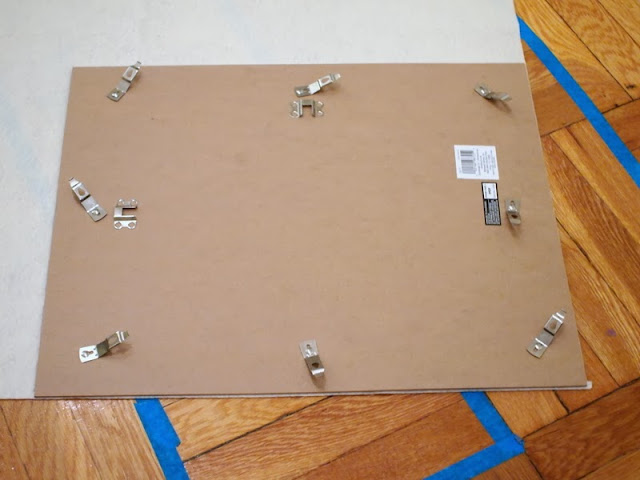
2. Take out the back of your photo frame. Discard the glass. Place the back on your piece of felt and trace it. Cut the rectangle out.
3. Optional: If your felt is a bit wrinkly, carefully iron it. (I turned my iron to a lower setting and placed one of those protective ironing pressing pads over my felt before ironing it so I wouldn't melt or burn the felt.)
4. Place your piece of felt directly over the photo frame back. Make sure the sides all line up. To help with the gluing, fold one side of the felt over the other. Then, use your sponge brush and brush a bit of Mod Podge right next to the fold. Press the fabric down over the glue. Then, spread a little more Mod Podge next to your new fold and press the felt down again. Keep repeating this procedure until one side is fully glued down. Then, repeat the procedure with the other side.
5. Once the Mod Podge dries, put your board back into the frame. That's it!
Now comes the fun part- making your felt pieces. Doodle your designs onto paper. Then, trace them onto felt and cut them out. I chose to make a set of Christmas tree felt pieces and a set of car part pieces.
Let's make a DIY Felt Board
(This post contains affiliate links. Thank you for your support!)
Now, in full disclosure, I wish I could say that Chuck loved it and played hours and hours with it while I took a nap on the couch. Errrm..... It didn't quite turn out that way. He played with the car parts for a bit, but then seemed much more interested in rolling around real cars.
But I won't call this a craft fail just yet. I'm hoping (cross your fingers!) that he'll grow to love the felt board as much as I did. But if not, no big deal. The entire thing only cost about 4 dollars to make because I already had most of the materials lying around the apartment. Score!
Now if you have a felt-loving child in your life, you can try making your own felt board too! (I bet it would make a great Christmas gift.) Here's how I made mine:
Materials to make a DIY Felt Board:
- Large poster frame
- Felt
(Background felt large enough to cover frame and Other pieces)
- Scissors (Fabric and normal)
- Paper
- Pen
- Mod Podge
- Sponge Brush
Directions to make a DIY Felt Board:
1. Clean your work area. Felt attracts stuff. (I worked on the floor, so I swept it first.)2. Take out the back of your photo frame. Discard the glass. Place the back on your piece of felt and trace it. Cut the rectangle out.
3. Optional: If your felt is a bit wrinkly, carefully iron it. (I turned my iron to a lower setting and placed one of those protective ironing pressing pads over my felt before ironing it so I wouldn't melt or burn the felt.)
4. Place your piece of felt directly over the photo frame back. Make sure the sides all line up. To help with the gluing, fold one side of the felt over the other. Then, use your sponge brush and brush a bit of Mod Podge right next to the fold. Press the fabric down over the glue. Then, spread a little more Mod Podge next to your new fold and press the felt down again. Keep repeating this procedure until one side is fully glued down. Then, repeat the procedure with the other side.
5. Once the Mod Podge dries, put your board back into the frame. That's it!
Now comes the fun part- making your felt pieces. Doodle your designs onto paper. Then, trace them onto felt and cut them out. I chose to make a set of Christmas tree felt pieces and a set of car part pieces.
Happy crafting!
Subscribe to:
Posts (Atom)







.JPG)


