Showing posts sorted by relevance for query Christmas. Sort by date Show all posts

Wednesday, December 4, 2013

Homemade gift: DIY Felt Board

Do you remember playing with felt boards as a kid?  (Is that too old school?  Maybe kids nowadays play with fancy touch screens instead ... hrmm....)  Anyway, I remember using a felt board in school and LOVING it.   So I thought I'd try making a homemade felt board for Chuck. After consulting a couple of tutorials online, here's what I came up with:

Let's make a DIY Felt Board

how to make a DIY Felt Board


(This post contains affiliate links.  Thank you for your support!)

Now, in full disclosure, I wish I could say that Chuck loved it and played hours and hours with it while I took a nap on the couch.  Errrm.....  It didn't quite turn out that way.  He played with the car parts for a bit, but then seemed much more interested in rolling around real cars.

But I won't call this a craft fail just yet.  I'm hoping (cross your fingers!) that he'll grow to love the felt board as much as I did.  But if not, no big deal.  The entire thing only cost about 4 dollars to make because I already had most of the materials lying around the apartment.  Score!

Now if you have a felt-loving child in your life, you can try making your own felt board too!  (I bet it would make a great Christmas gift.)  Here's how I made mine:

Materials to make a DIY Felt Board:


Directions to make a DIY Felt Board:

1.  Clean your work area.  Felt attracts stuff.  (I worked on the floor, so I swept it first.)

how to make a DIY Felt Board
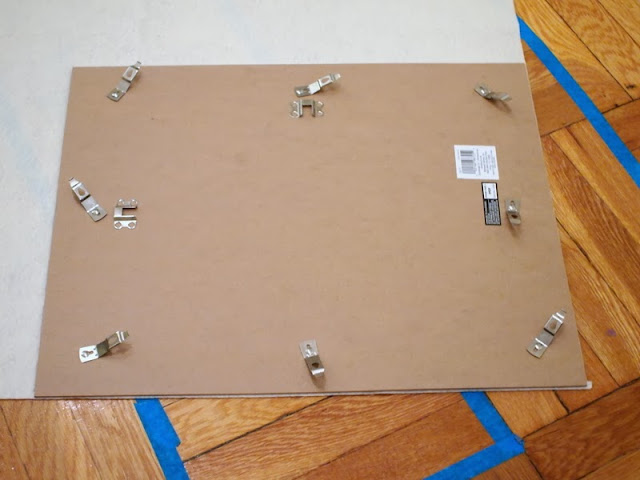
2.  Take out the back of your photo frame.  Discard the glass.  Place the back on your piece of felt and trace it.  Cut the rectangle out.

3.  Optional:  If your felt is a bit wrinkly, carefully iron it.  (I turned my iron to a lower setting and placed one of those protective ironing pressing pads over my felt before ironing it so I wouldn't melt or burn the felt.)

Glue on your felt
4.  Place your piece of felt directly over the photo frame back.  Make sure the sides all line up.  To help with the gluing, fold one side of the felt over the other.  Then, use your sponge brush and brush a bit of Mod Podge right next to the fold.   Press the fabric down over the glue.  Then, spread a little more Mod Podge next to your new fold and press the felt down again.  Keep repeating this procedure until one side is fully glued down.  Then, repeat the procedure with the other side.  

5.  Once the Mod Podge dries, put your board back into the frame.  That's it!

Now comes the fun part- making your felt pieces.  Doodle your designs onto paper.  Then, trace them onto felt and cut them out.  I chose to make a set of Christmas tree felt pieces and a set of car part pieces.

Homemade Felt Board Tutorial
Happy crafting!

DIY Felt Board Tutorial

Tuesday, September 20, 2016

Groovy Sticker Snowflakes Art (Printable included)

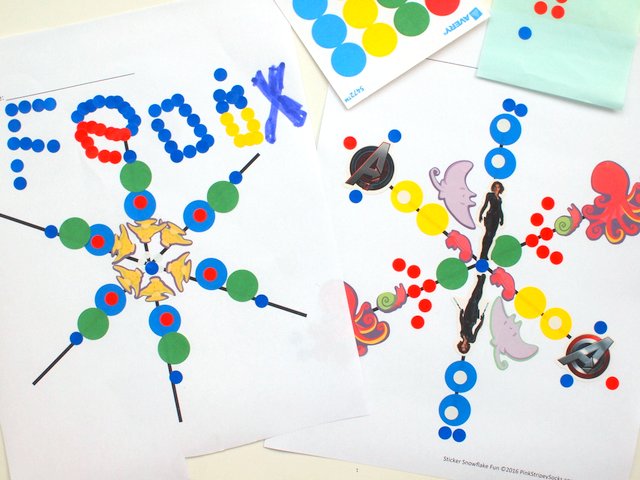
With the start of the new school year, our family is still trying to find its new normal.  Transitions from school to home can sometimes be rough.  So we've been trying to keep things easy with more downtime in the afternoon.  We play at the park, read books, or do simple open-ended crafts.   Today I wanted to share a really easy open-ended snowflake craft that my son and I really enjoyed.  We pulled out some old stickers and made ourselves some groovy sticker snowflakes! 

Groovy Sticker Snowflake Art- Fun Winter Art Project for Kids
This post contains affiliate links.  Thank you for the grocery money.  For my full disclosure policy, click here.

Wednesday, December 14, 2022

Build a Climbing Santa Paper Craft

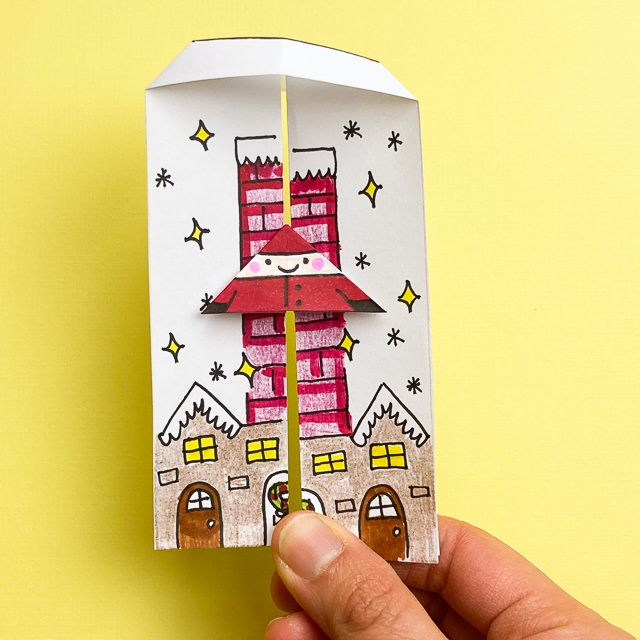
Christmas is right around the corner. It's been raining CONSTANTLY here and we've been keeping busy with games, movies, and a lot of crafts. Today, I'm sharing a really fun Christmas craft. This climbing paper Santa toy is the perfect DIY STEM building craft to keep hands and minds busy. Preschool, elementary, and even middle school-aged children will enjoy designing their own Santa and then watching him climb up the chimney. Best part about this activity - I'll bet you have all the materials available for an crafty afternoon of fun.

How to Build an Easy Climbing Paper Santa with Kids

how to make a DIY climbing Santa Paper STEM craft with preschool elementary middle-school aged kids for easy STEM-filled Christmas afternoon fun


Monday, December 10, 2012

Hand and feet salt dough ornaments

(Warning:  If your name is Nana, Pops, Gong-gong, Puo-puo, or Tita Tina- STOP!  Please do not read this post.  Please do not look at the photos.  Baby Chuck wants you to be surprised by the gifts he made you.)


Are they gone?  Good.  Now, for the rest of you-
This Christmas season I find myself crafting, and crafting, and crafting some more.  It's like someone opened up my blocked crafty gates.  My mind keeps churning and my hands making.  Mind you, not everything turns out the way it's supposed to (like the time I boiled cashmere for hours to felt it... big mistake... we just ended up a horribly smelly sweater), but it's just fun to make stuff.

Since Christmas (or as I now dub it "Craft-mas" get it?  Tee hee...) is just a couple of weeks away, I'm crafting more holiday items.  First I made the fortune cookie advent calendar and the geometric straw ornaments.  This week we tried our hand at making salt dough ornaments.  Patty from Make it Cozee posted such clear directions and cute photos that it was easy to get super cute results.  (Thanks, Patty!)

We painted the hand prints gold and we had a whole bunch of dough left so we made some tinier ornaments too.


Hopefully we can make this a yearly tradition.  Then we can see Baby Chuck growing.. and growing.. and growing... (Hmm... does this mean we need plate sized ornaments?  Oh well, we'll cross that bridge when we  get there.)

Tuesday, September 16, 2014

CLOSED- Giveaway Post!!! Win $100 credit to Minted.com!

I’m super-duper excited for today’s post.  *Insert girlish squeal here.* Today Minted.com and I are excited to be offering one lucky reader $100 credit to Minted.com  Yup.  It’s giveaway time!  It’s giveaway time! 


$100 giveaway to Minted.com


I’ve wanted to say a big “Thank you” to y’all for your support for a long time now.  So when I was contacted about doing a giveaway, I jumped at the chance because it meant that one of you could win something nice.   

This is a one awesome giveaway.  Minted.com is a beautifully curated online store that sells seriously gorgeous stationary and artwork.  I go goo-goo when I scroll through the pages because everything is so lovely and special.   In fact, here are four of my current favorite items…   
    
Yeti or Not Holiday Non-Photo Cards
Hee hee hee!  This Yeti or not Christmas card is uber cute.  (And bonus- they're currently offering 20% off their holiday card selection until 10/6!  Score!)


In a Pear Tree Holiday Non-Photo Cards
Ok....So apparently I have Christmas cards on my mind, but how could you not love this partridge in a pear tree card?  (Did you sing the words like I just did?)


I Left My Heart In London by Bonjour Berry at minted.comAll Aboard by One Little Bird at minted.com
We're still struggling to decorate Chuck's new big boy room.  So this poster and this poster totally caught my eye. 


Floral Chalkboard Wedding Invitations
Did you know that they have wedding cards too? A couple of my girlfriends are getting married, so I have weddings on my mind.  This lovely floral chalkboard invitation is just gorgeous. 


Now if you'd like the chance to win $100 credit to Minted.comhere are all the details:

This giveaway is open all readers worldwide.  (Yay!)  Here’s what you could possibly win:
  • For US readers: 
    • $100 credit
    • Free FedEx Ground shipping on everything except art
  • For the international readers: 
    • $100 credit
    • Free international economy shipping on everything except art
    • However, you have to pay your own country's duties/customs 

To enter the giveaway
  1. Visit Minted.com and find your favorite item from the store. 
  2. Visit my FB page and leave a comment on the 9/16 Giveaway post with your favorite item. 

That’s it!  The giveaway will close midnight Thursday (PST) and I’ll announce and contact the winner via Facebook by Friday morning. 


Good luck friends!  

This is a sponsored post.  But all opinions are mine.  I received $100 credit to give to one lucky reader.  I'm super glad that I did. :) 

Friday, December 21, 2012

Crapty DIY potato chip bag pinata

So remember that surprise we were talking about?

Surprise!  Today our Toddler Time group is holding a Christmas party.  We're going to eat, drink, and hopefully meet Santa Claus.  Cross your fingers.

Everyone is bringing something to the party.  Baby Chuck and I are bringing a pinata.  What?  Why am I making yet another pinata?  Well, some of the moms are from Mexico and apparently it's a Mexican tradition for children to hit a pinata at Christmas.  (Side note:  I really love that there are so many different cultures represented in our toddler group.  It's neat learning about other cultures.  Added bonus-I get a chance to practice my Spanish.  Que bueno!)   

Now, a traditional pinata looks like a sphere with seven cones sticking out of it.  Here's the one I made:


Erm... I know what you're thinking.  Leslie, yours looks nothing like that.  True true, but it looks kinda like a star and there are tassels.  Does that count?  Let's just say that mine was inspired by the traditional one.  The coolest thing about this pinata is that it's a true blue CRAPT!

Materials:
- several cereal boxes <-- crap!
- LOTS of potato chip bags* <-- crap!
- tape
- glue (I used Aileen's tacky glue)
- scissors
- pens
- ribbon
- aluminum foil

(*I'm slightly embarrassed by the amount of chips we eat in two weeks.)

Directions:


Hope you have a wonderful weekend.

Friday, December 13, 2013

Make a felt and cardboard gingerbread house

Today's craft was inspired by gingerbread houses.  It's a little cardboard and felt "gingerbread" house with felt "candy" decorations. Pretty neat, right? All the decorations can be easily placed on and taken of, so you can decorate and re-decorate to your heart's content.

DIY Felt and Cardboard Gingerbread House Toy

DIY Felt and Gingerbread House Toys


This post contains affiliate links. Thank you for your support.

If you'd like to make your own, keep on reading!

Tuesday, December 25, 2012

Merry Christmas!

Hope you have a wonderful time celebrating with friends and family.  
Here are some photos and a video from our recent Toddler Time Christmas party.


PC218897.AVI from Pink Stripey Socks on Vimeo.

Thursday, December 18, 2014

DIY Toy Car Ornaments

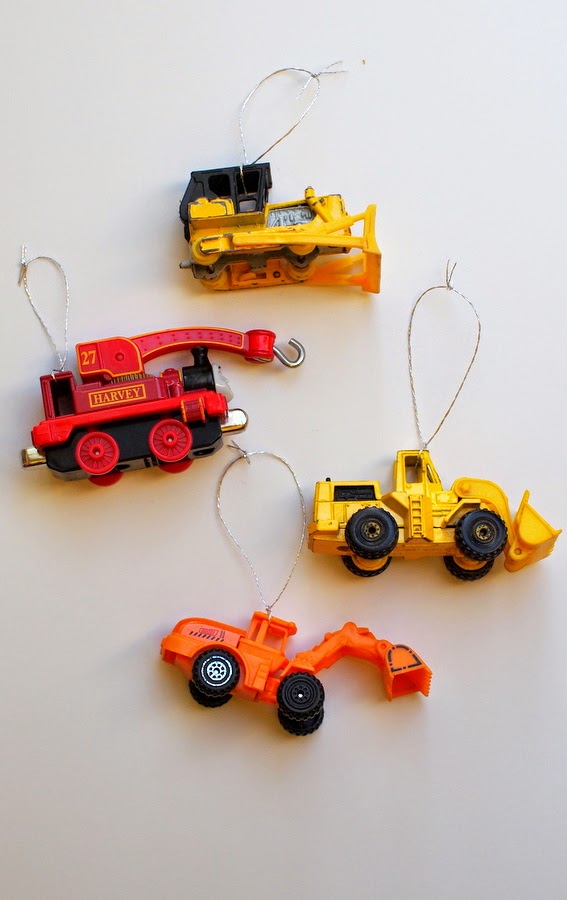
We have a TON of toy cars, trains, and trucks over here.  (Chuck's kinda got a thing for transportation toys.)  And lots of them have open windows.  I was staring at them the other day and realized... wouldn't they make fun (and cheap) ornaments?

DIY Car Ornaments


Easy DIY toy Car Ornaments- Turn toy cars into ornaments


Monday, September 12, 2022

Our 15+ Favorite Easy, Artsy, and Cozy Fall Kids' Crafts

Whenever fall rolls around, I find myself staying at home more, drinking hot drinks, and crafting with the kids. If you're looking for some easy, cozy, artsy, cute, and affordable kids' crafts, check out this list of my top 15+ favorite fall crafts. 


15+ Easy, Artsy, and Cozy Fall Kids Crafts

favorite best easy artsy cozy cheap fall kids crafts

Thursday, December 24, 2015

How to Cut Star Snowflakes

Merry Christmas, friends!
 If you're looking for an easy Christmas Craft, here are two designs for cutting your very own star inspired snowflakes with the kiddos!

How to Cut Star Snowflakes!


Thursday, October 24, 2013

DIY Sugar Skull (Day of the Dead) Milk Jug Luminaries


Currently my college friend Kim is visiting us for the week.  It's been really nice having someone else here while hubby is away.  Time just passes by much quicker when you're having fun with a friend.

And just how have we been having fun?  Well, we've been playing with Chuck... and eating... and watching tv... and crafting... a lot... a whole lot...  Halloween and Dia De Los Muertos are right around the corner, so all of our crafts have been centered around those two holidays. 

I'm currently on a sugar skull kick.  I just love the way they look.  So when I was staring at an old milk jug the other day, an idea dawned on me.  Ding!  Why not use them to make some sugar skull luminaries?  So tada, here's what I came up with:


I'd seen tons of posts for ghost milk jug luminaries for awhile, so I figured this was a nice twist on that craft.  It uses skulls and colorful lights instead of ghost faces and white lights.   I just love how this little guy turned out.  He's so cute and smiley... and gosh darn it, I've just got a big ol' soft soft for any craft that involves twinkly, colorful lights.


Monday, December 28, 2015

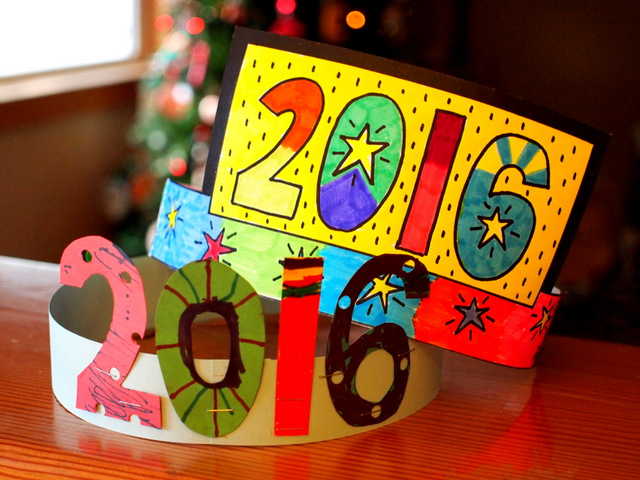
Free Printable New Year's Crown

If you're looking for the EASIEST New Years Craft ever, then today's post is for you.  Why not make your very own New Years Crowns with the kiddos?  I've got two great ideas for you- one that's a little more artsy and one that's a print out and color in (for free!)

Make (or Print out)  New Year's Crowns


Easy New Years Art Project and Craft- Make 2016 Crowns! (Printable included)

This post contains affiliate links.  Thank you for your support!


Tuesday, November 29, 2022

How to Build a Paper Air Skimmer Sleigh (FREE Printable included)

Looking for a really neat winter STEAM activity to make with the kids? A few months ago, my eldest son came back with a really cool paper skimmer that he made at school. They followed this paper skimmer tutorial on YouTube. The directions were great for older kids, but my youngest wasn't able to make one easily. So I came up with an easy printable that we could print out, color, fold, and race. :) Both boys loved using it so much that I'm sharing it here! With it being so close to Christmas, we called them our paper skimmer sleighs. 

Print, Fold, and Build a DIY Paper Air Skimmer Sleigh

(Free printable included!)


how to build a DIY paper air skimmer sleigh car with free printable for kids school library STEM STEAM project

Tuesday, December 17, 2013

DIY Earmuffs? (A craft flop)

A couple of weeks ago I couldn't sleep.

Did I drink too much coffee?  Nope.  Was I worried about Christmas shopping? Nope.

Don't laugh, ok?  *Big breath* I couldn't sleep because I kept thinking about how I could crapt myself a pair of earmuffs using stuff in our apartment. 

Weird right?  I don't even wear earmuffs... but for some reason I kept wondering if I could make them.  So the next day I played around with some materials ... and I ended up with a pair of these:


I have kind of mixed feelings about them.  On the plus side, they look like earmuffs and they also block out some of the cold.  However, they feel a little too light and stiff around my ears. 

So, while I'm proud that I made a pair of semi-working earmuffs, I think this is probably a craft flop.  Now if for some reason you want to see how I crapted these earmuffs (or you wanna see Chuck wearing the earmuffs), keep on reading!


Friday, October 11, 2013

10 Adorable DIY Slippers

It's finally getting cold here in Jersey.  And boy, oh boy, I'm so glad the cooler weather is finally here.  I love me some sunshine, but I've been chomping at the bit to pull out the jackets, socks, and boots.  (Somehow it just didn't feel like fall when I was still in shorts and flip flops.)

Has the colder weather has got you thinking about warm nights by the fire place, pink onsie pajamas, and cocoa too? Why not throw in a fun DIY slipper project where you get to make something cute and cozy?

 
Rawr.  These slippers that I embellished are the cat's meow. (Hardy har har.)  Check out BuzzFeed to see directions on how to make these and nine other super cute slippers.  (I'm personally very excited to try making slippers out of old sweaters.  I feel some ugly Christmas sweater slippers coming on....)

Happy crafting!


Friday, November 9, 2012

Crapty Fridays- DIY cardboard animal trophy head (Holiday edition)

So I know that this week I already made a crapty egg carton wreath.

And I guess that technically should count as my weekly piece of crapt.  However, I just couldn't help it.  Our pile of recycled materials was growing larger and larger and the crapting bug hit me full force.

I had to give in.

So here's another crapty project:  a cardboard deer head trophy (that I glitzed up for Christmas)

Before we continue, let me give this Crapting Disclaimer:  If you attempt to try this project you will need the patience of a saint and some kick-a&& knife skills.  I didn't really have either, so it took me several days to finish everything up.  (I adapted this project from this set of original directions.  I'm not ashamed to say that their final results looked way more polished than mine.  I just used the crap that I had lying around the apartment.  If you want a more polished look, go look at their directions.  If you want a quirkier girly crapty look, try out mine!)

Still with me? Ok, let's begin.

Materials:
- deer head template
- scissors
- pen
- Mod-podge
- foam brush
- aluminum foil
- very sharp craft knife
- shoe polish
- sequins!!!
- skewer
- cardboard boxes <--crap!

Directions:
Step 1: Print and cut out your deer head template.  Trace the various pieces onto cardboard and then cut everything out using a sharp craft knife.  (Scissors really won't work.  Trust me.)

Note:  I simplified the design of the antlers because I'm just really not that patient.


Step 2:  Modpodge your aluminum foil (shiny side down) onto the fronts  and backs of the different pieces.  Let everything dry overnight.

Note:  See how my edges are still cardboard brown? Ick. I wasn't quite sure what to do with them, so I just covered each piece's front and the back.  Looking back, I probably could have covered one side with aluminum foil and then left a little bit extra so that I could cover the edges as well.  Then, I would have just covered the back of the piece and not had to worry.


Step 3:  I wasn't too pleased that my deer head looked like it was made of cardboard and aluminum foil.  So, I pulled out some shoe polish and tried antiquing everything  I wiped on the shoe polish and then used a paper towel to wipe some off. Now my aluminum pieces looked a little less shiny.

(Like this look?  I used a very similar technique to make my cute cat metal magnets)


Step 4:  I still wasn't too pleased by my results, so I went with the "more is more" approach.  I totally blinged this baby up and added sequins to the antlers and nose.  To do this, I painted on a bit of Mod-podge, and added each sequin one-by-one.  I have shaky and clumsy hands, so my fingers got really sticky after a couple of sequins.  The whole process went by much faster when I switched to using a skewer to glue the sequins down.
Warning:  Sequins are super shiny and will blind you.  


Step 5:  I waited for everything to dry and ta-dah!  My glitzed out animal trophy is complete.


So what do you think?  Is this piece quirky and girly? Or, is it just a deer-saster?  I actually kind of like it and it's definitely going on our walls during this holiday season.

Hope you have a great weekend andthanks for joining me on another crapting adventure!

Thursday, September 29, 2016

Cute Kitty Gift Box

Who loves cats?  Who loves Halloween crafts?  Did you raise your hands for both?  If so, you'll love making this adorable kitty gift box craft!

Cute Kitty Gift Box Craft- Such a fun way to wrap gifts or decorate for Halloween!


Friday, December 19, 2014

Paper Plate Haircuts (Scissor Practice with Kids!)

Does your child have a fascination with scissors?  If left alone, Chuck would probably take a pair of scissors to everything.   Clothes, hair, yarn, paper, wood.... the Christmas tree.  (I've caught him on multiple occasions trying to cut our table.  Eeek! )

Today I've teamed up with the Creative Preschooler Team to share 5 fun ways to sharpen your preschoolers' scissor skills!  (Hee, hee.  Did you get it? Sharpen?  Wah wah wah.)

Scissor Practice:  Paper Plate Haircuts 


Wednesday, December 21, 2016

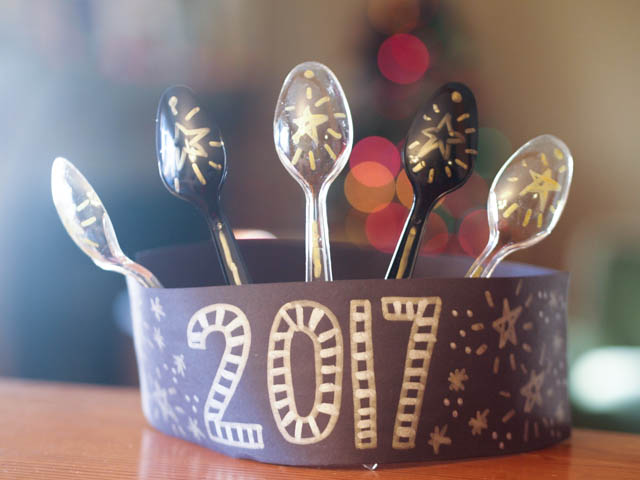
Plastic Spoon New Year Crowns

What?  New Year's craft already?  Sorry to pull you out of your cozy Christmas hidey-hole... but if you're looking for a New Year's craft then I've got you covered.  New Year's crowns are really easy for kids of all ages to make!  Grab some pipe cleaners and whip up these sparkly pipe cleaner crowns.  Or, you can make these easy paper number New Year's Crowns.  Today I'm sharing something a bit more unexpected.... have you ever seen a crown made from plastic spoons?


how to make plastic spoon new year crowns- super fun and easy kids craft
This post contains affiliate links.  For my full disclosure policy, click here.  Thank you for your support!