Showing posts with label STEM. Show all posts

Monday, March 23, 2015

Origami Artwork With Kids

Ever have just a crazy, crazy, week?  I'm sure you have... and last week was mine.  Chuck was sick the entire week and hubby had to work late hours.  So at night I found myself trying to relax by catching up on my favorite shows (currently Brooklyn 99) and folding origami.  Yup.  I'll hopefully have some cool origami projects  (like these origami black catorigami jack-o-lantern, and origami vampire lips) to show you in the next couple of weeks.

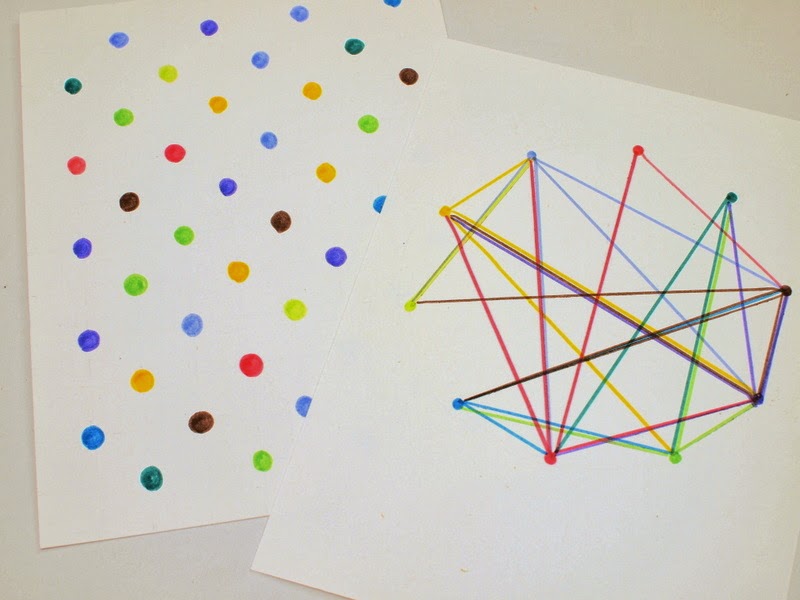
I'm not an origami ninja.  A lot of times projects just don't turn out quite how I imagined.  Lines aren't folded correctly and have to be refolded (again and again).  When imperfect projects are finally finished, it always seems like a shame to toss out the paper.  So I thought to myself, "Why not turn my old origami projects into art?"  And that's how this idea was born!

Make Origami Artwork with Kids

make easy origami artwork with kids
This post contains affiliate links. Thank you for your support!


Friday, March 13, 2015

5 Preschool Pi Day Activities

Ok.  Pi day is coming up this Saturday.  Are you ready to celebrate it with some fun activities?   Last year I came up with 3 Pi Day Activities for elementary aged children, like making Pi Day Bracelets and making 2 Types of Pi Inspired Artwork!  This year I thought it would be a fun challenge to try to introduce Pi Day to my Preschooler.

Pi Day celebrates Pi, the mathematical constant that describes the ratio of a circle's circumference to its diameter.  Pi's digits stretch infinitely long, never repeat, and seem to be random.  I really wanted to share my love for math with my 3 year old.  So here are 5 Preschool Pi Day Activities that are fun, easy to set up, and great opportunities for some hands on learning!


5 Preschool Pi Day Activities


5 fun Preschool pi Day Activities


Friday, March 6, 2015

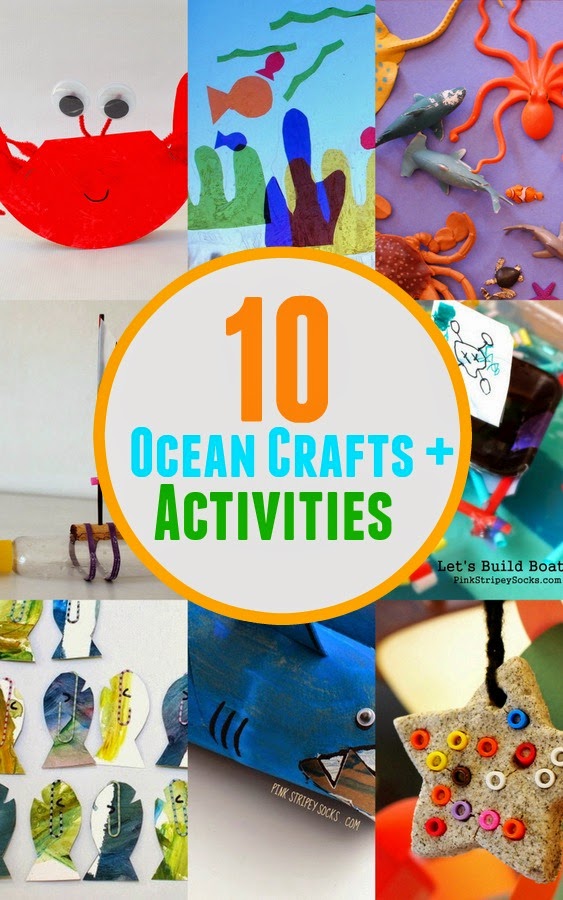
10 Ocean Crafts and Activities

This week's Creative Preschool Collaborator's theme is Oceans and Fish!  I was excited to tackle the theme because Chuck LOVES going to the beach and playing in the ocean.   So keep reading for some ocean themed storybook ideas, 10 preschool ocean crafts/activities, AND 4 other kid blogger's creative Ocean themed activities!

10 Ocean Crafts and Activties

10 Ocean themed Activities for Preschool kids and a list of ocean-themed storybook ideas
This post contains affiliate links.  Thank you for your support!

Thursday, February 19, 2015

Easy Spinning Top Marker Art

Recently Chuck's been interested in making things with me again. (Phew.  I thought our dry spell would never be over!)  He seems to enjoy using materials in different ways (like this rainy day process art activity).  So I thought it would be fun to combine a toy with an art item to make it more fun for him.  Tada... here's our spinner marker top!

Easy Spinning Top Marker Art!

Mix science and art with this great activity!  Simply spin the markers and watch them go!  Great activity to do with the kids!
This post contains affiliate links.  Thank you for your support!


This activity is just so cool because it combines science and art.  You can actually track the motion of the spinning "top."  (Just wait till you see the cool spirals it makes!  Wow.)


Monday, November 10, 2014

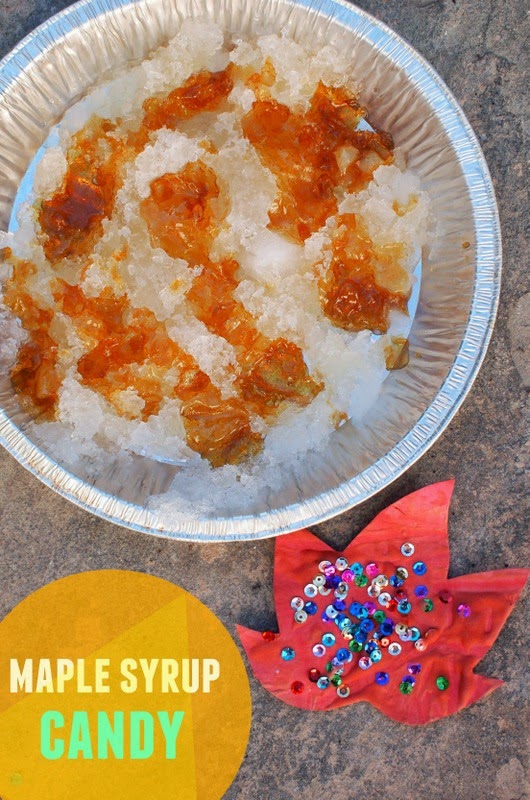
Maple Syrup Candy + Craft Fail book review!

Now that the weather is a bit chillier, I thought it would be fun to do more fall and winter crafts and activities.  I loved reading the Little House on the Prairie series as a child and always wanted to try doing the things Laura did.  Last year, we made homemade butter from heavy cream.  This year, we tried our hand at making homemade maple syrup candy!

Let's Make Homemade Maple Syrup Candy!

(using snow-- ooh la la)

Make maple syrup candy using snow and maple syrup! (Great Fall and winter activity for the kids)
This post contains affiliate links.  Thank you for your support.

Monday, November 3, 2014

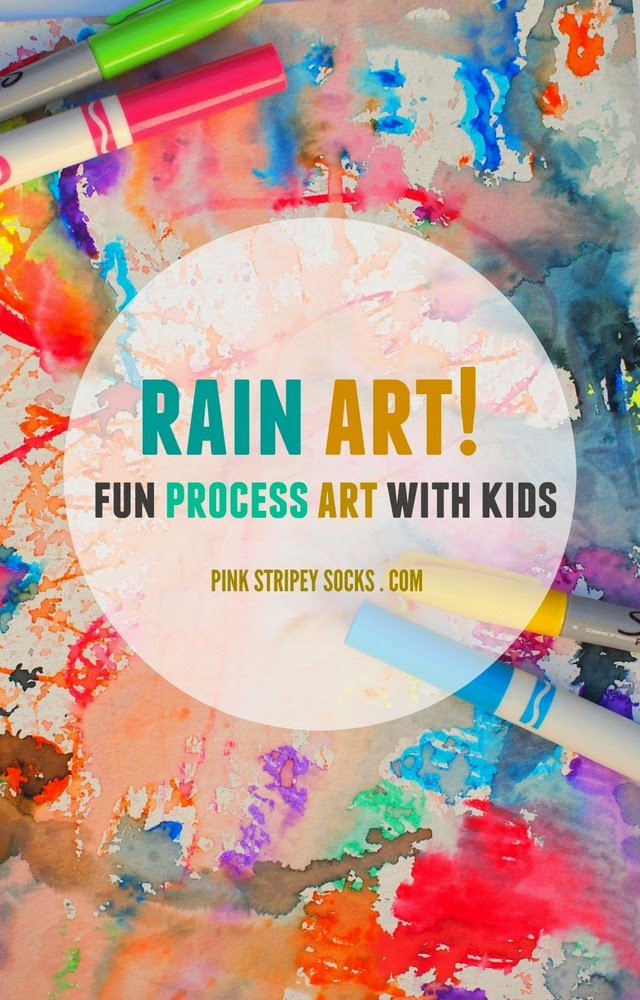
Rainy Day Process Art

We got rain!  We got rain!  Whoopie!  This was a pretty big deal here in SoCal because we've been in the middle of a drought for a looooong time. Since I love trying easy art projects with Chuck, we took advantage of the rain and collaborated with Mother Nature to create some beautiful rainy day process art.

Let's Make Rainy Day Process Art!

Rain Art:  Fun Rainy Day Process Art with Kids

This post contains affiliate links.  Thank you for your support!

This was a really fun and easy art project.  I really enjoyed it because we didn't concern ourselves so much with the final product.  Instead, we just really enjoyed making art together and then watching Mother Nature add her bit too.

Here's how we made our rainy day process art!


Wednesday, September 3, 2014

5 Ways to Write Secret Messages

As a kid, I loved the idea of being a detective or a secret spy.  They got to wear cool clothes, go on adventures, and solve mysteries.  A couple of weeks ago I tried playing a detective game with Chuck.  I hid his favorite stuffed pig and then left 5 clues for him to follow.  The clues were all written as secret messages.  We had to do something to the paper to revel the hidden words.

5 Ways to Write Secret Messages


Pretend to be a Detective and write secret messages 5 different ways

(This post contains affiliate links.  Thank you so much for your support!)

Chuck was onboard with the game.   We've recently been gobbling up Nate the Great books from the library, so he really enjoyed being a detective and solving the case.


Monday, August 18, 2014

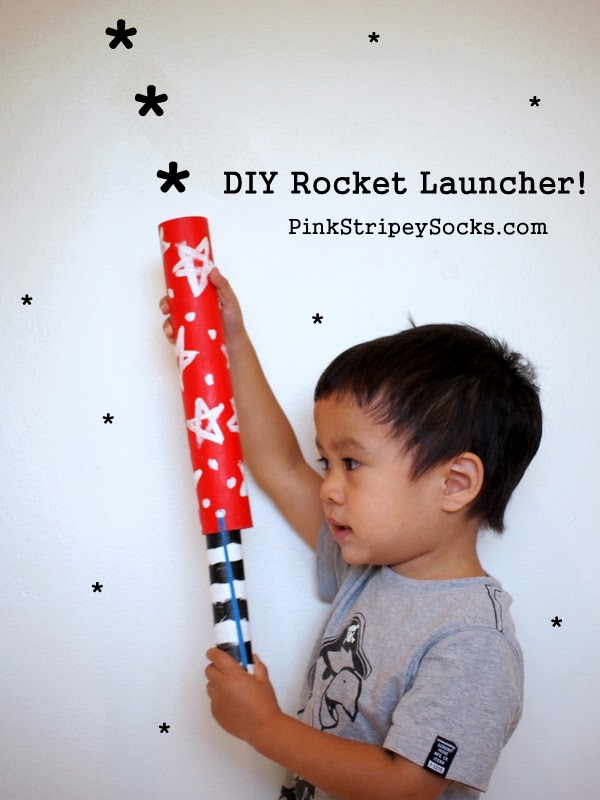
DIY Cardboard Rocket Launcher Toy

Apparently we've reached the stage where Chuck likes pretending to shoot things... and people.  (Ack.  Is this common?  I'm assuming so... )  So I thought it would be fun to somehow make a toy that would actually shoot things, like a catapult or a slingshot.  We always seem to have cardboard rolls lying around, so I built this cardboard roll rocket launcher toy.  Then, we had a BLAST playing with it!

Get it?  Rocket launcher?  Blast? Like blast off?   Hee hee hee... wah wah wah.

DIY Cardboard Roll Rocket Launcher Toy


How to make a cardboard DIY rocket launcher for kids

(Note:  This post contains affiliate links.  Thank you for your support.) 


This rocket launcher toy uses rubber bands and cardboard rolls to shoot aluminum foil balls.  It's so powerful that we can actually shoot a ball across our (small) patio... whoa, right?  Since the balls are made from aluminum foil, they don't hurt. So you could create several launchers, shoot each other, and then not worry about anyone getting hurt.  Excellent, right?

Keep on reading to build your own rocket launcher and see other cool DIY toys that you can make and play with your little one.


Monday, August 11, 2014

Building Cardboard Bridges (Kid Engineering!)

Ever wonder why corrugated boxes are so strong?  Since we've started unpacking, I'm surprised by how well our boxes held up.  Even after being shipped across the country, our stuff is intact and our boxes still look good.  Wow!  Those folded bits really make corrugated cardboard strong!  This thought inspired me to try building some simple cardboard bridges with Chuck.  This way we could see for ourselves how folds made cardboard stronger.

Easy Kid Engineering:  Let's Cardboard Build bridges!

(Does folding paper make it stronger?)

building cardboard bridges with kids (engineering)


Thursday, May 1, 2014

Build a toy car that moves

I love painting things with Chuck, but sometimes I yearn to make things that actually move or do things.  So when a mommy friend suggested that we build cardboard toy cars that actually move, wowzers, I had to say yes.  She found the directions in an old kids' science book (that I don't remember the name of... sorry).  And that's how we spent an awesome play date with five kids- eating pizza and then building and racing some cardboard racing cars

Kid Science: Let's Build a Car that Moves!

how to build a cardboard car that moves
Today's craft is awesome for 2 reasons:

1.  The cars really move.  Really.  You just twist the tin can and then let go.  Bam.  The rubber bands store the potential energy and then once released, they turn the can... and your car moves by itself!

2.  You don't need any expensive materials.  In fact, you probably have most of the items already at home.  

Have I whet your appetite enough?  Ok.  Let's build! Vroooom!

Friday, March 14, 2014

Pi Day Activity- Make Pi Art!

Happy Pi Day everyone!  I remember thinking this holiday was really cool when I was younger.  We let out our inner nerds, drank soda, and ate a pizza pie in class.  Earlier this week I whetted your mathy appetite when I shared how I turned Pi into wearable art.  My super easy and colorful Pi Day Bracelets were made by stringing different colored beads according to the digits in Pi.  Today I'm celebrating Pi Day with two colorful and geometric pieces of Pi Day Inspired Artwork.

 "Easy As Pi" Artwork!

Turn Pi into lovely math artwork

And if you have younger preschool aged children, check out my 5 easy ways to celebrate Pi Day with Preschoolers!


Now let's celebrate your inner nerd and create some fun artwork to brighten up your wall.  Let's get started!

Wednesday, March 12, 2014

Digging for St. Patrick's Day Gold Activity

Looking for a fun and easy kids' St. Patrick's Day science activity?  Well, lucky you!  You're at the right place!  I  originally saw this Fun at Home with Kids' St. Patrick's Day Ice Play activity and thought, "Wow!  I gotta try it!"  Basically you freeze Leprechaun's "gold" inside of ice, and then ask your child to help you break them out using salt.  (Because the salt lowers the freezing point of water, essentially melting your ice.)  Genius right?  So we tried it out.  Success!  Chuck had a ton of fun and we've already done the activity twice!  

Let's go digging for some Leprechaun gold!


Keep reading to see how we did this St. Patrick's Day Activity!


Sunday, March 9, 2014

Pi Day Activity- Make Pi Day Bracelets!

This Friday (3/14) is Pi Day!  Pi is a mathematical constant referring to the ratio of a circle's circumference to its diameter.  It's an irrational number, which means that it goes on forever and never shows a repeating pattern.  Every year it's celebrated on 3/14 because the first three digits of Pi are 3,1, and 4.  Now if you're looking for an easy way to celebrate Pi day, we've got a great collection of Pi Day Inspired Activities.  Today I'm sharing these nifty Pi Day Bracelets!  What makes this a great Pi Day Activity?  Well, the beads are strung according to Pi's digits. (Cool, right?)   It's a great way to combine math, art, and crafting!

Pi Day Craft Activity Make Pi inspired bracelets
Interested in making your own set of Pi Day Inspired bracelets?  Keep reading!

Sunday, October 27, 2013

Make Sugar Skull Sun Catchers and Crystallized Sugar Skull Ornaments

Alright everyone... the countdown is on.  It's just a couple of days till Halloween.  Are you excited?  Or, are you over all the orange and black?

I'm in the first group and still SUPER excited for Halloween.  I just finished Chuck's costume this past weekend, so he's ready to go.  I'm not sure if he'll appreciate the idea of trick-or-treating (plus his allergies prevent him from eating a lot of the candy out there), but I think he'll enjoy seeing other kids in costumes and all the spooky decorations.

I'll upload some photos of his costume later on this week... but today I just wanted to share the last of my sugar skull crafts.

So, we already made DIY sugar skull candle holders and DIY sugar skull luminaries and Allison shared her lovely tutorial for DIY sugar skull shoes.  Today's sugar skull crafts were designed with kids in mind.  They're easy to make and the resulting products look great.

1.  Sugar Skull Window Clings

Colorful and fun, these two skulls will float happily on your window.


Materials:
  • Contact Paper (Buy the cheap stuff from the Dollar Store)
  • Black paint pen (You could also use a Sharpie marker, but the lines won't be as dark.)
  • Scissors
  • Cellophane 
  • Tape

Wednesday, October 2, 2013

Make your own gummy candies

Did you know that you can make your own gummy candies?  I didn't know that it could be done so easily until I saw this fruit juice gummy candy recipe on Instructables. 

Last week I roped my sister into trying the recipe out.  Using just four ingredients, we made homemade gummy candies in a  little over an hour.  Here are our results:

make your own gummy candies- fun STEM activity for kids

Ingredients:
  • 2 envelopes of Knox Original Unflavored Gelatine
  • 1 tablespoon of sugar (or more if you want them sweeter)
  • 1 C of juice
  • Canola oil

Directions:
1.  Combine gelatine, sugar, and juice in a pot.  Let the mixture sit there for a minute.

2.  Lightly oil your mold.  (If you skip this part your gummy candies will break apart as they pop out of the molds.)

3.  Bring the mixture to a boil.  Let it boil for 10 minutes.  The liquid will become more viscous.

4.  Spoon the hot liquid it into your molds.
 Notes:
  • I placed my mold on top of a plate before I did this to catch my spills.
  • I had some extra liquid, so I lined a glass baking dish with saran wrap and then poured the liquid into that.  Once the liquid hardened, it was easy to pop out a very large gummy candy.  
  5.  Put your mold into the fridge until your candies harden.  (Mine took about 1 hour to solidify.)
make your own gummy candies- fun STEM activity for kids
6.  Pop your gummies out and enjoy!
make your own gummy candies- fun STEM activity for kidsmake your own gummy candies- fun STEM activity for kids


Can you believe that the recipe worked?  I was super stoked because the resulting gummies had a great texture and easily slid out of their molds.  I also liked that they weren't too sweet.  Next time I'll probably try using fruit juice concentrate instead of juice (as recommended by the original recipe.)  That should give them a more intense flavor.... and maybe they'll taste more like the store bought ones.

Happy Wednesday!

Thursday, September 12, 2013

Make Borax Crystal Flowers

Why make borax crystal flowers?  Well, do you love the look of freshly cut flowers sitting in a vase?  I do.  But I never buy them because of my cursed black thumb.  While most people's cut flowers last for weeks, mine always start turning brown and wilting within a day or two.

Boo, black thumb!   

Last week our craft store had a sale on fake flowers.  I was so tempted to buy them, but they looked kinda cheesy and screamed, "I'm fake and I attract dust."

But I ended up getting the flowers anyway, because I wanted to make something pretty with them.  Here's what I came up with:  Crystal Flowers 

Make Crystal Flowers!


DIY Crystal borax flowers
Yes.  My fake flowers are covered with real crystals... that I grew from Borax.  Lovely, aren't they?

Would you like to make your own frosted-looking flowers?  Read on!
  
This post contains affiliate links. Thank you for your support!

Wednesday, July 17, 2013

6 things to do with gummy bears

I thought you might need a giggle, so here's a list of six things you can do with gummy bears (besides eat them).

6 Ways to Play with Gummy Bears

6 Ways to Play with Gummy Bears - Fun and tasty STEM activity to do with the kiddos!


Monday, June 10, 2013

Make a sailboat out of a shampoo bottle

((Thank you to everyone for entering my Kiwi Crate Giveaway.  Before I talk about today's crapt, let me just announce that the winner of the giveaway is Mel!  Congratulations!  Please email me your mailing address so I can send you a Kiwi Crate straight away.))


Hi everyone!  Today I'm going to share how I made this shampoo bottle sailboat after being inspired by this DIY boat kit found here:

Materials:
- empty shampoo bottle <-- crap!
- 2 rubber bands
- wine cork <-- crap!
- drill
- stirrer <-- crap!
- straw <-- crap!
- pair of scissors
- triangle from a potato chip bag <-- crap!
- tape (packing tape is best, but I only had clear plastic tape)

Here are the boat's main components:

Directions:
1.  Cut your cork in half lengthwise.  Then, drill a hole through the middle.  The hole should be big enough to hold your stirrer (aka the mast) up.

2.  Your straw is going to be the horizontal bar holding up your sail (aka, the boom).  Cut your straw to the desired length.  Then, make two triangle cutouts on each side of the straw, so that your stirrer (aka the mast) can slide into the straw.  Both your stirrer and straw will support your plastic bag sail.  


3.  Cut your plastic chip bag into a triangle sail shape.  Tape the plastic bag onto your stirrer and straw to create a sail.


4.  Use two rubber bands to attach your cork to your shampoo bottle.  Then, stick your stirrer into the cork's hole and voila, instant sail boat.

The boat sails nicely in your bathtub, but Chuck and I took it one step further and sailed the high seas (eh hem... a nearby lake.)  We just tied a ribbon to it so that it wouldn't float away.

Hope you and your little one enjoy this crapt!


Thursday, April 11, 2013

Make pipe cleaner bubble wands and big bubbles

Currently Chuck only knows a couple of words.  One of them happens to be "bubbles."  This kid of ours really loves bubbles.  He'll point outside and say "bubbles."  He'll point to round objects and say "bubbles."  He'll point to the bathtub and say "bubbles."  He'll even point to birds and say, "bubbles."

Given his obsession with soapy spheres, I thought it would be fun to make our own bubble wands and bubble solution.  These pipe cleaner and straw wands make larger bubbles than the wands you typically buy in the stores.

To make the straw and string wand:  String together two straws with some yarn.  Slide the knot into one of the straws. If you have problems getting the string through the straws, try sucking it through.  You'll get a mouthful of string, but it works!
We dunked these wands in our homemade bubble solution and had some messy fun. At first it was difficult to make the larger bubbles, but I soon got the hang out of it and created some lovely large spheres.

(Psst- Here's the recipe for the bubble solution that we used.  I combined 5 C warm water, 1/2 C Dawn dish detergent, and 1/4 C glycerin.  I gently mixed the liquids together and made sure not to create suds.   Then, I let the solution sit overnight.   Even though this recipe made fairly large bubbles, I really didn't like the way the Dawn smelled.  Yuck.  Plus, Chuck tried to rub his face with soapy hands, so I worried that the soap stung his eyes.  Next time I'll find a recipe using baby shampoo.  This way the solution won't smell so detergent-y and Chuck's eyes won't sting.  )

Here are some photos from our first big bubble making adventure:


I found that the bubbles didn't pop as quickly if I made them by moving the wand through the air instead of blowing it.

Another bubble created by the wind.   


All in all, not a bad start.  We managed to make large bubbles, but they popped really easily.  Hrmm... Next time we'll try a different solution and we'll make one of those giant bubble blowing wands.  Oooh! I can't wait!

Tuesday, February 19, 2013

Make a bubble snake

We don't drink much soda so when hubby finally brought a Pepsi home I snatched up his empty bottle quicker than a hungry child grabbing at freshly baked Christmas cookies.

Why?  Well, I had been dying to make a bubble snake blower. And honestly, could you blame me?  Look at the long foamy chain of bubbles I was able to blow.

Wowzers.  This photo makes my inner child squeal with delight

To blow awesome foamy snake-like bubble chains, I just needed a couple of materials:

Materials:
- empty plastic bottle
- wash cloth
- scissors
- rubber band
- dish detergent
- water
- plastic container

Directions:
1.  Cut off the bottom of the bottle.
2.  Cut a circle out of the wash cloth that's about 1-2 inches larger than the bottom of the bottle.
3.  Use a rubber band to attach your washcloth circle to the bottle.  That's it!
4.  Dip the bottle (wash cloth bottom) into dish detergent that's been mixed with a bit of water.
5.  Blow.  A foamy bubble snake will appear before your eyes.

(Warning:  Do not inhale, only exhale. Otherwise you'll end up drinking dish detergent like I did. Yuck.)

Here are some photos of Baby Chuck and I playing with our bubble snake blower.  (You may be wondering why we're in the bath tub.  Or why my bathtub is so dirty.... Hmm..  Well, we fully intended to blow bubbles outside, but it was just too cold.  The bath tub served as a nice place to try the activity out, since the bubbles created quite a sticky mess on the ground.  As for why my bathtub  is so dirty... I've neglected to clean it.... eek.)


Let me know if you try this out with your kids.  I can't wait till the weather gets warmer.  We'll definitely try blowing more bubble snakes outside.