
DIY Magnetic Transportation Map Game

(This post contains affiliate links. Thank you so much for your support!)
Chuck really enjoyed helping me to color in the map and different types of transportation using watercolors. He also REALLY enjoyed moving everything around using magnets. It was a bit of trial and error to put this toy together, but at the end we came up with a craft that's easy to make, fun to use, and *hopefully* helpful for Chuck.
Let's get making!
Materials Needed
- Cereal Box
- Scissors
- Watercolor Paper
- Watercolors
- Tape (We used this kind
and this kind
- Magnets
- Popsicle Stick
- Marker (Use this kind
- Pencil
Let's Make ourselves a Magnetic Map Game!
1. Print out a map of the states.
 2. Cut the back and sides off of your cereal box so that it resembles a table. (Note: Do NOT cut your sides as high as I did because then your "table" will sag in the middle. See the photo after step 7 to see what I'm talking about.)
3. Trace your cereal box onto your map and trim the map so it's the same size as the cereal box "table" top.
4. Since I wanted Chuck to use watercolors to paint the map, I had to transfer my image onto watercolor paper.
Here's how you can easily transfer images:
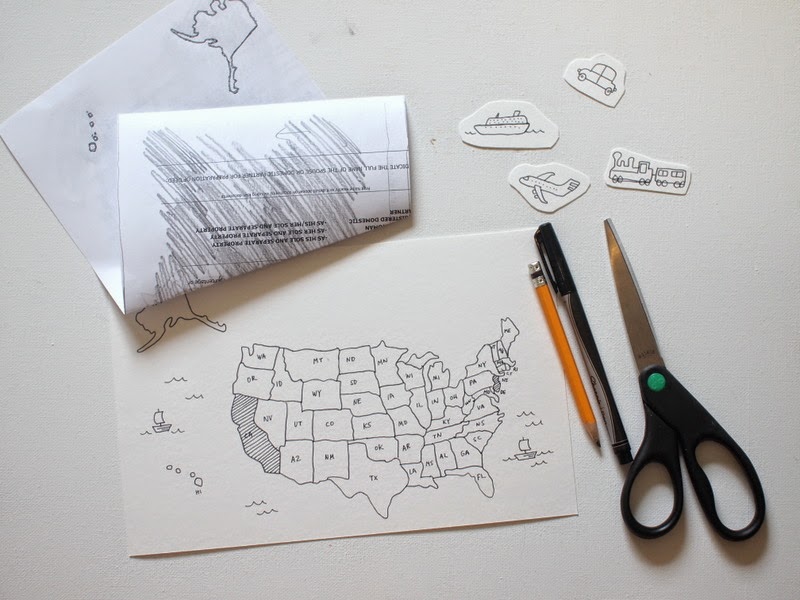
Rub the back of your printed map with pencil lead, making sure to cover the entire image. Then, place the map right side up onto the watercolor paper. Then, trace the map with your pencil. Once you lift off the printed map, you'll see a faint copy of the map on your watercolor paper. (The pencil lead on the back acts as homemade graphite paper.) Then, trace over your copy with this marker to ensure that your image won't bleed with watercolors.
5. Draw your transportation vehicles. Cut everything out.
6. Paint everything with watercolors.

7. Once your paint dries, tape your magnets
And that's it! Now you've got a simple, but fun toy that a young child can help you make.


Looking for other fun DIY magnetic toys and activities? Then check out the links below!
- Easy Paper Magnetic Fishing Game
- Babble Dabble Do's Bouncing Magnetic Toy
- Fun at Home With Kids' Life-Sized Magnetic Robot
And, of course you can always check out my Pinterest, Facebook, Instagram, or Twitter accounts for more fun ideas.
Happy making, friends! Pin It