How to do DIY Hair Wraps with kids
Materials Needed to Hair Wrap:
- Embroidery Floss with bobbins*
- Scissors (We use sharp fabric scissors)
- Comb / Brush
- Hair ties (One small one for the braid + larger one to tie up the hair that isn't being wrapped)
- Comfy seat (~ 20 minutes per hair wrap)
- At least 4 inches of hair
- Optional: Beads with bigger holes (to accommodate embroidery floss)
*It's better to use embroidery floss wrapped around bobbins of some sort so the string doesn't get tangled up. Don't have bobbins? You can always DIY your own (We made cute cardboard bunny bobbins)
Hair Wrapping Directions:
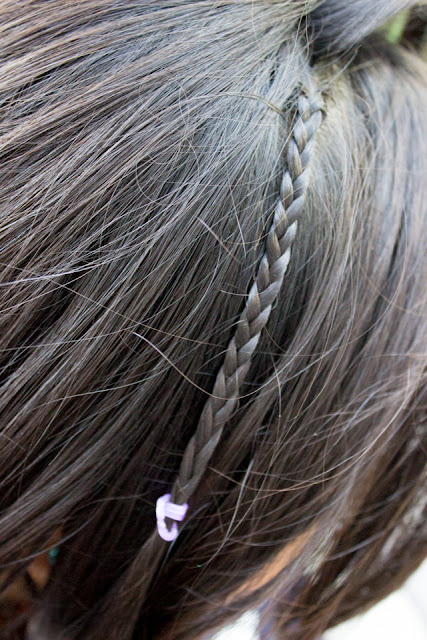
1. Section off a piece of hair on the top of your child's head. It should be less than the diameter of a pencil. Braid it and then put a small rubber band on the bottom to hold it. If it's possible, tie back the rest of the child's hair (so strands of hair don't fly into your hair wrap. This is more difficult if you have fine hair or shorter hair.)
Note: I've noticed that younger kids seem to like hair wraps on the top of their heads and older kids like them on the bottom by the nape so they just pop out sometimes. Also, you can easily do this with clip-on extensions if you don't want to wrap real hair.
3. Tie your embroidery floss to the very top of your braid. (The closer you can get to your scalp, the better.) Double or even triple knot it. (Don't worry about the excess embroidery thread on top. You will just trim those strands off later!)
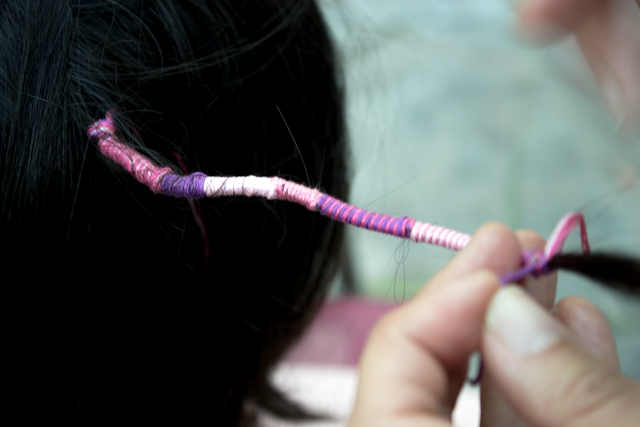
4. Now it's time to start wrapping! (I will try my best to explain the process, but if this is unclear, I've included some links down below that will make things clearer.)
Choose 1 or 2 color strands that you want to use to wrap your hair. (We chose bright pink + light pink.) Then, proceed to wrap those 2 strands tightly around both the braid AND the other unused embroidery floss strands. Keep wrapping until you get a nice section of wrapped hair.
Note: Depending on the texture or length of the child's hair, it could be difficult to begin hair wrapping because the rest of the strands will blow into your wrap. It's ok. It will get easier as you go along.
5. When you're finished with one section of hair wrap and want to change colors, simply tie your 1-2 strands (in our case dark pink + light pink) with a knot around the braid + other unused strands. This will end one section.
6. Then, simply choose 1 or 2 different colored strands and begin wrapping again. Tie off when you're done with that section. Keep repeating this process of wrapping + tying off sections until the majority of your hair is wrapped. Do a double/triple knot to secure the final strings to your braid.
Note: The little rubber band used to tie your braid can come off. You don't need it now.
7. Cut off the excess embroidery floss on top and bottom of your hair wrap. You're all done!!!
Note: This process takes about 20 minutes of time, depending on how long the child's hair is + how long they can sit still.
How long will these DIY hair wraps stay in place? (Can you take regular showers and baths?)
- Yes! You can shower and bathe with the wraps.
- They will stay as long as you want. If you tied the wrap tightly, they can stay on for 1 week (or longer.)
- If you don't like them, you can simply cut off the knot and unravel the string.
Still unsure what to do? Here are 2 resources that I found highly helpful:
- Wiki How: How to Hair Wrap
- LaurDIY How to Hair Wrap (She has some fancier designs there + beads)
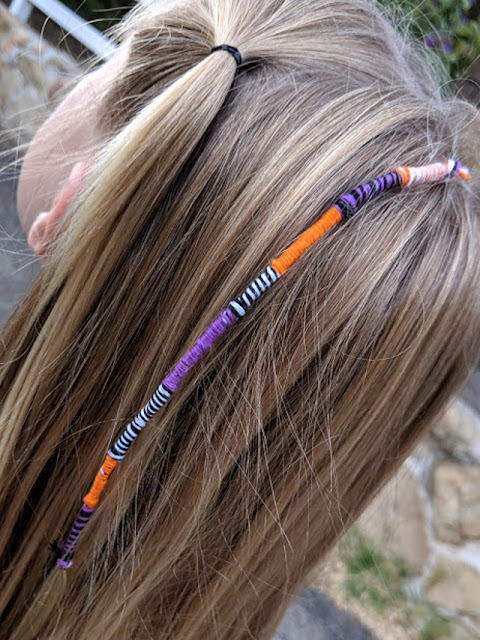
And you can always change the colors to fit the season.
Halloween hair wraps, anyone?
(Wrap by me... but this beautiful photo was courtesy of a friend!)
I hope you have a wonderful time trying out these hair wraps with your kids. So far I've done over a dozen hair wraps and all the kids loved them so much.
Happy making, friends!


