
"Easy As Pi" Artwork!
And if you have younger preschool aged children, check out my 5 easy ways to celebrate Pi Day with Preschoolers!
Now let's celebrate your inner nerd and create some fun artwork to brighten up your wall. Let's get started!
Materials Needed to Make Pi Artwork:
- Paper (I used Watercolor)
- Markers
- Pencil
- Ruler
- Something with a long straight edge
- Eraser
- Protractor
- Large circular object
- Printout of Pi's digits
- Color codes (To relate Pi's digits to specific colors)

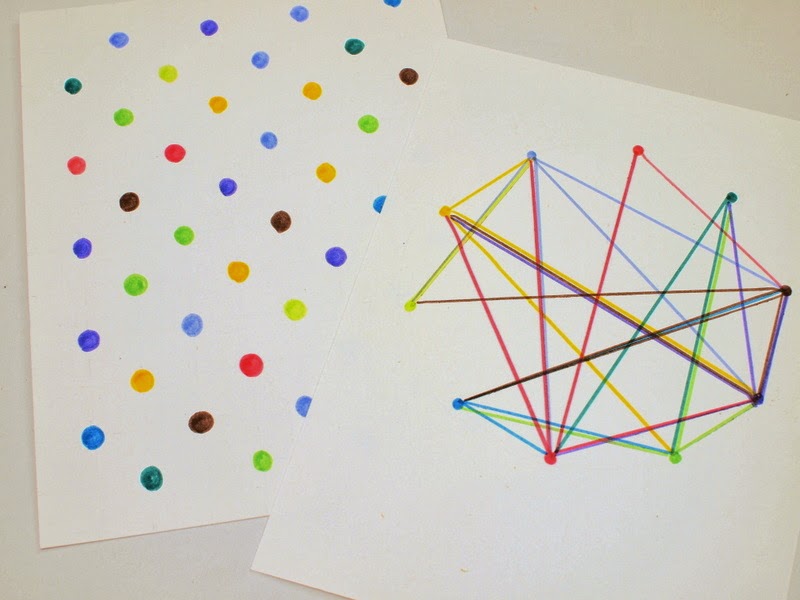
Draw Polka Dot Pi Inspired Artwork:

1. Place a small dash at every inch along all four sides of your paper. Then connect the dashes to make a grid.
2. Using your color codes, draw a dot (whose color corresponds with Pi's digit) at every other inch mark. Use an eraser to erase your pencil markings.

Draw Pi As a Colorful Network:


1. Trace your circular object.
2. Make a mark every 36 degrees and label that with a digit 0-9. Then, place a colored dot corresponding to each digit on your circle.
3. Draw a line connecting each digit of Pi with the next. For example, I first drew a line from 3 to 1 that was the color of 3. Then, I drew a line from 1 to 4 that was the color of 1. Keep on going. (Things got a bit confusing. So, to help keep track of colors and digits, I kept crossing off already used digits off my Pi printout.)
4. Once you have a design that you like (I waited till I finally got a 0), erase all your pencil marks.
There you have it. Two ways you can transform Pi's digits into lovely and colorful artwork.
And it was as easy as Pi, right?
Looking for more Pi Day Activities?
Check out the links below for some great and easy ideas!
Let's keep in Contact!
Like kids crafts and activities? Then you'll definitely want to check out this awesome craft ebook! It contains 115 pages of unique crafts written by 18 kid craft loving moms! And, it costs only $12.99!
And, you can always find fun ideas on my Pinterest, Facebook, Instagram, or Twitter accounts! (Or subscribe to my email mailing list by filling out the pink bar at the top of your screen.)
Happy making, friends!

Happy drawing, you Pi-lovers!