Showing posts with label tie dye. Show all posts

Friday, July 10, 2020

Easy DIY Tie-Dye T-shirt Macrame Plant Holders... with kids!

It's summer! Which means it's time for succulent crafts and tie dye crafts! Today's activity is perfect for this time of year. Everybody is tie-dyeing. Everybody is reminiscing about nostalgic summer camp crafts. And everybody is going bonkers planting. (And who doesn't love succulents?) So grab an old tie-dyed t-shirt, a cute potted plant, and let's make this adorable DIY macrame plant holder for yourself... or give it to a friend!

How to make Easy Tie-dyed T-shirt Macrame Plant holders

(A fun summer craft for kids, tweens, teens, and adults too!)


how to make easy DIY Macrame Plant Holders from old tie dye T-shirt fabric yarn, the perfect summer craft for the whole family (kids too!)


Note:  This post contains affiliate links.  This means I make a small bit of change when you purchase items through the links.  Thank you for your support and the grocery money! For my full disclosure policy, click here.


Thursday, July 21, 2016

Dip Dye Kids Art Project

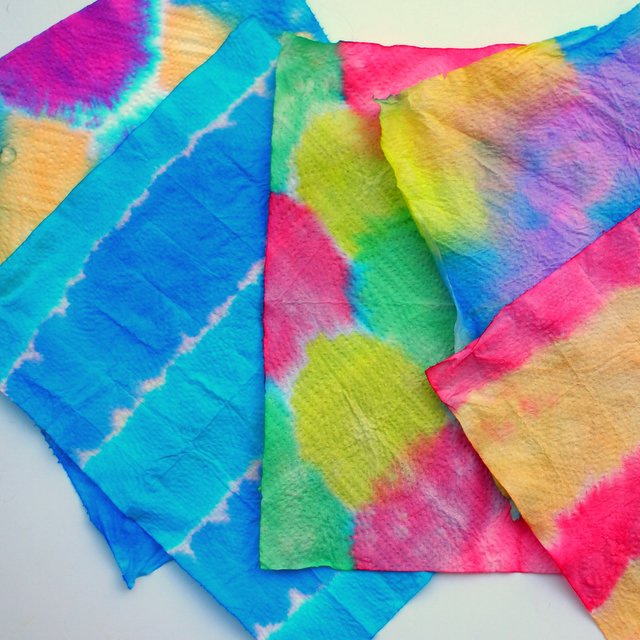
If you're looking for the easiest, funnest, cheapest, and most colorful kids summer art project... you're at the right place.  We've been dying up a storm over here and turning plain old paper towels into lovely dip dye art!

How to Make Dip Dye Art With Kids


Dip Dye Art with Kids- A great alternative to tie dying this summer!

Thursday, June 25, 2015

Hello Summer! Let's have a Tie Dye Party!

This post is sponsored by  I Love To Create and Blueprint Social.  However, all opinions are my own!

Ah, summer, sweet summer.  Nothing screams summer to me more than sunny weather, grill outs, fresh watermelon, and tie dye!   I recently received a free box of tie dye curtesy of  I Love to Create's Tie Dye Your Summer campaign... and I couldn't wait to try it out!

How to host a tie dye party with friends


Monday, April 14, 2014

Sharpie Tie Dye Shirt

It's Monday and we've finally started returning to our normal sleep schedules.  (Yes!)  And now that we're back and settled in, I realized that Easter is right around the corner.  Yikes.  Is it April already?  It totally snuck up on me this year. So here's my first semi-Easter related tutorial:   Sharpie Tie Dye Shirt


Toddler made- Sharpie Tie Dye Shirt

Wait, what does this shirt have to do with Easter?  Well, kids seem to wear cute, colorful outfits on Easter.  (See last year's DIY I heart Peeps Shirt.)   A friend graciously donated a bunch of clothes to us and one of the items was a blank white shirt.  It screamed "Paint me, paint me."  And so Chuck and I used it to make this year's Easter shirt together.  Keep reading to see how we made it!


Wednesday, May 30, 2012

DIY-Sharpie dye your clothes

I've always wanted to learn how to tie dye properly.  I tried to do it once way back in elementary school, but ended up with a light grey stained shirt.  (We were going for bright purple.) 

Now that summer is showing off her vibrant hues, I once again felt inspired to try this colorful art form.  Some quick researching online showed that people were actually using Sharpie markers to dye their shirts!   The method was so simple and I had all the materials at home.  Score!  So, I decided to give this craft a try. 

Here are the materials that I used:


Here's what I did: 
  1. I placed a piece of cardboard inside my shirt so the marker wouldn't seep through.  (I only wanted one side of my shirt dyed.) Note:  You could probably also use a plastic bag too. 
  2. I channeled my inner artist and began doodling on my shirts.  Note:  I used old markers which didn't have much ink in them.  I recommend using juicy, new, fat markers.  Then you can put more ink on the shirt and get a better effect.      
  3. I stretched my t-shirt over a baking pan to catch the alcohol.  Note:  Again, you could probably just do this part with a plastic bag.
  4. I used my dropper to drip alcohol onto my design.  A couple of drops was all it took to make the marker bleed. 
  5. I let my shirt dry.
  6. I ironed my shirt to set the colors.  (Note:  This didn't work because the colors still bled when I hand washed the shirts.  Other people suggested placing your shirts briefly in the microwave or dryer.)
  7. I hand washed my shirts.
 Want to see the results?
Here's my first attempt:
My inspiration came from beach waves and fourth of July fireworks.
The design reminded hubby of a dental x-ray.
Hmm... crafty or crappy?  Not sure if I'm digging my design...


And here's my second attempt:  (This time I tried something simpler.)  

All in all the method worked relatively well.  The colors were vibrant and reminded me of watercolors.  But, the markers bled during my hand washing, resulting in staining on the back of the shirts.  Also, the rubbing alcohol and markers smelled A LOT.  So just be sure to do this in a well ventilated room!

Have you tried using sharpies to dye your clothes?