Showing posts with label perler beads. Show all posts

Wednesday, April 6, 2022

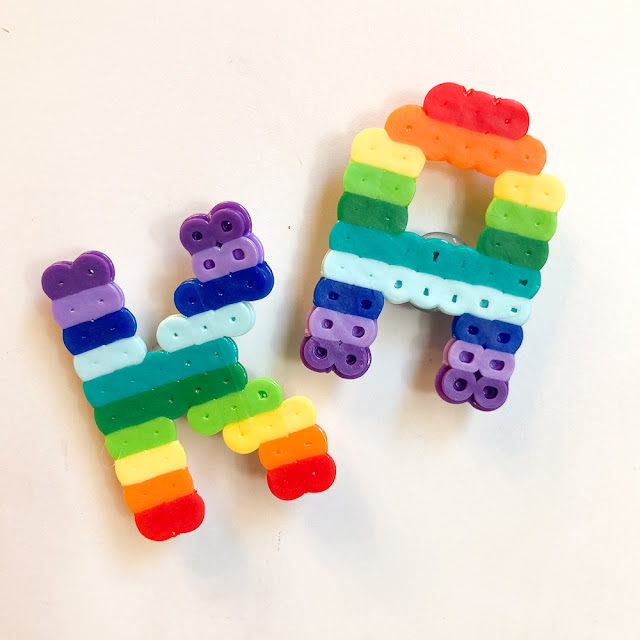
DIY Rainbow Perler Bead Magnetic Letters

Looking for a super cute and easy gift that kids can make for themselves or as gifts for friends? Why not try making these Rainbow Perler Bead Magnetic letters? We love Perler Bead crafts over here and this is such a cute one that my kids recently made for their friends. 


How to Make Rainbow Perler Bead Magnetic Letters

 DIY Perler Bead Magnet Letters Kid Made Gift Craft

This post contains affiliate links.  This means I make a small portion off of any purchases made through the links at no additional cost to you.  Thank you for the grocery money!  For my full disclosure policy, click here.

Monday, January 17, 2022

DIY Harry Potter Golden Snitch Perler Bead Craft

Calling all lovers of Harry Potter and Perler beads! This Golden Snitch craft is just for you. Here's how to make your very own DIY 3D Golden Snitch.... from Perler beads!


DIY 3D Harry Potter Golden Snitch Perler Bead Craft

DIY Harry Potter Golden Snitch Perler Bead Kids Craft


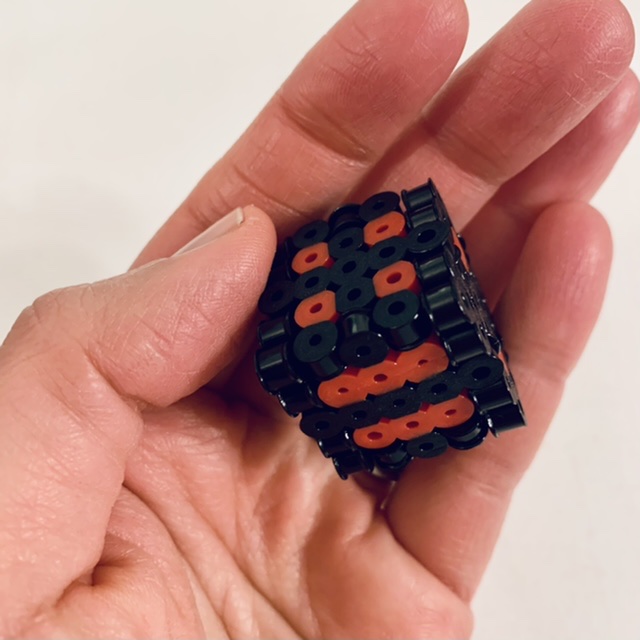
How to Make Perler Bead Dice (Free Pattern)

Looking for a fun and different type of Perler Bead Craft? Got a kid who enjoys crafting AND playing board games? We've made a ton of Perler Bead crafts over the years and today I'm going to share directions for making a Perler Bead Die! This easy 3D Perler Bead project is perfect for kids who want to try their hand at making 3D objects with beads. 


How to Make Perler Bead Dice with Kids!

DIY Perler Bead Dice Craft


Wednesday, October 13, 2021

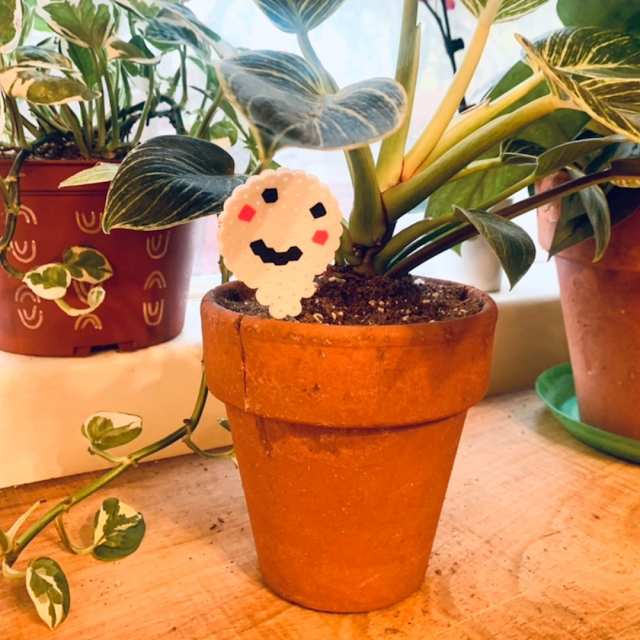
DIY Cute Perler Bead Decorative Plant Markers

Do you love houseplants? 

How do you feel about Perler (Hama) bead crafts

If you adore both, then this is the post for you! My boys LOVE making things with Hama beads and since I enjoy crafting with them too, I made this sweet ghost Perler bead plant marker for my houseplants. Here's how I made it:


How to Make Perler Bead Decorative Plant Markers for Halloween

How to make cute DIY Perler (Hama) Bead Decorative Plant Markers for a fun Halloween Craft For Kids


Tuesday, August 25, 2020

3D Perler Bead Minecraft Creeper Craft

We LOVE playing Minecraft and making Minecraft crafts! Last week, we folded these easy origami Minecraft origami pigs and origami creepers. This week, we're combining our love of gaming with our love for a good Perler bead craft. Yup! Today we're making our very own Minecraft Perler Bead Creepers!


3D Perler Bead Minecraft Creepers

directions how to make 3d perler bead minecraft creepers- fun affordable kids craft


Wednesday, July 5, 2017

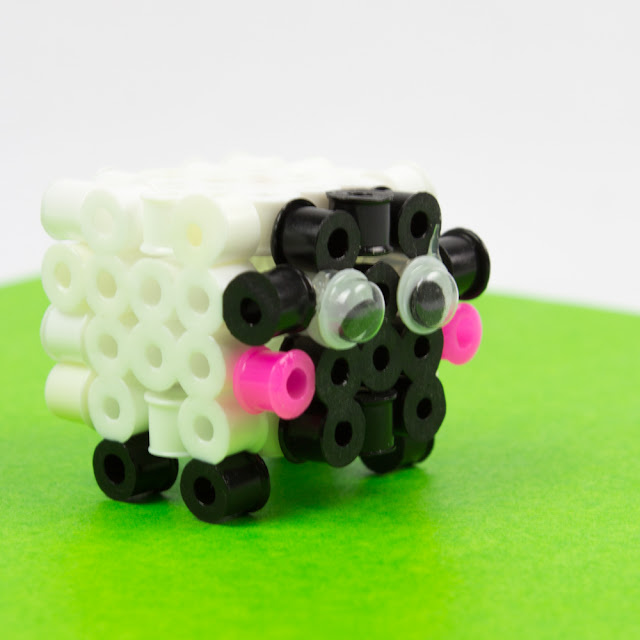
Cute and Cuddly 3D Perler Bead Sheep

It all started last week with this 3D Perler Bead Pokemon and Squirtle.  Well, you know me and of course we couldn't stop there.  Today I have another super adorable 3D perler bead craft for you.  We're making these adorable perler bead sheep!  Baaa!

How to Make 3D Perler Bead Sheep


3d perler bead sheep craft- how to for kids


This post contains affiliate links.  This means I make a small bit of change off of any purchases you make through the links.  Thank you for the grocery money!  For my full disclosure policy, click here.


Thursday, June 29, 2017

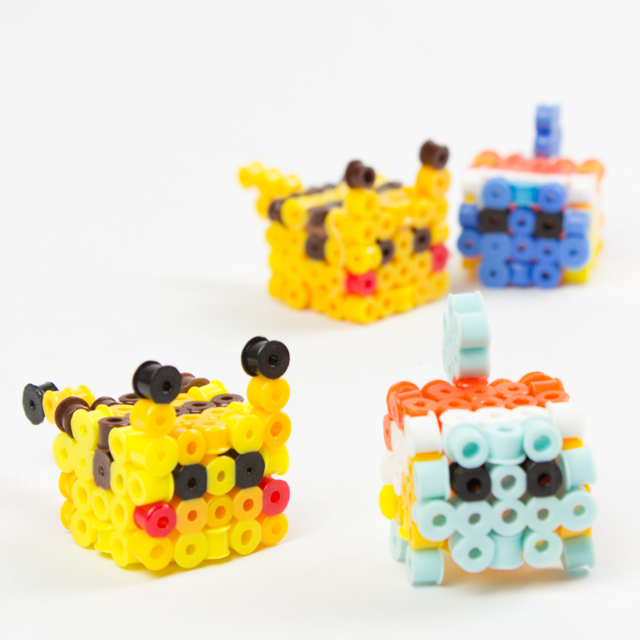
Totally Awesome 3D Perler Bead Pikachu and Squirtle (Free Patterns)

If you are OBSESSED with Pokemon then you gotta check out today's awesome Pokemon Craft.  Yup.  We made a 3D perler bead Pikachu AND Squirtle.    They're like little adorable puzzle cubes of fun. Swoon, craft-loving friends, swoon!

3D Perler Bead Pokemon Creations!

how to make 3d perler bead pokemon- pikachu and squirtle (free patterns)


This post contains affiliate links.  Thank you for the grocery money!  For my full disclosure policy, click here.


Thursday, January 29, 2015

Super Cute Personalized Pencil Toppers

Often times I just wanna make something, cute, kiddy, and fun.   And that's totally the vibe that I was feeling when I made these personalized pencil toppers.  *Insert girlish squeal* Colorful perler beads?  Lovely letters?  Hearts?  Too. Much. Cuteness.  

Personalized Pencil Toppers!


super cute personalized pencil toppers


So satisfy your inner elementary school girl and stop on by DIY Candy to see how I made these bad boys.

crazy cute personalized pencil toppers


And if you feel like making more super cute and fun kids crafts, check out the links below!


5 Super Cute and Fun Kids Crafts!


Let's keep in Contact!

You can always find other fun ideas on my Pinterest, Facebook, Instagram, or Twitter accounts!  (Or subscribe to my email mailing list by filling out the pink bar at the top of your screen.)

Happy making, friends!

Friday, November 28, 2014

Perler Bead Garland

The Perler Bead holiday crafting continues!  A couple of days ago I shared how to make these super easy Perler Bead Snowflake ornaments.  Today I'm over at DIYCandy sharing this quirky and unique Perler Bead Holiday Garland!

Perler Bead Holiday Garland

Perler Bead Holiday Garland- Easy, fun, and colorful!

You just need 2 materials:  Perler Beads and Zip ties!

(And if you like the adorable Christmas trees in the photo, you can find the tutorial for mini Christmas trees here.)


Hope you had a wonderful Thanksgiving, friends!  We're going black Friday shopping today with family!  Wish us luck!


Let's keep in Contact!

Like this idea?  You can always find other fun ideas on my Pinterest, Facebook, Instagram, or Twitter accounts!  Or, just sign up for the weekly newsletter in the pink bar at the top of the site.

Happy making, friends!

Wednesday, November 26, 2014

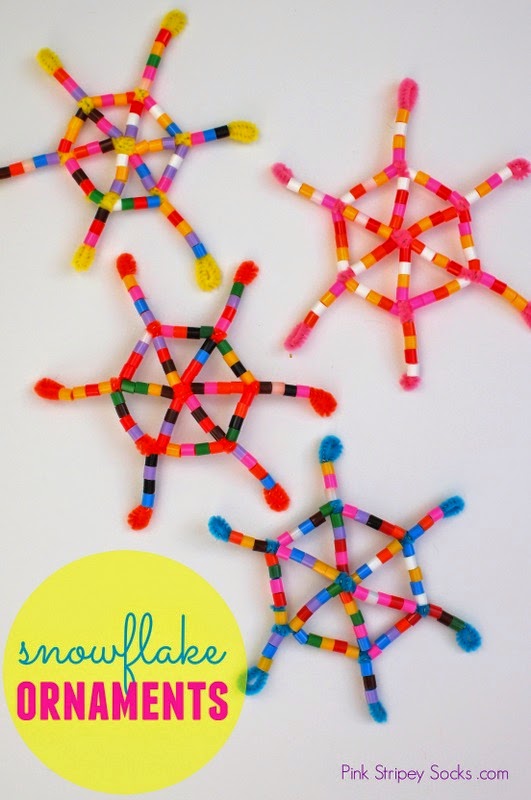
DIY Perler Bead Snowflake Ornaments

Every year I try to make a couple new Christmas ornaments for the tree.   So far I've made hand and feet salt dough ornaments and  felt and milk jug ornaments.  This year I used Perler Beads and pipe cleaners to create easy snowflake ornaments!

Perler Bead and Snowflake Ornaments


perler bead and pipe cleaner snowflake ornaments
This post contains affiliate links.  Thank you for your support!


These were so incredibly easy to make and the colors make me happy.  Keep reading to see how you can make some of your own!


Saturday, July 19, 2014

DIY Fish or Fruit Perler Bead Stretch Bracelet

Awhile back I had the wonderful opportunity to do a post swap with Allison from Dream a Little Bigger. (She's a serious crafting all-star, so I definitely recommend checking out her blog if you want to get seriously inspired.)   While packing the other day I found my collection of DIY Perler Bead Bracelets  (see the bottom of the post for pictures.)  And then I realized that I never shared my tutorial here.  So tada!  Here's a post from the archives.  Today we're going to make these lovely "fish" and "fruit" perler bead bracelets. 

Make "Fish" and "Fruit" Perler Bead Bracelets


how to make fish and fruit perler bead woven bracelets


(This post contains affiliate links.  Thank you so much for your support.)

Aren't they both so colorful and summery?  Don't you just want to make one? It feels like summer camp all over again...  Let's get stringing!

Wednesday, September 25, 2013

Candy Corn inspired Perler Bead Bracelet 2


Yesterday I shared how I made a  candy corn inspired perler bead bracelet.  Today I'll share how I made this slightly more complicated version.

While both bracelets were inspired by candy corn, the second one is my favorite.  It's graphic and quirky, just perfect to wear this upcoming month.

Materials:
  • Perler beads
  • Scissors
  • Elastic Cord (I used a thin 0.5 mm elastic cord for these bracelets, but a thicker cord would have been better to use because it's easier to string the beads with and the finished bracelet feels sturdier.)
Directions:

1.  Cut out about 40 inches of cord.  (It really doesn't matter what length you use.  You'll just end up tying on more cording later.)  Tie on a bead to act as a stopper.  (Again, it doesn't matter what color you choose because you'll end up removing this bead at the end.)


2.  String on six black beads.  I labeled the beads with numbers to help out with steps 3 and 4.   These six will be your first column of beads.

3.  Now you're going to add your second column of beads.  Add on a yellow bead (#7).  Then,slip your string through your #5 bead.  Add another black bead (#8).  Then, slip your string through your #3 bead .  Then, add another black bead (#9).  Then, slip your string through your #1 bead.   Then, pull tight.

These two columns are the basis for the rest of your bracelet.  See how some portions of the bracelet jut out and some portions of the bracelet don't?  As you continue to build your bracelet, you'll alternate between adding a bead to fill in a gap, and stringing your cord through the next bead that juts out.


4.   Now we're going to string one candy corn.   Remember to pull your string tight after stringing each column of beads.

Column 3: Add a black bead, string through  #9 black bead, add a  black bead, string through #8 black bead, add a yellow bead, string through #7 yellow bead 

(From now on, I'll just tell you what color beads to add.  But remember to alternate between adding a new bead and stringing through a bead that's jutting out.)

Column 4: Yellow, orange, black
Column 5: Black, orange, yellow


Column 6:  Yellow, orange, orange
Column 7: White, orange, yellow
Column 8:  Yellow, orange, orange


Column 9:  Black, orange, yellow
Column 10:  Yellow, orange, black
Column 11 :  Black, black, yellow


Column 12:  Yellow, black, black
Column 13:  Black, black, black

 Now you've got your first candy corn strung.  High five!  Keep going and continue to follow the pattern.  If you run out of cord, no worries!  Just tie on another strand.

Soon you'll get a long bracelet like this:  (The ending section contains more black because I knew I wouldn't be able to add on a whole candy corn.)


5.  Now make sure that (1) it fits your wrist and (2) both ends fit together like zipper teeth.  Then, string your cord through both sides of the bracelet and pull tight.  Remove the stopper bead and tie your beginning and ending cords together. 


And you're done!  Happy beading!

Tuesday, September 24, 2013

DIY Candy Corn Perler Bead Bracelet 1

Are y'all going Halloween crazy yet?  (Or is it just me?)

Last weekend I took Chuck to Target and we had a blast seeing all the costumes and decorations.   Doesn't matter how many times I've seen a dancing skeleton or singing skull, this stuff never gets old.  I guess I'm a kid at heart because Halloween is my very favorite holiday.

So that's why I'm super excited to share this craft with you.  I went a bit crazy with my perler beads and designed two candy corn inspired bracelets.  Today I'm sharing the simpler design with you.  If you like this one, head on back tomorrow to see how I made the more complicated one.  

Here's a photo of my candy corn inspired bracelet: 


Materials:
  • Perler beads
  • Scissors
  • Elastic Cord (I used a thin 0.5 mm elastic cord for these bracelets, but honestly a thicker cord is better to use because it's easier to string the beads with and the finished bracelet feels sturdier.)

Directions:
1.  Cut out about 40 inches of cord.  (Honestly, it doesn't matter what length you initially use.  You'll just end up tying on more cording later.)  Tie on a bead to act as a stopper.  (I used a black bead.  It doesn't matter what color you choose because you'll end up removing this bead at the end.) 

2.  String on 
  • white bead (#1 bead) 
  • white bead (#2 bead)
  • orange bead (#3 bead)
  • orange bead (#4 bead)
  • yellow bead (#5 bead)
  • yellow bead (#6 bead)
(I labeled the beads with numbers to help out with step 3.) These six will be your first column of beads.


3.  Now you're going to add your second column of beads.  Add on a yellow bead (#7).  Then,slip your string through your #5 yellow bead.  Add an orange bead (#8).  Then, slip your string through your #3 orange bead .  Then, add a white bead (#9).  Then, slip your string through your #1 white bead.   Then, pull tight.


 Now you've got the basis for the rest of your bracelet.  See how some portions of the bracelet jut out and some portions of the bracelet don't?  As you continue to build your bracelet, you'll alternate between adding a bead to fill in the gaps, and stringing your cord through the beads that jut out.

4.  Let's add the fourth and fifth columns. 
  • Column 4:  Add a white bead.  Slip your string through the jutting out white bead.  Add an orange bead.  Slip your string through the jutting out orange bead.  Add a yellow bead. Slip your cord through the jutting out yellow bead.  Pull tight.
  • Column 5:  Add a yellow bead.  Slip your string through the jutting out yellow bead.  Add an orange bead. Slip your string through the jutting out orange bead.  Add a white bead. Slip your string through the jutting out white bead.  Pull tight.

Keep going and continue to follow the pattern.  Add a bead and then slip your string through a bead that's jutting out.  Keep pulling your string tight after adding each column of beads.  If you run out of cord, no worries!  Just tie on another strand.

Soon you'll get a long bracelet like this:
Now make sure that (1) it fits your wrist and (2) both ends fit together like zipper teeth.  Then, string your cord through both sides of the bracelet and pull tight.  Remove the stopper bead and tie your beginning and ending cords together.


Tada!  Done. And that's how you make a simple candy corn inspired perler bead bracelet.  Like it?  If so, come back tomorrow to see how I made a slightly more complicated candy corn bracelet.

Happy beading! 


Monday, September 2, 2013

DIY Watermelon Perler Bead Bracelet

That's it.  
Summer is over.
No more vacation, no more white shoes.

Want to keep the good time summer vibes going?  
 Check out this watermelon bracelet I made out of Perler beads.
It's my second craft post for Handmade Charlotte.  

Happy belated Labor Day!

 DIY Watermelon Bead Bracelet
 

Wednesday, August 21, 2013

Perler Bead Zip Tie Statement Necklace

Ok, ok.  I'm still on the Perler bead kick.

I can't help it!  The jar is still practically full of beads.... and it mocks me whenever I walk by.  I tried hiding them in a craft drawer, but it didn't help.  I hear tiny colorful voices crying  "Leslie, Leslie.  Use us.  Use us!"

So like any crafter, I caved in to their siren calls.

Inspired by Mark Montano, I used zip ties to make these quick and easy Perler bead statement necklaces.  Tada!


I think the right one looks really cute and fresh.  I was on the fence about the left one... but it was a hit with Chuck.  He decided to wear it to church on Sunday (along with a backwards basketball cap, purple exercise shorts, and sneakers.....oi!) 

So if you too find yourself taunted by Perler beads, you could try making these necklaces too.  Let's begin!


Wednesday, August 7, 2013

Perler Bead Safety Pin Bracelet

And so the Perler bead craze continues!

(You know how they have "Shark Week" on tv?   Maybe I should have called this "Perler Week..."  Hmm...)

Last night while watching tv, I strung a whole bunch of black and white Perler beads onto some safety pins.  Why?  Well, because I wanted to make this bracelet...


The black and white design makes it quite graphic, the Perler beads make it fun, and the silver safety pin bits make it a bit edgy.  When I wear it, I imagine that I'm a hip preschool teacher going out to a club.  (Wow.  I really need to get out more....)


Tuesday, August 6, 2013

Perler Bead Statement Necklace

Yes.  I'm still on a Perler Bead kick.  I'm sorry.  I can't help it.  I'm the kind of person that likes to finish things off... and so far I've been thwarted from doing just that.  Boo.  Even after all this crafting, I still have like a billion beads left.

A billion!  Ack!  What do people do with all these beads anyway?

So today I'm going to share how I made this statement necklace using Perler beads.  But, full disclaimer here... honestly, I'm on the fence over the results.  Cute?  Or kind of crappy?  I'll let you decide....


Materials:
- 1/8" wide ribbon, cut at 72 inches
- Scissors
- Masking Tape
- Perler beads
- Ruler

Tuesday, July 30, 2013

Melted Perler bead braided bracelet

Maybe you're like me.

You rushed out to buy a huge tub of Perler beads because you had to make an awesome Perler bead bowl.

But now you find yourself staring at a huge tub of tiny colorful cylinders, wondering what you're going to do with all of them.

Well, how about making a braided Perler bead bracelet?

Oooh.  Arm Candy.


Materials:
- Colored hemp cord
- Perler beads
- Wax paper
- Baking pan
- Scissors
- Tape (or clipboard, or you could just use your foot)
- Button
- Ruler


Monday, July 15, 2013

Make Perler bead bowls (and words)

Today's post is a bit late because my computer died last night.

RIP, dear friend.

I knew that it was going to happen sooner or later (but I just wish it was later.)  Boo.  I also wish that I had backed up my stuff (double boo.)  Hubby's performing some intensive surgery on it, so hopefully we can get my documents and photos back.

OK, enough heavy shop talk... onto today's craft.

When I saw Poppy Haus melting Perler beads to make bowls, I knew that I had to try it too.  Melting plastic beads in the oven?  Too. Much. Crafty. Awesomeness.  Sign me up!

Definitely check out her results, because they were much classier (she used two colors.)  I, on the other hand, went whole-hog color crazy.  Here are my results:

Bam!  It's like a whole bunch of sprinkles and confetti exploded to make this bowl.  We're currently using it to store fruit.