
Cardboard Space Shuttle Craft
Want a ride to the moon on your very own cardboard roll space shuttle? Then keep reading to see how we made them (template included)!
Materials to Make Cardboard Roll Rocket Ship:
- Cardboard space shuttle template
- Cardboard paper towel roll
- Cereal Box
- Scissors
- Pen
- Paint
- Paint Brushes
- Permanent marker
- Glue
- Mod Podge
- Sponge Brush
- Scrap paper
- Tray ( to hold paint and glue)
- Optional: Straw, tape, and yarn (if you want it to slide around)
Directions to Make Cardboard Roll Space Shuttle:
1. Print out the template. Cut out the body/wing piece and the rudder piece. Trace them onta cereal box and cut them out.
 |
| Two sets of pieces- One for my large shuttle and then a set of modified ones for a smaller roll |
2. Then, cut out three slits in you paper towel roll. Cut out two approximately 2 1/2 " slits on both sides of your paper towel roll. Then, cut out one approximately 2 " slit on the top of your paper towel roll. (Confused? See the template for a diagram.)
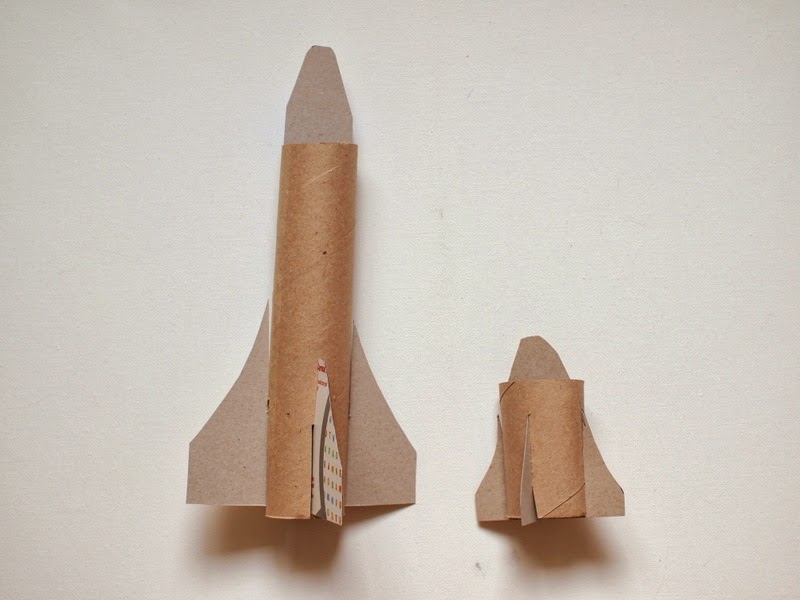
3. Slide your body/wing piece through your cardboard roll. Its slits should slide nicely into your cardboard roll's 2 1/2" side slits. Then, slide your rudder piece in. The rudder's top slit should slide into your cardboard roll's 2" slit, and the bottom slit should slide into your body/wing's slit. (Again, the template makes this much clearer.) If the slits don't exactly match, cut them longer as necessary. Also, you can always add a dab of glue to make your pieces stay in place.
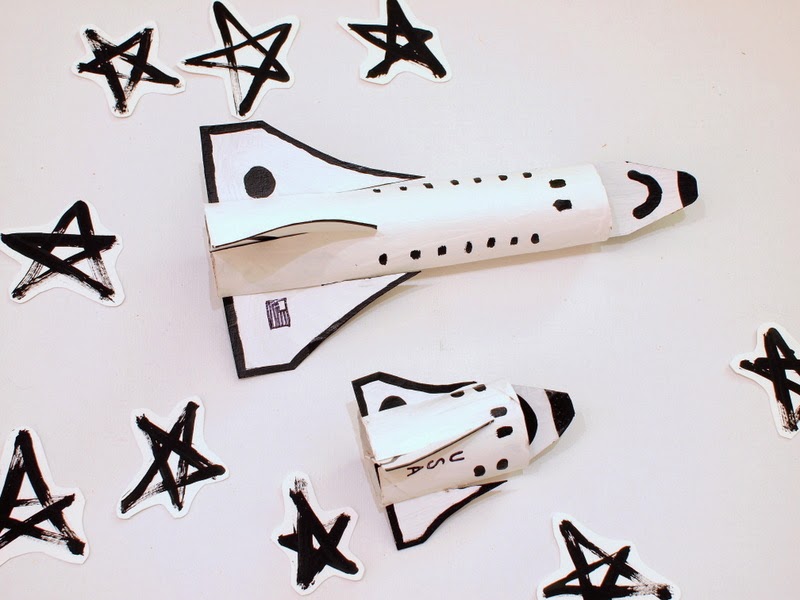
4. Once everything fits nicely, pull your pieces apart and paint them! We painted the bottom of the body/wing portion black. Then, after that dried, we painted everything else white. Then, I added the black details while Chuck slept.

5. I knew that Chuck would be playing with this toy, so we coated it with a layer of Mod Podge to protect our paint job. (If your kid has perpetually sticky hands like mine, I definitely recommend this step. It's always a bummer to see stains on your lovely paint job.)
6. Slide the pieces together and then play! (Once again, if the slits don't quite fit together because of your paint or Mod Podge, just make them longer or add glue.)
No rocket fuel needed, these space shuttles are sparked by love and fueled by imagination!

Want to make your cardboard rocket ships really fly?
Ahh, I see you want to take it the next step further! Yes. We can do it! Tape a straw to the top of your rocket ship. String it through a piece of yarn. Then, tie a piece of yarn across the room. (I tied it from one door handle to another.)

Slide it along the yarn to make it fly!
Cardboard Space Shuttle from Pink Stripey Socks on Vimeo.
Chuck really loved helping me making the space shuttle. (We both painted in white and covered it in Mod Podge to protect our paint job.) And I had a lot of fun designing the project too. Isn't it neat when a couple of simple materials are transformed into something really magical?
Until next time, happy crafting!
Psst- the fun doesn't have to stop. Looking for other transportation-related crafts?
Check these out!