Showing posts with label Cars. Show all posts

Tuesday, November 29, 2022

How to Build a Paper Air Skimmer Sleigh (FREE Printable included)

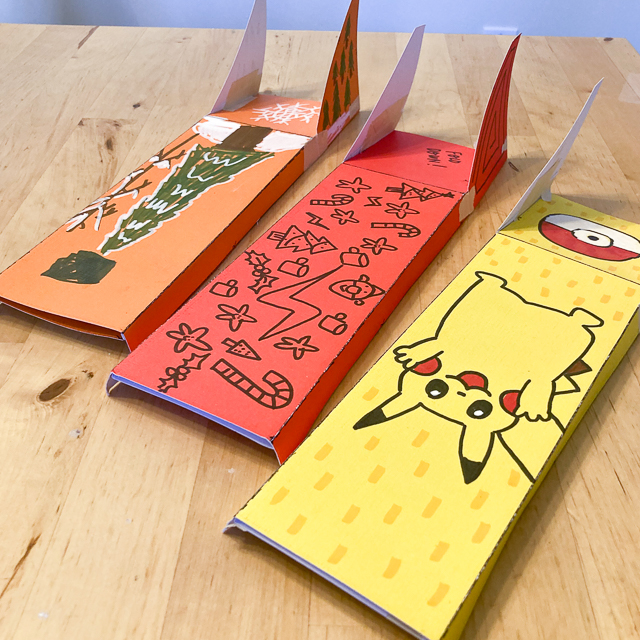
Looking for a really neat winter STEAM activity to make with the kids? A few months ago, my eldest son came back with a really cool paper skimmer that he made at school. They followed this paper skimmer tutorial on YouTube. The directions were great for older kids, but my youngest wasn't able to make one easily. So I came up with an easy printable that we could print out, color, fold, and race. :) Both boys loved using it so much that I'm sharing it here! With it being so close to Christmas, we called them our paper skimmer sleighs. 

Print, Fold, and Build a DIY Paper Air Skimmer Sleigh

(Free printable included!)


how to build a DIY paper air skimmer sleigh car with free printable for kids school library STEM STEAM project

Tuesday, February 28, 2017

Create a Rock Maze

Is the weather getting warmer where you are? Yesterday we embraced the sun with this quick and easy STEM activity.  We grabbed some rocks and made our very own rock maze for cars!

create a rock maze with kids- super easy and fun STEAM activity

This post contains affiliate links.  Thank you for your support! For my full disclosure policy, click here.


Tuesday, July 5, 2016

Build Your Own Unique Wooden Car

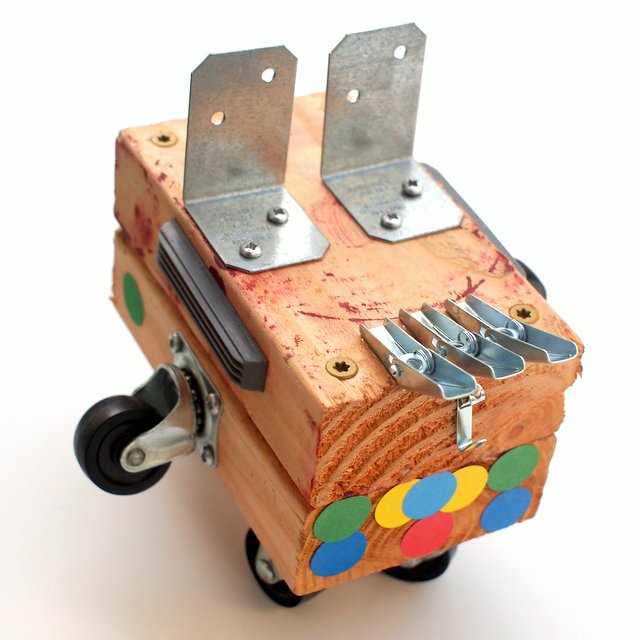
Ever since my eldest son was young, he LOVED cars.  Is your child that way too?  Then you'll understand why we've done a ton of car crafts over here on the blog.  And boy are you in for a treat with today'd post.  Tada!  My husband and son designed and built their very own wooden car... for free!

  Let's Build A Wooden Car!

Raid your tool chest and leftover bits to build your own wooden race car- great STEM activity for kids
This post contains affiliate links.  Thank you for the grocery money!  For my full disclosure policy, click here.

Wednesday, May 6, 2015

Pizza Box Car Garage

The next time you get some take-out pizza, ask them for an extra clean pizza box.  Why?  So you and the kids can make a pizza box car garage, of course!

Recycled Pizza Box Car Garage

Recycled pizza box car garage- Super fun toy to make with or for car-loving kids!


Friday, March 20, 2015

Map Learning with Planes!

When we moved to our new place, one of the first things I bought for Chuck's new "big boy" room was a large world map.  I intended to teach him about all the different places and people in the world.  Well....  lots of other things came up and that dream never quite panned out.  That's why I was excited for this week's preschool collaborator challenge.  It's all about map learning!  Yup.  This challenge gave me a swift kick to the bum to think of an easy and fun way to help preschoolers learn about maps.

I came up with this idea to travel the globe with the Planes and Cars characters!

Let's Learn Geography with Disney's Planes and Cars characters!


How to use Disney Planes and Cars movies to teach preschoolers about geography and maps
This post contains affiliate links.  Thank you for your support.

So keep reading to see how I (and 4 other bloggers) taught our preschoolers all about maps!


Wednesday, February 18, 2015

DIY Disney Character Snack Bags

As a child, I LOVED watching Disney Movies.  I watched Little Mermaid and Beauty, Beast and the Beast a million times (no kidding).  In fact, to this day I know 80% of the lyrics by heart.  (But ask me any question about US history and I'll totally draw a blank.  Crazy how the mind works, right?)

Why all the Disney talk?  Well, today 7 other kid bloggers and I challenged ourselves to come up with easy, Disney Inspired Crafts.  But wait, there's a catch... we have to make the crafts with... kitchen items!  (Duh, duh, duuuuuh!)   So stick around to the end of the post to see the other ladies' great ideas!

I thought it would be fun to make Chuck some Disney Character Snack Bags.   They took a couple of minutes to make, and really make the bags special for kids.


DIY Disney Character Snack Bags! 


Add Disney Characters to any of your snack bags using this quick and easy method!
This post contains affiliate links.  Thank you for your support!

Wednesday, January 14, 2015

DIY Toy Launcher!

With the nights still being quite long, we often find ourselves stuck inside twiddling our thumbs... and going kinda bonkers.  :)  So one day we took matters into our own hands, and our family worked together to tinker and turn a long, narrow box into a DIY Toy Launcher!

DIY Cardboard Toy Launcher


DIY toy launcher!  fun STEM activity to build and play with kids!
This post contains affiliate links.  Thank you for your support!


It's really amazing how many moving types of toys you can make from with rubber bands!  The stretchiness of the rubber bands provides ample opportunities for fun STEM (science, technology, engineering, and mathematics) activities and crafts.  (For example, we've made this DIY Rocket Launcher, this DIY Paper Slingshot, and this Cardboard car... that uses potential and kinetic energy to MOVE using rubber bands!)  


Thursday, January 8, 2015

18 Transportation Crafts that "Go!"

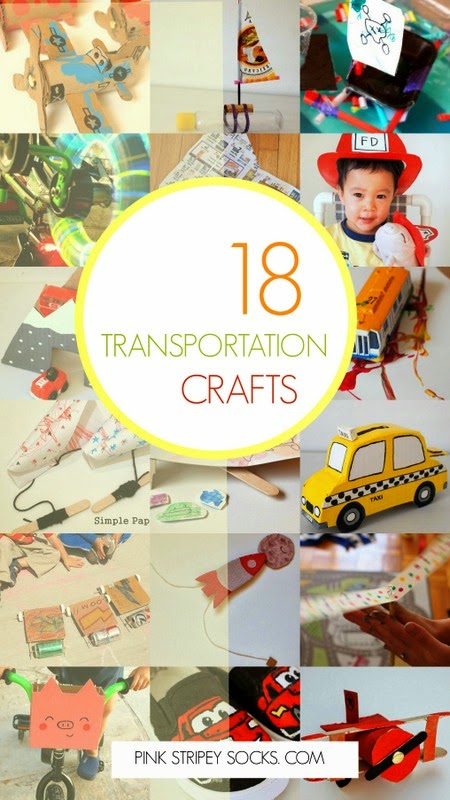
Do you have a plane, train, helicopter, truck, boat, car, or spaceship loving kid?  While looking through the archives, I realized that we've done quite a few transportation-related crafts here.  18 to be specific!  (Whoa.  Kinda cray-cray and kinda cool...)  So I thought it would be fun to take a walk down memory lane and share this compilation of all 18 crafts that "go" here!

18 Awesome Transportation Related Crafts!


18 AWESOME Transportation crafts- planes, trains, buses, bikes, space shuttles, kites, trucks


Ok.  I gotta admit something to you.  I was originally going to call this post, "Crafts for Boys" (that's why it's in the permalink) but then totally decided against that name.  Girls can like cars, trains, planes, boats, trucks, and bikes too! Right?  Right.  Ack!  Sometimes it's so easy to fall into gender stereotyping.  (Do you ever feel the same way?)   So anyway, that's why I changed the name to Transportation crafts.

Thursday, December 18, 2014

DIY Toy Car Ornaments

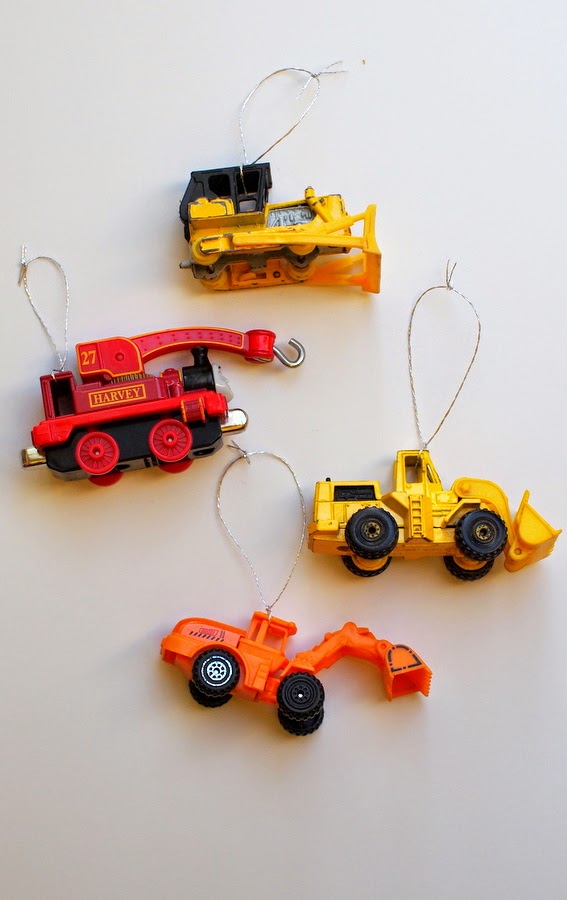
We have a TON of toy cars, trains, and trucks over here.  (Chuck's kinda got a thing for transportation toys.)  And lots of them have open windows.  I was staring at them the other day and realized... wouldn't they make fun (and cheap) ornaments?

DIY Car Ornaments


Easy DIY toy Car Ornaments- Turn toy cars into ornaments


Thursday, May 1, 2014

Build a toy car that moves

I love painting things with Chuck, but sometimes I yearn to make things that actually move or do things.  So when a mommy friend suggested that we build cardboard toy cars that actually move, wowzers, I had to say yes.  She found the directions in an old kids' science book (that I don't remember the name of... sorry).  And that's how we spent an awesome play date with five kids- eating pizza and then building and racing some cardboard racing cars

Kid Science: Let's Build a Car that Moves!

how to build a cardboard car that moves
Today's craft is awesome for 2 reasons:

1.  The cars really move.  Really.  You just twist the tin can and then let go.  Bam.  The rubber bands store the potential energy and then once released, they turn the can... and your car moves by itself!

2.  You don't need any expensive materials.  In fact, you probably have most of the items already at home.  

Have I whet your appetite enough?  Ok.  Let's build! Vroooom!

Wednesday, January 15, 2014

Make a Cardboard Bridge for Trains and Cars

We bought an Ikea train set awhile back and Chuck loves it.  The only problem is that our poor Thomas train is too big and doesn't fit under the train set's tunnel.  So I poked through my trusty cardboard stash and made him a cardboard mountain bridge.  

Cardboard Bridge for Trains and Cars

Aha!  Problem solved.
cardboard bridge for trains and cars

Now all the trains can fit underneath the mountain while his cars drive over the train track.  Yay! 

Wanna make a bridge too?  Well then keep on reading! 

Monday, November 4, 2013

Halloween photos (Past and Present)

How was your Halloween?  Ours was pretty jam packed.  We entertained some out-of-town guests, carved pumpkins, attended a couple of kids' parties, and went trick-or-treating.  I was loving most of it until the very end.  I was definitely burned out by the last Halloween party.   Phew.  Too much candy and partying for this mama.

Here are some photos from our Halloween adventures:


Several pieces of felt and dozens of hot glue sticks later.... I finally finished both Mack and Lightening McQueen costumes.  Chuck and I wore them out when we trick-or-treated around our neighborhood.   (Click here to see how I made the costume and click here to see how I made his matching Lightening McQueen shoes,   Or, click here to see Chuck's previous  Thing 1 Costume and his Mr. Potato Head Costume.)

DIY Mac and Lightening McQueen Halloween Costume

In addition to trick-or-treating, we attended two Halloween parties at the library.  It was uber-cute seeing dozens of toddlers dressed up in costumes.  I also couldn't help but ooh and ahh over the cute treats that some moms made.  Check out these marshmallow monsters.  Too. Darn. Adorable. 


Thursday, October 31, 2013

Happy Halloween from a little Lightening McQueen

Happy Halloween everybody!  

Hope you have a wonderful and magical day!  
As promised, here are some photos of Chuck in his Lightening McQueen costume at a church party.
(And if you want to see my matching Mack costume, click here.)


(Did you see shoes?  Click here to see how I painted his Lightening McQueen Shoes.)

And here are a couple of photos showing how I made it. 

Wednesday, October 30, 2013

Painting Lightening McQueen Shoes


Here's a fun fact- In the past couple of months, I've watched the movie Cars probably twenty or so times.  By now, I know all the characters' names and I could probably recite 50 to 75 % of the movies' lines from memory.

Why this sudden and intense interest in cartoon vehicles?  Well, it's Chuck.  We're a Cars household because he just loves the movie.  If you ever visit our home, you'll probably find him either (1) racing around on his bike, pretending to be Lightening McQueen, or (2) playing with his toy cars.

This Halloween, Chuck's going to dress up as Lightening McQueen.  I thought it would be fun to try painting him some shoes to go along with his costume.  It was my first time painting shoes. Here's how they came out: 


At first I wanted to get white or red canvas shoes, but they only had black ones at Walmart. Overall I'm pretty pleased with how they turned out.  They're super cute.  But, I'm not sure how long (or how well) the paint will last.... so the jury's still up about that.   I'll probably update this post in a couple of weeks to include some notes about wear and tear.... but for now here are some photos of my process in case you wanted to see what I did.

Materials:
  • Canvas shoes
  • Chalk
  • Acrylic paint
  • Thin paint brushes
  • Pencils
  • Paper
  • Q-tip
  • Paper towels
  • Jar with water
  • Tray to hold paint


1.  First I placed a piece of paper on top of my shoe and traced the top of the shoe to see how big to draw my images.  Then, I drew and cut out my Lightening Mcqueen.

2.  I briefly lamented not having white canvas shoes because I wasn't sure how to transfer my image to the shoes. (Seasoned crafters out there- do you know of a good way to do this?)  I ended up just tracing my image onto my shoe with sidewalk chalk (way too big, I know... but this was the smallest chalk I had) and sketching out the details.  (There's gotta be a better way, right?)


3.  I pulled out my paint and started painting my images.  After I filled in all the colors (see right shoe), I outlined my images using a pencil dipped into my black paint.  The black outline made my images much sharper and nicer to look at (see left shoe.)  Then, I just cleaned off my chalk marks with a wet q-tip.

And that's all!  Ka-chow!


Chuck's really enjoyed wearing these bad boys around town and I'm just glad that I got to craft something useful and cute.   

How are you getting ready for Halloween?  Happy crafting! 

Tuesday, August 13, 2013

Toddler painting with toys

Ok, the title of the post pretty much says it all.

1.  Get some toys.
2.  Dip them in paint.
3.  Watch your kid go to town.
4.  Remind your child to not paint the floor... or wall... or you... or...
5.  Pat yourself on the back for entertaining your child. 
6.  Wash toys and child in bathtub.
7.  Watch your kid go to town cleaning the toys.
8.  Pat yourself on the back for keeping the fun going.

What can I say?  Entertained child = happy child = happy mama

Happy toddler crafting!