
Kid Science: Let's Build a Car that Moves!

1. The cars really move. Really. You just twist the tin can and then let go. Bam. The rubber bands store the potential energy and then once released, they turn the can... and your car moves by itself!
2. You don't need any expensive materials. In fact, you probably have most of the items already at home.
Have I whet your appetite enough? Ok. Let's build! Vroooom!
Materials Needed to Build a Toy Car with your kids
- Piece of corrugated cardboard 6" x 6" (this will be trimmed a bit later)
- Scissors
- 4 skewers
- 2 caps (we used formula caps)
- Drill (or something sharp to pierce holes)
- Soda Can (rinsed out, dried, and tab removed)
- 3 Rubber bands
- Crayons, markers, or stickers
- Tape
- Straw
How to build a Toy Car that Moves
1. Use crayons, markers, or stickers to decorate one side of your cardboard.

Note: Don't get too comfortable with the skewers being where they currently are. You may need to pull them out and reinsert them after step 4.
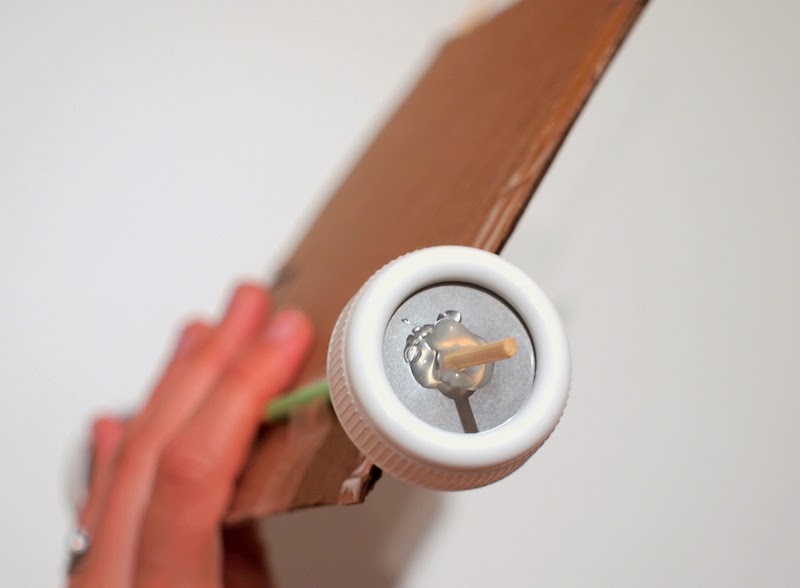
3. Drill or pierce a hole in the middle of each cap. (They will serve as the wheels.)
Notes:
- Make sure your hot glue does not touch your straw or cardboard. You need the skewer to spin freely inside of the straw.
- Hold the wheels flat as they dry on the skewer. Otherwise they will be slanted and your car won't drive as well. (Learned this one the hard way.)
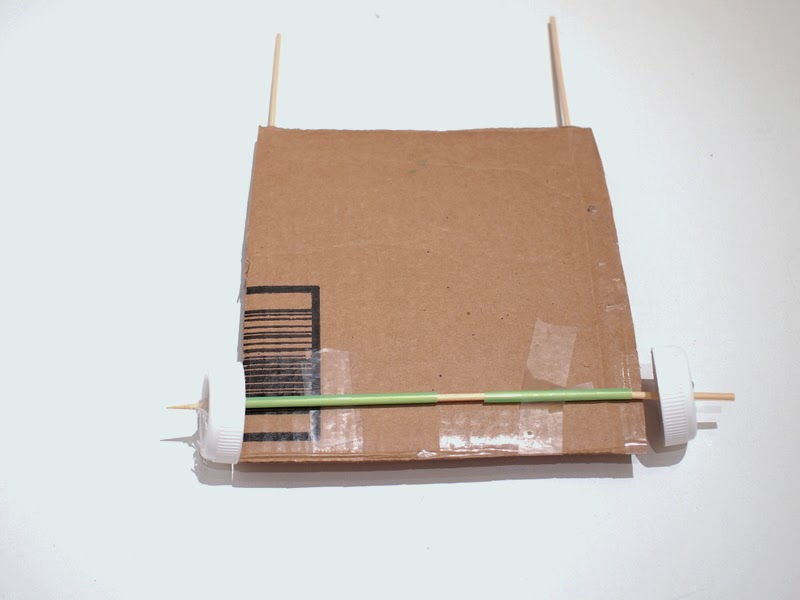
4. Tape this skewer with the wheels onto the bottom your cardboard. (Note: Make sure that your wheels spin freely when taped to the car. Depending on the size of your skewer, you may need to trim your cardboard a bit to give the wheels more space to spin.)
Here's a close up of what our wheels looked like:
Now let's attach our soda can! (The soda can and rubber bands are what will actually move our car.)

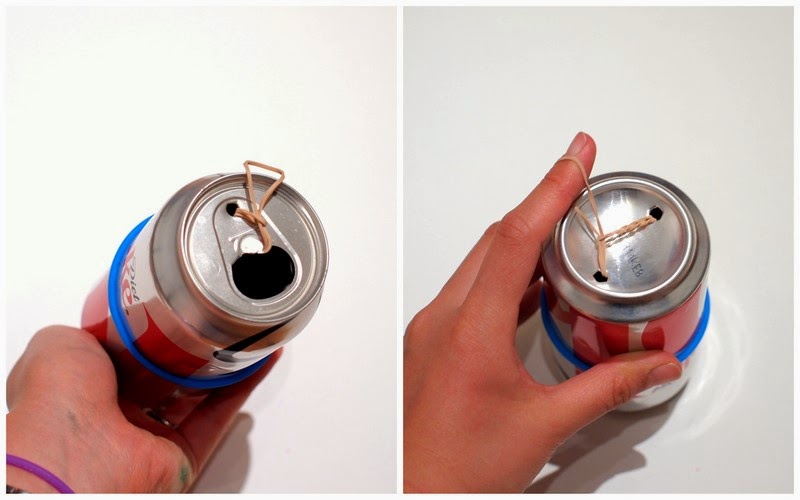
7. Twist each rubber band onto a skewer. And then you're done!
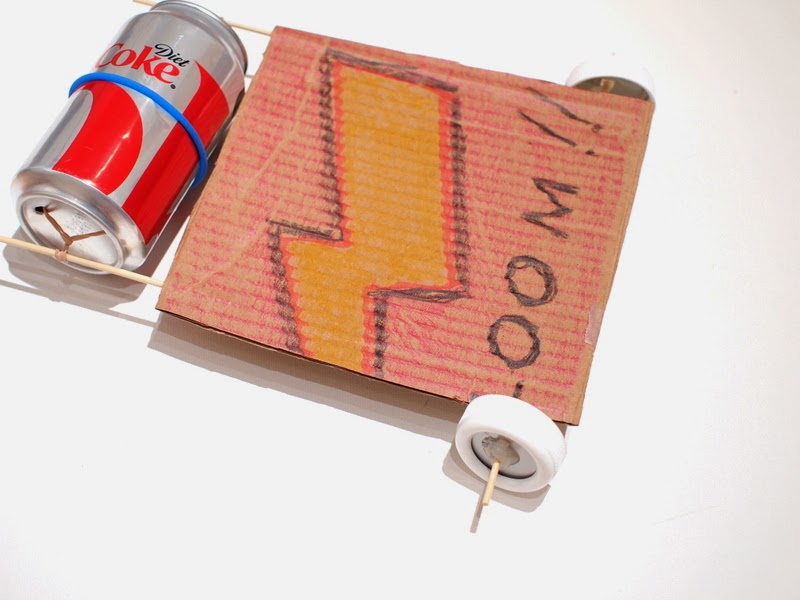
Here's what our DIY cardboard toy car looked like from the top:
Here's what our kid-made cardboard toy car looked like from the bottom:

How to make your cardboard car move:
Simply turn your soda can around and around in one direction so that the rubber bands store up some potential energy. Then, place your car on the ground and let the can go. The soda can should spin, releasing all the stored energy and moving your cardboard car!


Super cool, right? Happy building, friends!
Pssst- Wanna make other cool things that move with your kids?
Try making these!
- Simple Paper Kite
- Whirly copter toy
- Toilet paper Roll Space Shuttle
- Spaceship Climbing Toy
- Shampoo Sailboat Bottle