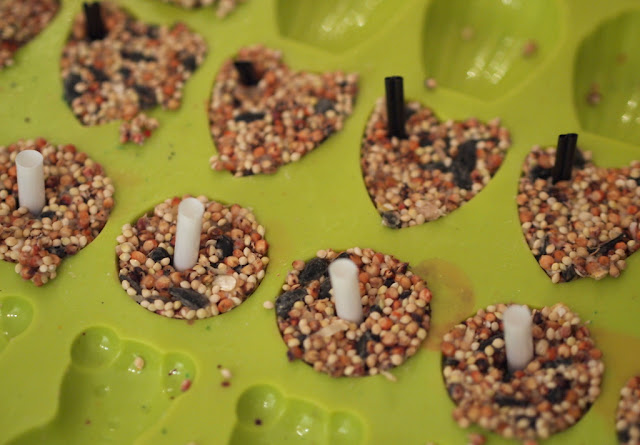
Today I'll be sharing how we created these lovely DIY Birdseed ornaments.
Back in Michigan, hubby and I put up a small bird feeder to feed the birds during the winter. Now that we live in the city, we don't have space to put a bird feeder up. (Plus, even if we did figure out a way to do it we'd probably just attract pigeons or rats. Ew and double ew.)
So, you might say that I was feeling a bit nostalgic after seeing this lovely tutorial from Saltwater Kids showing how to make birdseed ornaments. Luckily we have several family members that live in nearby tree-filled suburbs, so I made a bunch of these as small Christmas gifts. I don't know about you, but I could really just spend hours watching birds hopping or flying around. Hopefully this gift will keep the kids (and adults) entertained as they enjoy nature.
If you'd like to make them yourself, let me just first make two notes:
(1) The Saltwater Kids tutorial contains really lovely photos and clear directions. I totally copied their recipe. I'm a copycat. I fully admit it.
(2) I tried to be neat, but the birdseed got everywhere. Be prepared to sweep and wipe up lots of tiny seeds and sticky birdseed mess.
Still want to make them? Ok, here's how I did it:
Materials Needed to make DIY Birdseed Ornaments:
-3/4 C flour- 1/2 C water
- 1 envelope unflavored gelatin (Knox)
- 3 T corn syrup (I used dark... but I'm not sure if that matters)
- 4 C birdseed
- muffin tins/ molds (or cookie cutters)
- nonstick cooking spray
- drinking straws/ stirrers
- wax paper
- ribbon
Directions to make DIY Birdseed Ornaments:
1. Combine flour, water, gelatin, and corn syrup in a large bowl. Stir until everything is combined and resembles sticky goo.2. Add birdseed. Stir until birdseed is covered.
3. Spray muffin tins / molds with cooking spray.
4. Pack birdseed mixture into the molds. Use a measuring cup to pack and smooth everything down. (I had a bit of trouble with this, which resulted in rough edges.)
5. Push straws or stirrers through the birdseed. (Make sure to push them all the way through so that you have a hole to string the ribbon through.)
6. Let your birdseed mixture sit there for three hours. Then, take out your straws and slide/pop out the hardened ornaments out onto wax paper. (They easily popped out of the silicone molds, but I had to use a fork to pop them out of the muffin tins.) Flip the ornament upside down so the bottom gets a chance to harden as well. Let them sit out overnight.
7. Put ribbon or string through the holes and enjoy!
Merry Christmas feathered friends!
Update- I wanted to hang up ornaments with Baby Chuck around town, so I stored some in our apartment for about a week. Bad idea. When I finally remembered them, I saw that they had grown fuzzy with mold. So, make sure you use them as soon as you make them! Otherwise you'll end up with fuzzy black ornaments. Ick.
Interested in other ways to create birdseed feeders?
Create your own toilet paper roll bird feeders and ice bird feeders.


