
Origami Pumpkin

This post contains affiliate links. Thank you for your support!
I'm still an origami novice and I found these pumpkins to be much easier to fold than the black cat. I just followed the original tutorial here. It was shown with very few words and lots of arrows. So I took photos of my process in hopes that these photos and descriptions will make things clearer. (Although if you run into trouble, definitely check the original source!)
Let's get folding!
Materials Needed
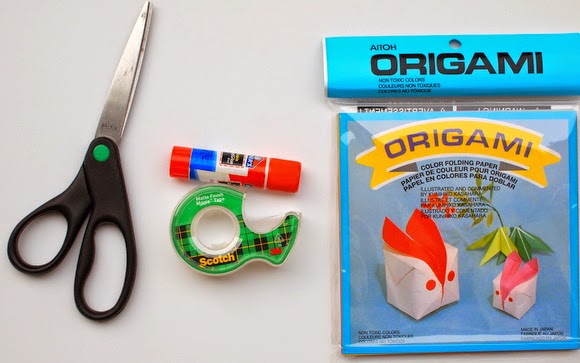
- Origami Paper
- Scissors
- Glue Stick
- Clear Tape
Let's Fold an Origami Jack-O-Lantern!
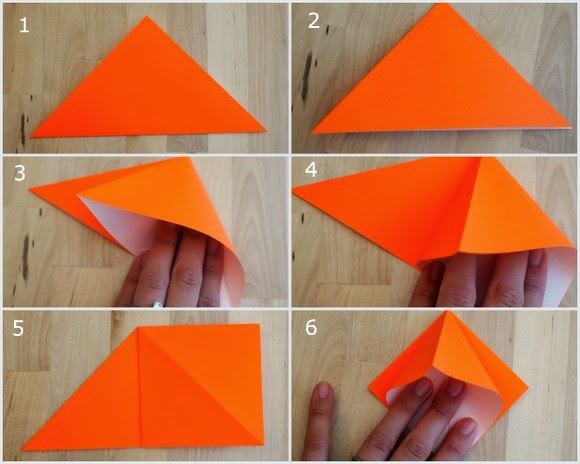
1. Fold your origami paper in half diagonally.
2. Fold your paper in half again.
3. Lift up the top triangle and place your fingers in the pocket.
4. Push the pocket over to the side.
5. Press down on it, creating a square.
6. Turn your paper over. Repeat steps 3-5 on the other side.
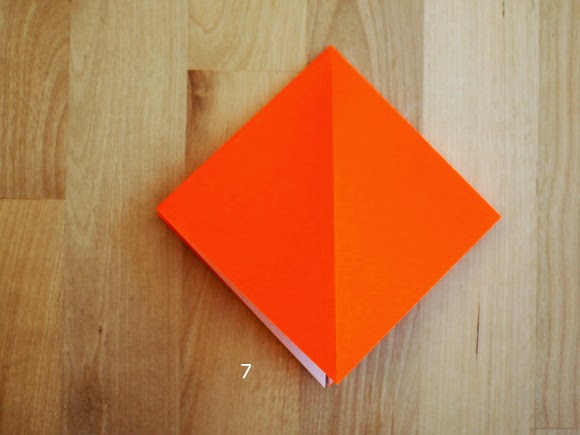
7. Now you should have two squares on top of each other. Make sure the paper opens on the bottom (point closest to you.)

8. Lift up the top left flap (left side of top square) and fold it over to the right side. Then, fold the flap so that the side corner meets the middle fold.
9. Flip your left flap back over again to its original place and you should see this.

10. Do the same thing with the top right flap (right side of top square.) Now you should see see this. (You're basically folding both sides of the top square behind themselves.)
To make it look even more pumpkin-like, we're going to adjust the way these folds look.

11. Flip over your left flap again. Then, make a fold as pictured in 11.
12. Flip that left flap back to its original place and you should see this.

13. Repeat steps 11 and 12 with the right side. (See how we've just changed the shape of the two flaps?)
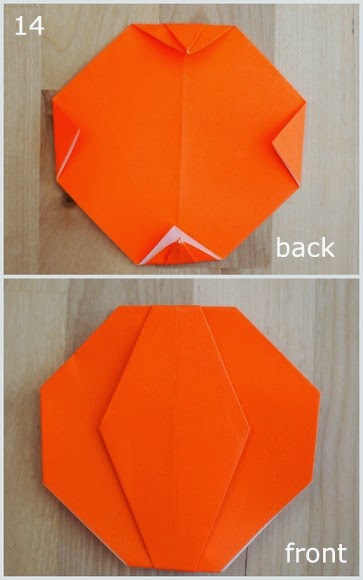
14. Flip your pumpkin over. Fold down all four corners. Then, flip your pumpkin back to its front. You should see something that resembles a pumpkin. (I thought it looked a bit strange on top, so I fixed my top fold.)

15. Tape a stem onto the back and glue on facial features to the front of your pumpkin. (I cut everything out from origami paper. Ok, ok. I know that's probably not kosher in the strictest origami sense, but it certainly made my pumpkin cuter.)
And that's it! Enjoy your cute patch of origami pumpkins!

Hopefully these directions were clear enough for you to make your own pumpkins too! I really enjoyed making these little guys. Their faces give them such different personalities, don't you think?
Let's Keep in Contact!
Like this idea? You can always find other fun ideas on my Pinterest, Facebook, Instagram, or Twitter accounts!Happy folding!