Showing posts with label Halloween. Show all posts

Tuesday, October 8, 2013

DIY Monster Mash-up Rubbing plates

Looking for a neat Halloween activity for your older kids to do? 

Well, why not try making some monster rubbing plates?  Call forth your inner Frankenstein and create a bunch of monster rubbing plates out of cereal boxes and fabric paint. Then, cut your monsters up and mix and match different heads and bodies to create even more wacky creatures. 

DIY Monster Mash-Up Rubbing Plates

Pretty silly, right?  Head on over to Handmade Charlotte to get started on this spooktacular craft.

Saturday, October 5, 2013

Make your own glow in the dark chalk

A couple of weeks ago Chuck and I were perusing the Halloween aisles at Target (for the bajillionth time... what can I say?  It's my favorite holiday!) and I spotted a pack of glow in the dark chalk.

Then a light bulb went off in my head.  I could buy the chalk... but it'd be more fun to try making my own.  So after tinkering around for a bit.... I came up with this result. 

Ooh!  It glows!


What what?  Yup.  They glow after you "charge" them with light.  Just doodle a design at night, shine a light on them to "charge" them, and then turn off your light.  Your doodles should glow for a bit and then you'll need to charge them again.  

To make this novelty chalk, I simply modified this homemade chalk recipe.  Instead of tempera paint, I added 3 T of glow in the dark paint to the mixture.  Here's what my chalk looked like setting up:


Have a great weekend!

Tuesday, October 1, 2013

DIY Fake Sleeve Tattoo

So... what are your thoughts on tattoos?

I don't have any, but I really love them.  They're beautiful to look at and often times come with a touching or inspiring story.  Every year or so, I toy around with the idea of getting one.  But I never do because they're so permanent.  Even though I love the ways hearts and sparrow tattoos look today.... I'm not sure how I'll feel 10, 20, or 30 years from now.  (Although... sometimes I like to imagine myself as a crazy old grandma, rocking some really gnarly skull tattoos.)

With Halloween just around the corner, I lived out my tattoo fantasies with this DIY sleeve tattoo.

Interested in seeing how I made one?  Well, in the interest of full disclosure:
  • This craft took much longer to complete than I initially thought.  It was really, really tough to color on hosiery.  So, if you aren't digging that... you can just buy yourself a sleeve from the store.  Or, you could just draw and color in one tattoo.  I love the way sleeve tattoos look, so I went in whole hog. 
  • I found this sleeve tattoo tutorial from Urban Threads to be really helpful.
 
Materials:
  • Cereal box
  • Tattoos doodled with Sharpie on paper 
  • Tape (Normal kind and packing tape)
  • Scissors
  • Old nude hosiery
  • Fabric markers

Directions:

1.  Take a cereal box and roll it into a cylinder that's approximately the same size as your arm.  Tape the cylinder closed.

2.  Cut out your various doodled tattoos.  Tape them down onto your cardboard cylinder.

3.  Cut off one of the legs from your hosiery.  Cut off the toe portion.  Roll it over your cylinder.  (If you find that it's getting cut on some of your sharp cardboard edges, round them off so the hosiery slides on easily.)

4.  Color and outline your tattoos.
Notes:
  • This was pretty tough to do.  If you color normally, your marker tip drags along the surface.  I found that dabbing worked best. 
  • I first used lighter colors and then moved to darker ones (to prevent blurring and smearing). 
  • I also looked at tattoos online for color inspiration. 

5.  Let your images dry according to directions.  (I waited overnight.)

Once your fabric paint dried, roll your sleeve right off.   Tada!

And that's it!  Slide the sleeve over your arm and you've got your very own DIY fake sleeve tattoo. 

Here's what a "tattoo" looks like up close:
Happy "tattooing!"  

Tuesday, September 24, 2013

DIY Candy Corn Perler Bead Bracelet 1

Are y'all going Halloween crazy yet?  (Or is it just me?)

Last weekend I took Chuck to Target and we had a blast seeing all the costumes and decorations.   Doesn't matter how many times I've seen a dancing skeleton or singing skull, this stuff never gets old.  I guess I'm a kid at heart because Halloween is my very favorite holiday.

So that's why I'm super excited to share this craft with you.  I went a bit crazy with my perler beads and designed two candy corn inspired bracelets.  Today I'm sharing the simpler design with you.  If you like this one, head on back tomorrow to see how I made the more complicated one.  

Here's a photo of my candy corn inspired bracelet: 


Materials:
  • Perler beads
  • Scissors
  • Elastic Cord (I used a thin 0.5 mm elastic cord for these bracelets, but honestly a thicker cord is better to use because it's easier to string the beads with and the finished bracelet feels sturdier.)

Directions:
1.  Cut out about 40 inches of cord.  (Honestly, it doesn't matter what length you initially use.  You'll just end up tying on more cording later.)  Tie on a bead to act as a stopper.  (I used a black bead.  It doesn't matter what color you choose because you'll end up removing this bead at the end.) 

2.  String on 
  • white bead (#1 bead) 
  • white bead (#2 bead)
  • orange bead (#3 bead)
  • orange bead (#4 bead)
  • yellow bead (#5 bead)
  • yellow bead (#6 bead)
(I labeled the beads with numbers to help out with step 3.) These six will be your first column of beads.


3.  Now you're going to add your second column of beads.  Add on a yellow bead (#7).  Then,slip your string through your #5 yellow bead.  Add an orange bead (#8).  Then, slip your string through your #3 orange bead .  Then, add a white bead (#9).  Then, slip your string through your #1 white bead.   Then, pull tight.


 Now you've got the basis for the rest of your bracelet.  See how some portions of the bracelet jut out and some portions of the bracelet don't?  As you continue to build your bracelet, you'll alternate between adding a bead to fill in the gaps, and stringing your cord through the beads that jut out.

4.  Let's add the fourth and fifth columns. 
  • Column 4:  Add a white bead.  Slip your string through the jutting out white bead.  Add an orange bead.  Slip your string through the jutting out orange bead.  Add a yellow bead. Slip your cord through the jutting out yellow bead.  Pull tight.
  • Column 5:  Add a yellow bead.  Slip your string through the jutting out yellow bead.  Add an orange bead. Slip your string through the jutting out orange bead.  Add a white bead. Slip your string through the jutting out white bead.  Pull tight.

Keep going and continue to follow the pattern.  Add a bead and then slip your string through a bead that's jutting out.  Keep pulling your string tight after adding each column of beads.  If you run out of cord, no worries!  Just tie on another strand.

Soon you'll get a long bracelet like this:
Now make sure that (1) it fits your wrist and (2) both ends fit together like zipper teeth.  Then, string your cord through both sides of the bracelet and pull tight.  Remove the stopper bead and tie your beginning and ending cords together.


Tada!  Done. And that's how you make a simple candy corn inspired perler bead bracelet.  Like it?  If so, come back tomorrow to see how I made a slightly more complicated candy corn bracelet.

Happy beading! 


Tuesday, September 17, 2013

Make your own window clings

Currently Chuck's windows are covered in homemade window clings.


They were super easy to make.  All you need are:
  • Clear contact paper
  • Paint pens (or Sharpies-- although the colors aren't as vibrant)
  • Scissors.  

Just doodle on the contact paper, cut out your doodles, and you're done.  Easie peasie.  Instant personalized decorations for your windows.

Happy Tuesday!

Monday, January 21, 2013

Cowboy gear part 2: Cardboard tissue box cowboy hat

 Cardboard Tissue Box Cowboy Hat

And here's how you crapt a cowboy hat from cardboard...
(Directions modified from a video that I viewed here)

tissue box and cereal box cardboard cowboy hat

Cowboy gear part 1: Make your own sheriff star

Hi everyone!
Here's how I crapted Baby Chuck's Sheriff star:

Materials:
- cake tin <-- crap!
- cereal box <--- crap!
- scissors
- strong glue (I used Aleene's)
- thin permanent marker
- packing tape
- pen
- safety pin
- felt (optional)
- printout of a sheriff star


 Directions:
1.  Glue your cake tin to your cereal box.
2.  Print out an image of a sheriff star that you like.  Cut that star out.
3.  Trace the star onto the cake tin.  Trace and color over the "sheriff" lettering too.  Lift up your paper star and reveal your "sheriff" imprint.
 4.  Cut out the star from the cake tin.  Use your permanent marker and trace over your lettering and any decorative designs that you want to stand out.

5.  Use your packing tape to "laminate" your star.

 6.  Cut out a piece of felt (or cardboard), and tape it to the back of your sheriff star to secure a safety pin to your star.  (Make sure to orient your safety pin so that the star sits the right way when pinned.)

Enjoy!  Yee-haw!

Wednesday, October 31, 2012

Happy Halloween!

We just got power back.  Yay!   It feels so good having hot water, a working fridge, lights, and the internet again.  Sadly, some of our family is still left without power.  We're hoping that everything gets fixed soon.  

Even though it doesn't really feel like Halloween, I still wanted to wish you a Happy Halloween! Here's a photo of Baby Chuck in his Mr. Potato head costume.

DIY Mr. Potato Head Baby Halloween Costume


We're just going to have a low-key day today.  With the terrible weather conditions, I'm so thankful that we were able to celebrate Halloween last Friday at our nearby library.  They did such a nice job bringing the Halloween spirit to the kids.


Tuesday, October 30, 2012

Queens County Farm Museum


Dear Sandy,

You're not playing nicely with others.  I'm sorry, but I'll have to ask you to leave.  No treats for you.  Please go away!

Leslie


As I'm writing this post, Sandy is outside loudly howling and rattling our windows.  We've briefly lost power a couple of times, but I think we should be ok.  *Crosses fingers*

Hubby and I have been watching the news and it's horrible seeing all the flooding and damage.  We hope everyone is able to stay safe. 


To mentally escape from the craziness outside, I'm posting several photos from last weekend's pumpkin picking adventure.  (Looking at colorful photos makes me happy.)  It was our first time visiting the Queens County Farm Museum.  Just an hour away, we felt like we left our urban environment behind. 

Who knew that such a beautiful place existed in New York City?


  These pictures are such a far cry  from what's going on outside.  Eek.  Please stay safe! 

Monday, October 29, 2012

Hurricane and pumpkin carving

As we waited for Sandy's arrival, I spent the night carving a pumpkin and eating ice-cream.  


Here's hoping that Sandy quickly comes and goes.  Stay safe!  Hubby, Baby Chuck, and I are hunkering down in the apartment until the storm passes through.

Thursday, October 25, 2012

DIY Halloween window clings

I made these window clings on a whim because I still had left over black glue from my  DIY faux stained glass project

I doodled Halloween images onto a piece of paper.  Then, I traced the images in glue on a  piece of wax paper. Afterwards, I let them dry about 24 hours. (Yah, I was surprised it took that long for the glue to dry too!)

Just realized now that my bat looks like a black golden snitch with eyes


Tada!  Spooky!

As you can see, these clings aren't quite as nice as the ones from the store.  They are kind of bumpy and don't completely stick to the window.  But, they're one of a kind and fun to make.

Because I lay down the black and white glue at the same time, they mixed together as they dried.  (Now my ghosts a bit spookier than I intended.  Eek!)  When I make window clings again, I'm going to outline my images in black (or whatever color) first. Once that dries, I'll fill the images in with my other glue. 

Also, the clings didn't initially stick to the windows.  I had to wet the back of the cling with a bit of water and then stick it to the window.  (Tip learned here.) Somehow the water helps the clings to stick.  Water also dripped down the window as I stuck them up.  But not to worry! Once they were sufficiently stuck, I just wiped the smudges and dribbles up.

I think the Halloween decorations are helping Baby Chuck to get into the Halloween spirit.  He's so cute.  He keeps pointing to the clings and and pumpkin garland and growling. 

Friday, October 19, 2012

Crapty Fridays- Make a Halloween garland out of an egg carton

Before we talk about today's crapt, let me just begin with this short poem about crapting: 

Crap is destined for the garbage
and therefore it is free.
When I use crap to make my crafts,
a-crapting I will be.

Today's crapting project is a Halloween inspired one.  Our apartment desperately needs Halloween-y decorations.  (We currently only have a pair of Day of the Dead candle holders)  So, I whipped up a super easy Halloween garland out of an egg carton and string.      

Materials:
- egg carton
- string
- craft paint
- paint brushes
- craft knife
- scissors
- newspaper/scrap paper/paper bag
- Sharpie marker


Directions:
1. I cut out all the little egg holders in my egg carton.  (Is there a name for those things?)


2. I painted the little egg holders orange and green.  
This is probably as close as I'll ever get to growing pumpkins


3.   Once my paint dried, I drew faces on my tiny pumpkins.
Doesn't this look like a school photo?  Can you spot the naughty pumpkins in the back row?


4.  I cut two slits on the top of my pumpkins.  Then I strung my pumpkins together.


Right now they're just smiling and dangling away above our table. Seeing their cute faces when I eat cereal in the morning makes me happy.

Happy crapting!

Sunday, October 14, 2012

Bunny Halloween Coloring page 2

So my poor bunny still doesn't know what to wear for Halloween.  Perhaps he should wear one of these costumes?

(To see the previous coloring page, click here)
Halloween bunny coloring page 2


Friday, October 12, 2012

Crapty Fridays- Day of the Dead candle holders out of baby food jars

Last year hubby, Baby Chuck, and I went to our first Day of the Dead Celebration (click here to see photos).  Feeling inspired by the colors and festive atmosphere of the holiday, I made two skull candle holders out of saved baby food jars.


Wednesday, October 10, 2012

Bunny Halloween coloring page

A couple of nights ago a bunny appeared magically on my piece of paper. 
He had a question and asked if I could help.


He certainly asked the right person.  I love Halloween!  So we spent the next hour doodling away....
Coloring page- Halloween bunny costumes 

Tuesday, November 8, 2011

Kitty Litter cake


You can eat this box of dirty kitty litter.  

No, I'm not kidding.  This isn't a real box of kitty waste; it's a cake.   This edible look-a-like is made from cake mix, instant pudding, cookies, and Tootsie rolls.  Whether you find this creation extremely creative, terribly gross, or both, it's sure to be a conversation starter at your next party.


Cake first spotted on the Edible Crafts blog and recipe originates from Amanda's cookin' blog

Tuesday, November 1, 2011

Day of the dead

This weekend our town held a Dia de los Muertos celebration as a way to remember deceased friends and family.  With the brightly colored paper decorations, twinkling lights, and dozens of costumed attendees (many with faces painted like skulls), the entire experience felt quite otherworldly.

It was a deliciously creepy and beautiful way to celebrate Halloween weekend.  

It doesn't feel like we're in Holland anymore!

Aren't these Fridas beautiful?

Monday, October 31, 2011

Spooky celebrations

Today we're celebrating two events:
(1)  It's finally Halloween, my favorite holiday of the year. 
(2)  It's the one year anniversary of my blog.  *Throws imaginary confetti in the air and blows noisemaker*

As we all know, Charlie just loves wearing costumes.  (As seen here and here.)  With the new addition to our family, Charlie was gracious enough to whip up two matching costumes, inspired by Dr. Seuss characters.   Although Baby Norris is still too young to fully appreciate this holiday, I do think he enjoyed dressing up. 

DIY baby thing 1 Halloween costume
Baby Norris- "So this is what it feels like to have hair.  I kind of like it."

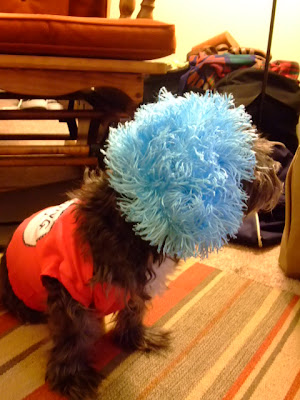
DIY dog Halloween Costume Thing 1
Charlie- "Aw mom, I'm having a bad hair day."

Happy Halloween!

Thursday, October 27, 2011

Pumpkin play (Part 2)

Not only did we carve this round orange vegetable, we gobbled it up too! 

(Left) Roasted pumpkin seeds       (Right) Pumpkin pie brownie

Tuesday, October 25, 2011

Pumpkin play (Part 1)

This past weekend hubby, Baby Chuck, and I were invited to a pumpkin carving party.  We had a lot of fun and I learned a few new carving tips and tricks. 

Here's my finished pumpkin:
My homage to pumpkin pi.  (Get it?  Get it?  Oy vey, I'm too corny. )

Five finished pumpkins sitting in a row.

Let the countdown to Halloween begin!