Showing posts with label Food. Show all posts

Thursday, May 30, 2013

Domino's gluten free pizza


One of the toughest things about having a child who's allergic to wheat (among other things), is that hubby and I very rarely eat wheat too.  Sure, we sneak in the random cookies or pasta when we're out on date nights or late at night when Chuck's asleep (oh boy, do I feel naughty then).  I usually don't mind the sacrifice, but there is one wheat-filled goodie that I sorely miss:  pizza.  It's one of my favorite foods.  And as a longtime lover of that holy trinity of cheese, tomato sauce, and crust, it's been really really tough not eating  pizza and not passing on my love to my son.

By now you're probably thinking, "Boo hoo.  Cry me a wheat-filled river.  Leslie, haven't you heard of gluten-free pizzas?"  Well, sure, there are gluten-free options out there... and trust me... we've tried a whole bunch.  But the resulting pie is always the same.  The pizza looks like a re-heated frozen disk and the crust tastes like dirty cardboard.  Sacrilege!  Poor Chuck usually just pulls off the cheese and eats that.

So when we found out that Domino's made a gluten free pizza crust, hubby and I were.... well... skeptical.  

But, we really didn't need to be.  Chuck loved it.  He ate two whole slices- crust, cheese, sauce, mushrooms and all.  Hubby and I even snuck in a couple of bites (while Chuck wasn't looking) and we were quite surprised by how good it was.

Now, Domino's does note that the pizza shouldn't be eaten by people with Celiac's disease.  Although the crust is certified to be gluten free, they just can't guarantee that any cross-contamination didn't occur at the restaurant.  So maybe this wouldn't be a solution for everyone.  But, since Chuck didn't break out in any hives or develop a rash after eating the pizza, hubby and I are deeming it a win..


In case you're curious, here's what the gluten free pizza looked like in the box:  (minus the 2 slices that Chuck devoured)
 And here's what the pizza looked like up-close:
Oh yeah, and here's Chuck.  Now he's a bona fide pizza lover too, just like his mama.

Have a great weekend!  See you next week!

Thursday, May 9, 2013

Two days in New York

This past week I got a chance to tour Manhattan for two whole days.  (!!!!)  Hubby took me around town to celebrate my birthday (yay!) and then I showed our aunt around town another day.  It was such a nice treat to wear my "nice" clothes (aka non-mommy-stained-t-shirts) and see the city I love.

Here are some photos from my New York adventures:
Delicious breakfast at Cafe Lalo (famous from the movie "You've got mail.")

Sneakily taking a photo during a wedding photo shoot at Central Park's Bethesda Terrace

One of my travel companions


Fresh flowers at Union Square Farmers Market
Ethiopian food served at Massawa Ethiopian Restaurant

No idea where I shot these flowers, but I love them because they remind me of an old painting
Best. Popsicle. Ever.  (People's Pops on the High Line)  I left feeling inspired to re-try popsicle-making this summer
Beautiful mural seen on the High Line

Three Pie Face meat pies. Yurrrmmy.


Tiny New York City from Pink Stripey Socks on Vimeo.

Wednesday, May 8, 2013

Homemade watercolor paints

Yesterday it rained a whooole lot.

Luckily, my homemade watercolor paints finally set (after two days of waiting), so Chuck and I spent the morning painting.

Overall, the directions I used were pretty good, but I made two changes:
1.  I only used half of the materials recommended... and I still had plenty of water color paints.
2.  I added drops of food coloring to each of the ice cube trays.  (Looking back, maybe I should have compensated for the extra liquid by adding a bit more cornstarch to shorten my drying time.)


As you can see, Chuck enjoyed painting.  He also enjoyed repeatedly dipping the Q-tips into the water... and sneakily trying to drink the dirty water.  (Ick.)  I probably had more fun painting than he did because I was so delighted that the paints actually worked.

Here are our two joint paintings:

The paints weren't chalky when they dried.  We'll probably cut up the cards to make a birthday card for a niece.  Right now the leftover paints are sitting in the fridge.  We'll keep using them throughout the week because I'm curious how long they'll last.    

UPDATE:  5/24- I pulled the paints out of the fridge yesterday and they were rock hard.  I was worried, but after I didn't need to be.  After adding a couple drops of water into each well, they became paints again.  The colors didn't seem as vibrant as before, so Chuck and I ditched the q-tips and just used our fingers to paint. We got some lovely results.  Now they're back in the fridge again, and I'll pull them out in another couple of weeks to see if they last.

Have you ever tried to make homemade watercolors before?

Wednesday, April 3, 2013

Tattoo a banana

Got a banana?  Got a safety pin?  Great.  
Now you can tattoo a banana.

 Materials:
- banana
- safety pin
- pencil
- refrigerator

Directions: 
1.  Use a pencil to sketch a design on a banana.  (If you don't feel comfortable sketching straight on the banana, you can sketch your design on a piece of paper first.  Then, tape your design to the banana to guide your poking.)

2.  Use your safety pin to poke holes in the banana.  Watch your tiny dots turn black.

3.  Place the banana in the fridge for a couple of hours.  Pull it out to reveal a new tattooed banana.

4.  Place the banana in your kid's lunch box.... or sneak it back into the pile of bananas at the grocery store to surprise shoppers.

Happy tattooing!

(I first spotted this idea on the excellent How About Orange blog.)

Thursday, March 14, 2013

Make an eggshell mosaic pendant

Don't toss out your eggshells!  Today's craft shows a really unique way to turn them into beautiful pieces of art!

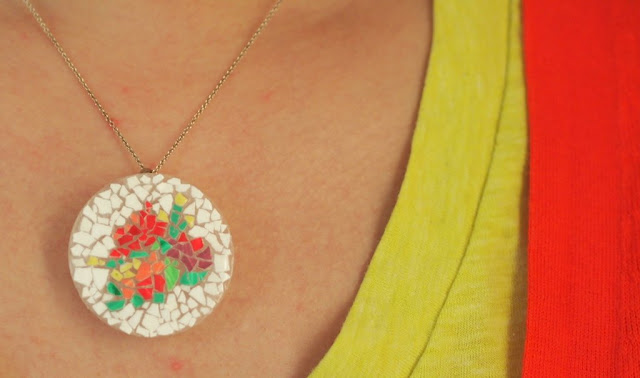
I love vintage micro mosaic jewelry, but being a huge cheap-o, I never allow myself to buy it.  So, yesterday, armed with a bunch of eggshells and milk jug caps (thanks Tita Tina for the stash!), I made my own version of micro mosaic jewelry.  Here are my two finished pendants:

Eggshell Mosaic Pendants


make yourself an eggshell mosaic pendant- great kids craft!
What a lovely piece of crapt


This post contains affiliate links. Thank you for your support! 

Thursday, February 28, 2013

Bridal Shower

I can't believe I've known these girls since college
.
Life is certainly one crazy, wonderful, beautiful, and scary adventure.  
Thank goodness we're not making the journey alone.


Monday, February 25, 2013

Make a Mosaic Bean Pendant

Hi everyone!

How was your weekend?   We had a pretty quiet Sunday, but our Saturday was full of fun activity.  I attended a bridal shower while hubby and Toddler Chuck visited family.  (I'll post up photos from the bridal shower later on this week.) I thought I'd start off the week with this crapty (and slightly crappy?) pendant that I made.

I think mosaics are lovely.  There's something quite special (and dare I say, possibly mathematical?) about laying pieces of varying shapes and/or colors together so that they fit a space and create a desired image or pattern.

Wanting to make a wearable mosaic of my own, I used some household materials to create this mosaic bean pendant:


Yeah.  I know what you're thinking.  Girl, that's a lot of look.  And my reply? Girl, I know.  But really, what does one wear with beans anyway?

Erm.... I'm not sure if I like the result, but I did have fun making it.  And who knows?  If you ever find yourself trapped at home with a couple of bored children, then perhaps you could whip these up for fun.

Materials:
- dried beans
- cereal box cardboard <--crap!
- craft paint
- paint brushes
- Tacky glue (I used Aleene's)
- String
- Felt
- Scissors


Tuesday, February 19, 2013

Make you own toast stampers (Three ways to write on toast)

One of my favorite things to eat is toast.  I love feeling its rough texture on the roof of my mouth.   I love the satisfying crunch that comes with each bite.  And I love pairing it with sweet jam and melted butter.

Yum. Yum. Yum.

I'd eat toast every day if I could, but since Baby Chuck is allergic to wheat, I haven't eaten real bread in a long time.  Last weekend I had a strong hankering for toast, so while Baby Chuck slept I sneakily made some for myself and hubby.

It was delicious!

But of course, I couldn't just leave it at that.  I had another "I wonder if... " moment.  This time I wondered if I could write messages or draw images on my toast.  Here are three methods that I came up with:

(Note:  I realize that cookie cutters would have worked too.... but I don't own any.... so necessity bred invention)

Method 1:  Use a chopstick


I simply took a chopstick and drew on my toast.  I made sure to press down hard enough to get a clear indentation in the bread, without ripping through it. Then, I placed the bread under the broiler. (We don't own a toaster... but I think using a toaster should work too).  Once my bread browned enough, I quickly pulled the toast out.  Voila!  Most of the bread turned darker brown while my indented image remained white.  Easie-peasie.


Method 2:  Make an aluminum foil shape


I rolled a piece of aluminum foil into a snake-like shape.  Then, I bent the foil into my desired shape (heart).  I pressed my heart down into the bread.  This time, instead of removing the heart shape and broiling the bread, I left the foil on the bread as I placed it under the broiler.  Once my bread toasted, I pulled it out of the oven and removed my foil shape.  Voila!  A much cleaner heart image emerged. The aluminum foil protected that portion of the bread from getting toasted.  (Note:  I don't recommend leaving the aluminum foil shape on your bread if you use a toaster.)

Method 3:  Crapt a cardboard toast stamper


Step 1:  Trace the shape of your bread and your desired stamp shape onto a piece of cardboard. (If the thought of your bread touching recycled cardboard grosses you out, you could always trace your bread onto a piece of paper towel first, cut that bread shape out, and then tracing that shape onto a piece of cardboard.)

Step 2:  Trace and cut out three more cardboard copies of your desired shape.  (So all in all I cut out 4 identical hearts out of cardboard.  My bread was pretty thick, so I needed my stamp to be pretty thick too.)

Step 3:  Cover one side of your bread shape with aluminum foil.   Tape together your four identical shapes and then cover them with aluminum foil too.  (If you don't mind having cardboard touch your food, you could always skip this step.)


Step 4:  Tape your stamp shape onto your bread shape.  Give yourself a pat on the back because you made a toast stamper.

To use the  stamper, match it up to your slice of bread and push down.  Make sure your shape is deeply imprinted on the bread.  Place your bread under the broiler (or in toaster) and toast away!


Let me know if you try making these toast stampers.  I'd love to see what your toast looks like.

Wednesday, February 13, 2013

Make Eggshell dolls

During a recent trip to our library, I found a couple of old craft books showing how to create dolls from eggshells.  I'd never seen this type of craft before, so I was super excited to try it out.

If you're like me, you have a thing for Matryoshka dolls... and fairy tales.  (Random tangent time:  As a kid I used to read tons and tons of fairy tales.  Magical powers? Fairies?  Elves? Yup. Yup. Yup.  I loved it all.  This love for fairy tales ended up morphing into a love of science fiction and fantasy novels later on... but I digress.)

 Here are my results:

Make Eggshell Dolls


how to make dolls using eggshells


I had fun making them... but I had way more fun decorating them.  In my opinion, painting cute things is the best part about crafting.


If you'd like to make your own eggshell dolls, read on!

Tuesday, February 5, 2013

My discarded bits

While chopping up the fruit and veg for last Sunday's salsa and guacamole, I was struck by how beautiful my discarded bits were.


Friday, January 18, 2013

Cocoa! Coffee! Face mask!

Thanks MB for suggesting this recipe!


Maybe you're wondering why I chose to put not one, but three exclamations in my title.  Have I finally jumped over the grammatical deep end and resorted to adding lots! of random!! exclamation marks to increase interest! in my posts?!?

Eep.  No.

I used a bunch of exclamation marks! to convey how tingly! and zingy! this mask felt on my face.  Once I applied the brown goop, my face felt like it was on fire.  (I guess that's the effect of the caffeine?)  But don't worry, the burning sensation lessened after the first five minutes.  By the time the mask dried I didn't feel a thing. (I also couldn't move a thing.)

The recipe claimed that the mask would "decrease puffiness in the face and the eye area, brighten skin and wake up a dull-ish complexion."   Erm.  My face looked the same post-mask as it did pre-mask... except that it was a lot redder after being scrubbed with coffee grit.

Interested in trying out a mask that smells like warm, dark, gooey chocolate cake?  If so, read on.

To make 2 masks:

Ingredients:  (I modified this mask for my oily skin.  Check the original recipe for ways to modify the recipe for dry skin.)
- 1 T ground coffee
- 1 T cocoa
- 2 T milk
- 1/2 T lemon juice

Directions:
1.  Mix together all the ingredients until you have thick goop.
2.  Smear goop onto a clean face.
3.  Wait till goop hardens.
4.  Use a warm washcloth and slowly wipe everything away.  
(Word of caution:  The dried coffee grounds will definitely scratch your skin.  Does that count as exfoliation?  No idea....)


Bottom line, I enjoyed the new experience, but I'm not sure if I'll try this mask again.

(If you want to read about my previous attempts at making other skin care products, click the links below:
jello facial pore stripschocolate face maskGreen tea matcha face mask)

Have a great weekend!

Wednesday, January 16, 2013

Fun with food coloring, soap, and milk

We've now had 2 days of cold and wet weather.  Baby Chuck and I try to go out in the mornings, but we usually stay at home in the afternoons because parking spots are so difficult to find.  (Curse you, parallel parking!)

So... what's a cooped up mama and 16 month old baby to do?

Well, yesterday we tried another food coloring activity.  This time we found Steve Spangler's amazing science page.  He had a demonstration that involved food coloring, dish detergent, and milk.   Look what we were able to do:

Ooh.  Psychedelic!


Materials:
- milk  (we used whole... but I bet you could use other types of milk... but the intensity may differ...)
- bowl / container
- food coloring
- dish soap
- cotton swab


Monday, November 26, 2012

Cakesgiving

Are you more of a sweet or savory person?

I've always been a savory type of gal.  I like eating sweets occasionally, but I always have room in my tummy for salty snacks.

(By the way, sorry hubby for devouring that bag of chips the other day.)

Anyway, back to this post.  This Thanksgiving (which shall hereafter be called "Cakesgiving"), everything changed.  Our aunt (yah, the same one that made Chuck's Hungry Caterpillar cake) fully embraced our new dietary restrictions and made a gluten-free triple layer carrot-cheesecake-carrot cake.

Oh.
My.
Goodness.

One bite and I felt myself leaving my body and floating away to sugar heaven.

Carrot cake?  Ooh yeah, it was delicious and moist.
Cheesecake center?  Um, yes please.  It's was creamy with just a bit of tang.
And that cream cheese frosting?  To.  Die.  For.

(Just thinking about that cake now makes my toes curl.)

I never got a chance to get the recipe.  Rats.  But fortunately, I did take tons of photos of her making it.  (This was me "helping" out with Thanksgiving preparations.)  So, dear reader, I present to you some delicious cake photos.

(Warning- If you're on a diet or thinking about going on a diet, please avert your eyes.  Read another post.  Take a walk.  Eat a rice cake.  Just turn away and don't look at the photos.)
  
Ooh, mix it!


Yeah, crack those eggs...

Ooh, sugar...

Softened cream cheese... yuuuuuuuum....

Take a whiff.  Can you smell it?  Yup, that's warm carrot cake fresh from the oven...

I'm totally drooling.  Oh baby, whisk that icing!

Oh. My.  Goodness.   My pulse just quickened...

Ack.  My toes are curling. 

If only they I had taste-o-vision.  Then I could reach in and take one more delicious bite. 


It was really the best cake I've ever had.
Ever.
Ever ever.


Phew.

I don't know about you, but it's time for me to cool myself off with a nice cold glass of milk.

Happy (yummy) Monday!

Wednesday, November 21, 2012

Countdown to Thanksgiving

Thanksgiving is tomorrow!  Eeek.  I know you're probably busy with plans and preparations.  But, on the off chance that you have some free moments to spare (or children to entertain), here are some last minute Thanksgiving themed crafts and recipes:

(1)  You could make a turkey paper plate hat
turkey paper plate hat kids' activity

(2)  Or, whip up a batch of cranberry mochi cakes  (I'm making some later tonight to bring to a party.)


(4)  Or, cut up an egg carton and put together this wreath to welcome guests


And, if you have even more moments to spare, would you mind voting for my reindeer head craft (number 4) in the Totally Green Crafts contest?  Their polls will be open until Sunday.

Hope your Thanksgiving Day preparations aren't too hectic!