Showing posts sorted by date for query math. Sort by relevance Show all posts

Monday, June 23, 2014

Kids' Matisse Inspired Collages

Earlier last week, fellow Rockin' Arts Mom Kristen from Art History Mom shared a really neat way to introduce young children to the artwork of Henri Matisse.  I was so intrigued by her post that I did a shortened version of her lesson with my 2 1/2 year old son.  Wow.  I was so pleasantly surprised at how Chuck responded.  He loved looking at the artwork, counting the figures, and finding different colors and shapes.  Since Matisse's collages are so colorful and graphic looking, we then tried making our own Matisse inspired artwork at home.

Kids Make Matisse Inspired Collages

Kids Make Matisse Inspired collages

(This post contains affiliate links.  Thank you for your support.)

Aren't they beautiful?  Now little did I know, Kristen (from Art History Mom) also had a similar idea in mind.  She ended up making these lovely Playdough and Construction Paper Collages with her son.  I think that using play dough to make collages is such a cool idea, so definitely check out her activity too!


Friday, June 20, 2014

#riskrejection- Confessions of a Kids' Craft Blogger

A couple of months ago, a friend shared some of my blog posts with her sister who has kids.  After seeing some of my posts, her sister said something along these lines... "Wow.  She makes me feel like a bad mom because I don't do those things with my kids."

Ouch.

Now, I think her sister was only half joking... but still, the comment dug in deep and hit me hard.  I started this blog as a way to document all of the fun and crapty ways that I keep myself (and now, my son) entertained.  And I've kept this blog going for because I want to keep creating things... and hopefully inspire other parents and kids to create things too.

In no way did I ever want to make someone feel bad about themselves...

So today's post is an honest post.  Friends, hopefully I haven't made others feel that way.  Let me share some honest, kid craft blogger confessions with you...

1.  Ever notice how Chuck is always cute and smiley in photos?
Confession- I bribe my child to smile.  *Gasp* Yurp.  It's true.  I give Chuck a gummy snack to smile and laugh for photos.  Yes.  Gummy snacks... the sugary, non-organic, artificial color-laden kind.  It works every time and he enjoys working for this "fee." 

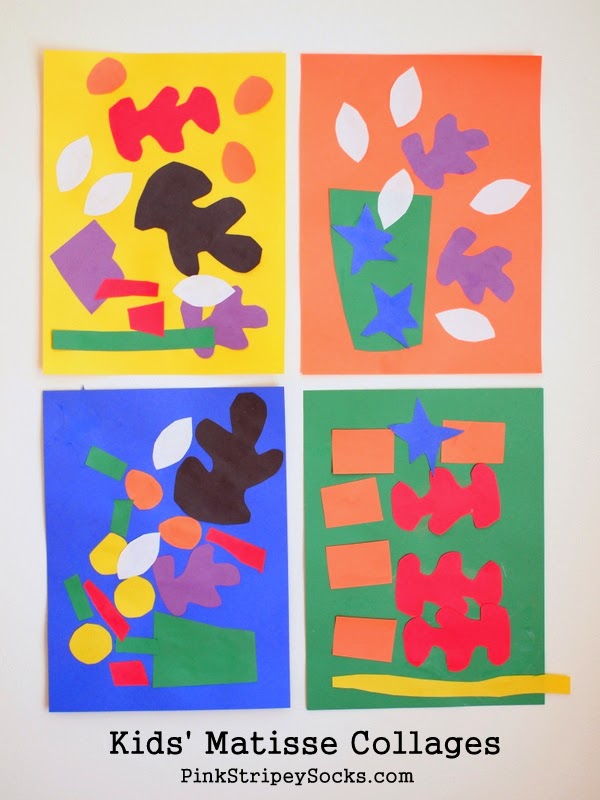
2.   Ever notice how the first photo of each post shows a lovely project laying on a clean, white background?
Confession- It's staged.  *Gasp*  It's true.  I take up "office" in Chuck's room, move around his toys, place my artwork and projects on a white board, and shoot like a million photos.... and end up using only one or two.  (Oh and btw- I also recently learned that images are considered more "pinnable" if they're vertical ones instead of horizontal ones... so I've been working on that too.) 

3.  Ever notice how my photos are nice and bright?
Confession- They are edited.  *Gasp*  Yes.  It's true.  I take photos in the morning (for the best light).  Then I edit them on free software like Picassa.  (And here's another confession- I even do this for many of my photos on my Instagram Feed too)

4.  Ever notice that I post a lot of craft posts every week?  Where do I get the time to do this stuff?
Confession- I'm a super hero and have the ability to stop time.

Just kidding!  I hate cleaning.  When Chuck is finally in bed, and I see a dirty bathroom/floor/kitchen/bedroom (take your pick) and an enticing list of craft ideas... the craft ideas win every time.  So if you ever come and visit our apartment... sorry for the dirty toilet and the giant dust bunnnies... let's make something together!

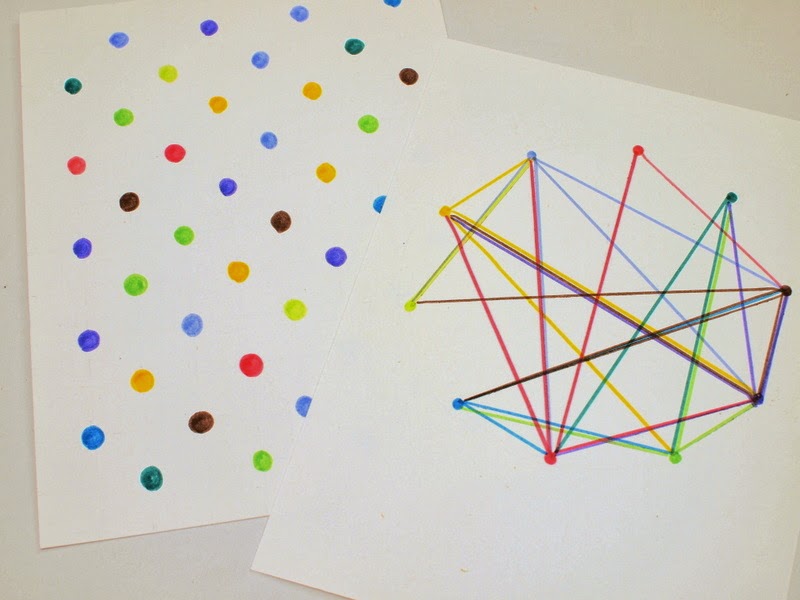
5.  Wow.  So many of my projects seem to work out so nicely and neatly....

Confessions-
  • 2/3 of my projects are "duds."  Ideas often don't work out (like my exploding dinosaur eggs) or activities just weren't very fun (like my DIY math game).   
  • I usually go through several iterations of more complicated projects to get a version that I like. 
  • Of the 1/3 "successful" projects, only about 1/2 of them ever make it to the blog.  The other ones are never posted because... (and I know this is superficial... but I'm being honest here)... the photos just aren't that great.  
 

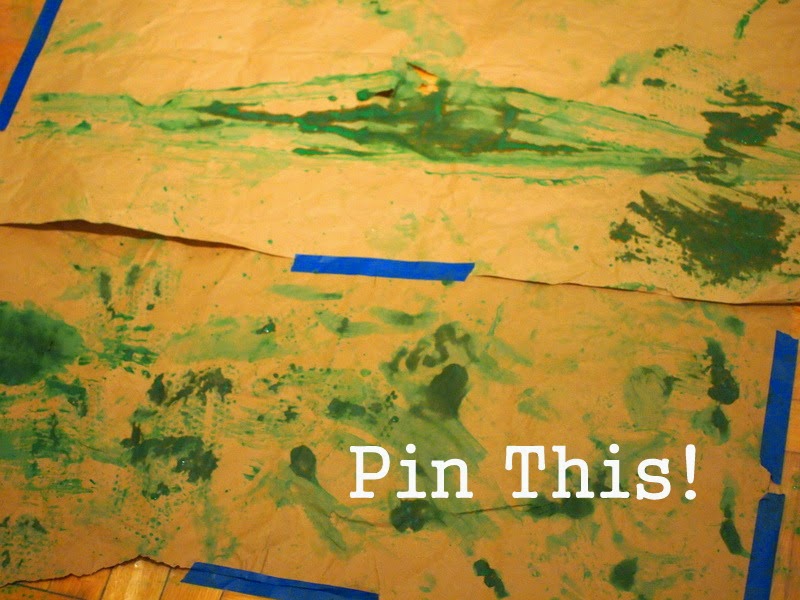
And now that I've bared my kid crafter soul, I'll end with this post with couple of photos from our latest creative endeavor.  A couple of days ago Chuck and I had a TON of fun painting in our living room.  Here's a photo of our activity:

confessions of a kids' craft blogger


Yes.  this was in our living room.  Yes. We went a bit crazy.  He ended up painting his feet, hands, bubble wrap, a random tire, and some of his clothes green.  It was a good rainy, day, stuck-inside activity.   

And here are real* (and blurry) smiles from Chuck:
*No gummy treats were offered here


And here's our final artwork (made 100% by Chuck)

super awesome bright amazing pinnable image


Heh heh.  Isn't the image gorgeous?  Isn't it super pinnable?

Friend, this is what a lot of our artwork and projects end up looking like... 


So that's the end of my confession.  I'm just a regular mom, who hates cleaning, but loves making stuff (some good, some really not so good) with my regular kid (who is sometimes happy and smiley and agreeable... and sometimes not).

Thanks for joining me on this crafty and crapty adventure.


Linking up with other ladies who are daring to be honest and risk rejection.


Friday, March 14, 2014

Pi Day Activity- Make Pi Art!

Happy Pi Day everyone!  I remember thinking this holiday was really cool when I was younger.  We let out our inner nerds, drank soda, and ate a pizza pie in class.  Earlier this week I whetted your mathy appetite when I shared how I turned Pi into wearable art.  My super easy and colorful Pi Day Bracelets were made by stringing different colored beads according to the digits in Pi.  Today I'm celebrating Pi Day with two colorful and geometric pieces of Pi Day Inspired Artwork.

 "Easy As Pi" Artwork!

Turn Pi into lovely math artwork

And if you have younger preschool aged children, check out my 5 easy ways to celebrate Pi Day with Preschoolers!


Now let's celebrate your inner nerd and create some fun artwork to brighten up your wall.  Let's get started!

Sunday, March 9, 2014

Pi Day Activity- Make Pi Day Bracelets!

This Friday (3/14) is Pi Day!  Pi is a mathematical constant referring to the ratio of a circle's circumference to its diameter.  It's an irrational number, which means that it goes on forever and never shows a repeating pattern.  Every year it's celebrated on 3/14 because the first three digits of Pi are 3,1, and 4.  Now if you're looking for an easy way to celebrate Pi day, we've got a great collection of Pi Day Inspired Activities.  Today I'm sharing these nifty Pi Day Bracelets!  What makes this a great Pi Day Activity?  Well, the beads are strung according to Pi's digits. (Cool, right?)   It's a great way to combine math, art, and crafting!

Pi Day Craft Activity Make Pi inspired bracelets
Interested in making your own set of Pi Day Inspired bracelets?  Keep reading!

Friday, December 7, 2012

Crapty DIY geometric straw ornament

To my highschool geometry teacher:
You were right.
Triangles are really cool.
This crapt is for you.

I think geometric forms are beautiful.  Using the directions I found here and here, this week I tried to diy my own geometric ornament out of straws.

Materials:
- stirrers <-- crapt!
- scissors
- ruler
- string
- Elmer's glue

Directions:
(1) Cut your stirrers into 12 two-inch segments.
(2) Cut yourself a piece of string that's two arm lengths long.
(3) String four segments onto the string.
(4) Push the segments to the end of the string. Create a square with the straws and tie a double knot to hold the straws in place.  (Note:  Don't tie the straws too tightly together, otherwise your straws will split under the pressure. I saw this happen with my first attempt.)


(5) String two straws onto your string and then tie those straws down across from your previous knot.


(6)  String two more straws and then tie them across from your previous knot.   (At this point you should be tying a knot over the first knot you made in step 3.)

We're going to now tie more straws onto the figure, but this time we'll tie them in the middle of the figure, between each of the pairs of straws.  So, you'll have to cut your string.

I made a small loop to hang the ornament from at this point. But you could create the loop elsewhere too.


(7)  Tie a double knot in the between two straws in the middle of your figure.

(8) String a straw and then make a knot between another set of two straws.

(Note: The most difficult part about making this ornament was making sure I tied the knot in the right place.  I found it helped if I mostly tied the knot over a straw and then slid the knot into place between the straws.)


(9) Repeat step 8 with with three other straws.  Double knot at the end and cut string.  Add a drop of Elmer's glue if you're worried about the final knot coming undone.  If you don't like the colors of your stirrers, you can also spray paint the ornaments whatever color you want.

Voila!  Enjoy your ornament and make your math teachers proud.


Wednesday, October 24, 2012

What did you fail at today?


When I was in elementary and middle school, I was deathly afraid of getting bad grades.  Once I got a B (which my mind translated to F) on a test and I cried and cried and cried.

When I got to high school, the stakes became higher. I learned about the triad of dreaded acronymns- GPA, PSAT, and SAT. 

*Shudder shudder shudder* 

I wore them like heavy chains around my heart.  I became even more afraid of failing.  On the outside I showed a smiley faced demeanor and acted like I didn't care too much.  But inside I was fiercely competitive.  School was the one thing that I was always good at.  I studied hard and wasn't happy unless every grade was some sort of A.  I put a lot of pressure on myself because I didn't want to be labeled the dreaded F word: Failure.

*Shiver*

This September, for the first time in twenty-seven years, I'm no longer a student.  I'm no longer working for a grade and dreading what someone will label me.   (If you're interested in my decision to drop out of the PhD program, you'll have to wait a big longer.  I'm still reflecting on that whole journey.  That'll be for another post, for another day, for another blog...)


Now that I'm no longer being graded, I feel a loosening of the weights around my heart.  Gone are the scary nightmares where I'm back in school and *gasp* asked to take a ridiculous math exam that I didn't study for.

Now that I'm not being graded anymore, I'm giving myself a free pass.  I'm giving myself permission to fail.

Wait, strike that.  I'm encouraging myself to fail... every day.

Surprised?

Last spring I heard an interview of Sara Blakely, the inventor of Spanx.  (According to Forbes magazine, she's the world's youngest self-made billionaire.)  When I listened to her journey, I was struck by a story she shared about her father.  Every night he would ask his children to name one thing that they failed at that day.  Faced with this question night after night, Sara was encouraged to try to do new things every day. 

She learned not to be afraid of failing.  She also learned that failure didn't happen when things didn't work out.  Failure meant not pushing yourself to try new things, not pushing yourself to do and be more than the day before.

That story planted itself into my heart.

I'm going to fail at something every day.  This way I can stop being afraid of things and grow.

Thursday, December 1, 2011

Healing math

I was having a rough day yesterday and feeling quite glum. Thankfully, a friend called and cheered me up with some kind words and a math question. (She's studying to be a teacher.) I'm not sure why, but working on her math question cheered me right up.

Here's the question:

We know that
A pair of suspenders and a pair of socks cost 18 dollars.
A tie and a pair of socks cost 22 dollars.
A tie and a pair of cufflinks cost 25 dollars.
A shirt and a belt cost 37 dollars.
A pair of cufflinks and a shirt cost 33 dollars.
A belt and a pair of socks cost 17 dollars.

Given all this, how much does each item (pair of suspenders, pair of socks, shirt, tie, pair of cufflinks, and belt) cost?

Have fun!

Thursday, February 3, 2011

Gong Xi Fa Cai

Happy Chinese New Year!

Today I'm going to celebrate my Chinese heritage two ways: 

Wednesday, February 2, 2011

Pathways to love

With Valentine's day just around the corner, I thought it might be fun to include a Valentine's day inspired math brain teaser.

Can you figure out the number of paths that spell the word "Love" if only vertical and horizontal moves to adjacent squares are permitted?


By the way, here's the answer to yesterday's math brain teaser.

Did you figure it out?


Answer to be revealed tomorrow!
(Problem taken from NCTM Mathematics Teacher Dec 2010/Jan 2011)

Tuesday, February 1, 2011

Virtual cutting

Last week I found myself happily lost in a maze of math brain teasers.  Here's one that I really enjoyed: 

Make one cut to the first figure (a) and then rearrange the pieces for the second figure (b).


Answer and next math brain teaser will be revealed tomorrow!
(Problem taken from NCTM Mathematics Teacher Dec 2010/Jan 2011)

Tuesday, November 2, 2010

Admire the beauty!

My hubby recently showed me a book of different math proofs performed through pictures.  That's right, no words or numbers neededWho knew it could be done?  Here's one that I sat pondering awhile. Then, eureka! I got it.  And now I tell you, dear reader, admire the beauty! 


Sum of Cubes:   (Solomon W. Golomb)
13+ 23+ 33+…+ n3 = (1 + 2 + 3 + …+ n)2