Showing posts sorted by relevance for query felt. Sort by date Show all posts

Saturday, January 17, 2015

What's up? Happy Handmade- A Joint Craft eBook Adventure!

Hi everyone!  I don't usually post on Saturday but I'm posting today because I'm feeling super excited and super nervous about next week.  (Isn't it funny how those two feelings often seem to go together?)  

Around this time last year, I shared my now-not-so-secret dream of being a professional crafter.  Re-reading that post, I wish I could go back in time to hug my old-self, and tell her that I'm proud of her for taking a step in a new direction.

Throughout 2014, I took several steps towards making that dream a reality.  I pushed my super shy self to join a couple of really supportive kid blogger groups (like Kid Blogger NetworkRockin Art Moms , and the Creative Preschool Collaborators.) I dipped my toes into the super scary (and still, completely confusing) world of blog advertising and sponsorship.  And, I also got the opportunity to do some freelance craft work for wonderful sites like Handmade CharlotteMollyMoo Crafts, and DIY Candy.

You're probably wondering now- Leslie, was it worth it?  Are you raking in the big bucks?  Well, yes.  I'm glad that I took those initial steps.  And no, I'm definitely not making big bucks.  But, I do make some grocery money and I really appreciate the opportunities that come my way.

And that's what I wanted to share with you today- one of these opportunities.  (Sorry for the rambly intro, but I felt so nostalgic after re-reading my posts from 2014 that I had to say something first...)

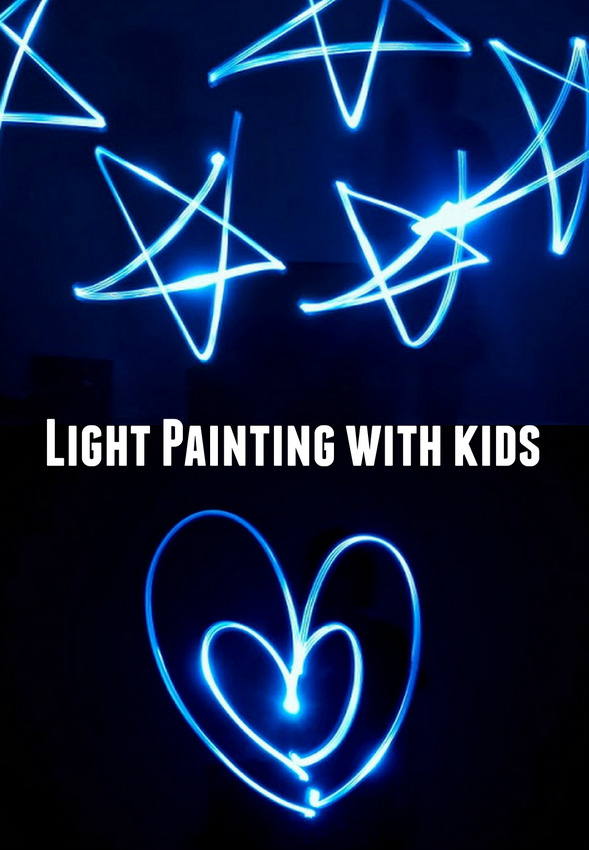
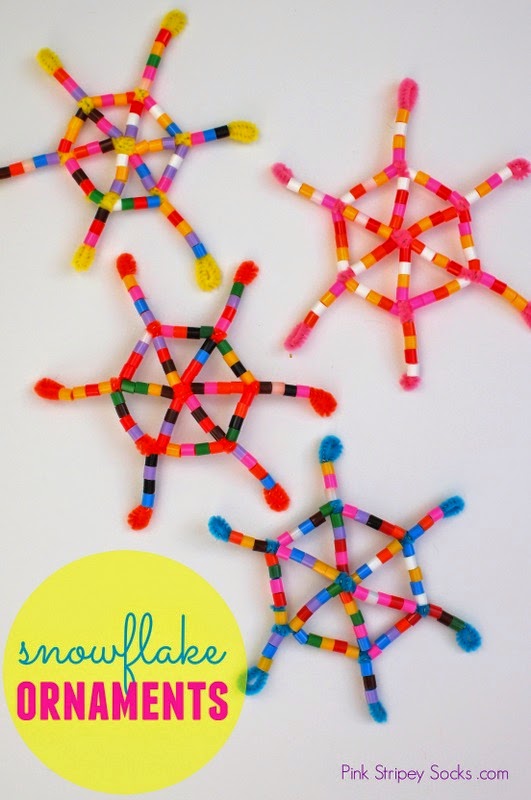
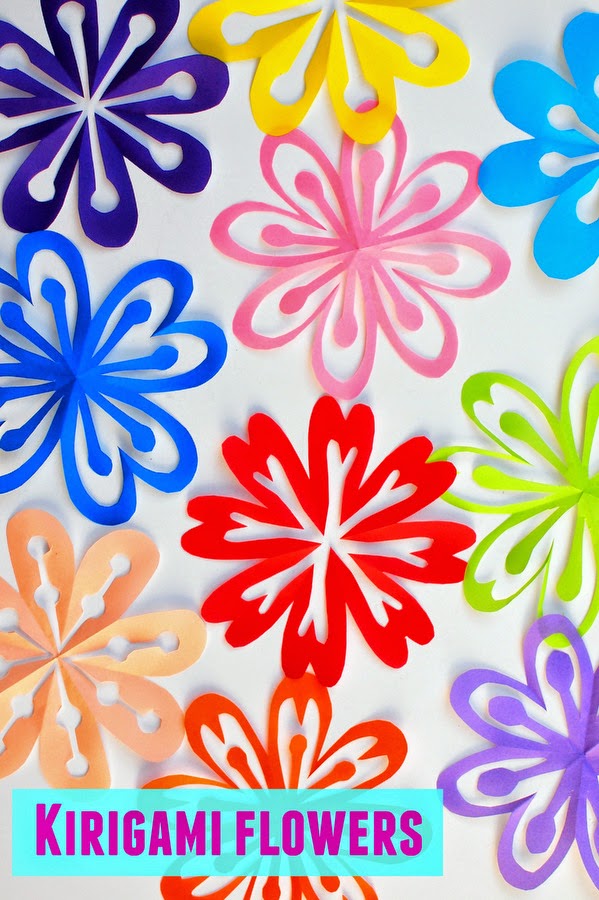
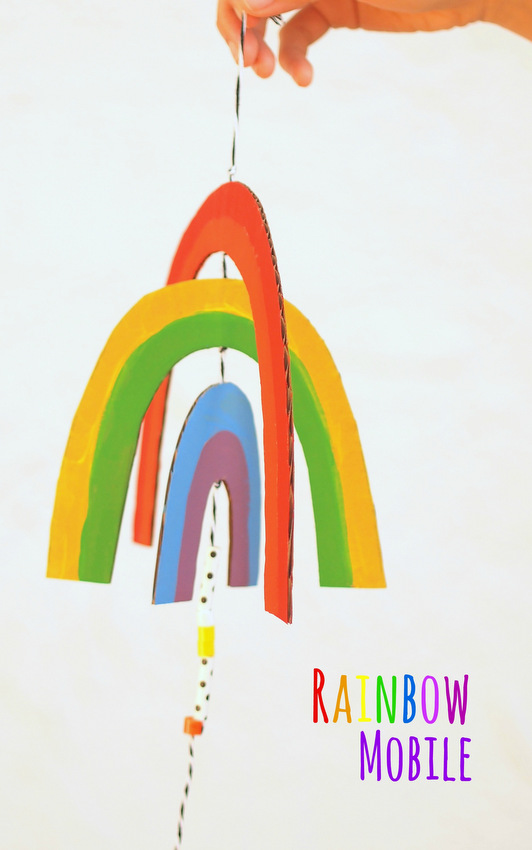
I recently had the opportunity to join with 17 other kid-craft-loving moms to put together Happy Handmade- a beautiful, unique and fun ebook showcasing 115 pages of crafts to make with and for kids!  

Happy Handmade Kids Craft ebook!
   

I'll be sharing more about the ebook and how you can purchase it on the blog this Tuesday, January 20th.  But I just wanted to just write something about it today because there are just so many lovely and unique ideas inside.  And my heart feels like it's bursting open because I'm so proud of all the work that went into it.    


Ok.  That's all friends.  Thank you for stopping by and thank you for all of your support.


And before you go, here's a sneak peak at some of the crafts inside...
*Insert happy sigh here*

happy handmade joint craft ebook inside sneak peak


  Hope you have a wonderful rest of the weekend, friends!
   

Friday, November 30, 2012

Crapty Paper Fortune Cookie Advent Calendar


Can you believe that tomorrow is the first of December!  Aiyah!  How quickly the time flies.

I love advent calendars.  I don't know why, but there's something immensely satisfying about moving a little figure from one day to the next.

We own one small felt snowman advent calendar, but I wanted to try making my own out of crap.  (Why?  Why not!  I love crapting.  There's just something immensely satisfying about transforming garbage and recyclables into something beautiful.)

I've always loved eating fortune cookies. (They're the best part about eating Chinese food!) So, I made my advent calendar look like paper fortune cookies.  Unlike their doughy counterparts, these fortune cookies don't contain traditional cookie wisdom.  Instead, each holds a Christmas-y activity that our family can do together or a way that we can serve others. Each cookie also holds a bible verse.

Hopefully these paper treats will help put us in the right frame of mind this holiday season.

Want to make your own paper fortune cookie advent calendar? Read on!

Materials:
- paper grocery bags (<--crap!)
- scissors
- cup
- pen
- computer paper
- glue stick
- gold paint
- paintbrush
- string
- tape
- Bible Advent verses

Directions:
1)  Trace and cut out 24 circles.
 2)  Write down fun Christmas-y activities or different ways you can serve others onto the circle's backs.
 3)  Make your fortune cookies!  Fold your circle in half, making sure your writing is on the inside.
 4)  While still holding your half circle, use your other hand crease the circle like so.  (Thumb and middle finger on the edge while your pointer finger gently applies pressure and creases the paper.)
 5)  Keep applying pressure until you have your fortune cookie shaped.
 6)  To keep the paper in this shape, you'll now need to let go of the paper and dab glue onto center crease. (Or you can use one of those glue dots... but I'm cheap so I just used my glue stick.)
 7)  Now, refold your fortune cookie.  Apply a bit of pressure to where the glue is to make sure both fortune cookie "arms" (no idea what  they're called) stick together.  Insert a bobby pin inside the "arms" so that they remain sticking together until the glue dries.
 8)  Repeat the process to create the rest of your fortune cookies.
9)  Come back 24 hours later.  (Or earlier if you wish.  I just waited to make sure the glue was dried.)  Paint half of the fortune cookie gold.  While waiting for the paint to dry, write out your bible verses and corresponding numbers on thin slips of paper.
9)  Once your paint dries, tape the slips of paper into the fortune cookies.

10)  I wasn't sure how to string the cookies up, so I created small loops out of leftover paper and taped them to the inside of the fortune cookies.) String up your cookies and enjoy!


Monday, December 17, 2012

Graham Cracker Houses

Hubby and I have been still thinking about Sandy Hook.  This past weekend, we struggled with whether we should still hold our gingerbread house making party.  At first it felt kind of wrong.  Hold a party to make small houses out of crackers and candy?  Were we being too frivolous?  Was it ok to have fun while others grieved?

In the end, we still held the party.  And you know what?  I'm really glad we did.

Two gal pals came over and we spent the night eating, talking, and building.  We shared what was happening in our lives.  We listened a lot and laughed even more.

*Sigh* What happened in Connecticut was really really horrible.  But maybe this was our small way of battling the darkness.  Where one candle glows, darkness cannot win.  That night, I imagined our small apartment glowing with good friendship and love.

And doesn't the world need a little more of that right now?


Monday, July 1, 2013

Paint a rainbow fan

So I don't know about you, but this DIY rainbow fan has been stuck in my mind.  What?  You can see primary colors mixing in front of your very eyes?  Amazing!  I felt so inspired that  I made my own version.  Here's my DIY rainbow fan:


DIY Rainbow Fan


how to paint a rainbow fan DIY


(This post contains affiliate links.  Thank you for your support.)

Oooh.  Circular rainbow!  I just think it's so cool that the blades are painted different combinations of red, yellow, or blue.  Yon can only see the rainbow when the fan is turned on.  Whoa, right?

Let's get crafting.

Sunday, June 12, 2016

Cheap, Easy, and Creative Super Hero Party Ideas

A couple of weeks ago my son graduated from preschool.  I didn't think I would get emotional... but I did.  I felt kinda sad-happy realizing that he wasn't a baby anymore.  Oh boy, I'm starting to feel a bit emotional right now.  Yeesh... must.. toughen.. up.... Ahem.  Anyway, back to introducing today's post...

Our preschool celebrated with a super hero themed graduation party.  All the moms and dads came together to plan a really fun day for the kids. I was so impressed by everyone's creativity.  I just had to share the super hero-themed activities and crafts here because I know a ton of you probably have super hero loving kids at home too.

So put on your super hero capes and get ready for some...

Cheap, Easy, and Creative Super Hero Party Ideas!

11 Awesome and Easy Super Hero Party Activities and Crafts- Budget friendly and Perfect for Kids of all ages!

This post contains affiliate links.  This means I make a teeny tiny bit of money from any purchases made through the Amazon links below.   Thank you for your support! For my full disclosure, click here.


Friday, July 13, 2012

Reviewing our move: Arriving at our new place


After days upon days of driving (ok, it was only two days, but it felt like forever), we finally arrived at the promised land our new apartment.  When a couple of days passed and our stuff still didn't arrive, we got worried and bombarded our movers with numerous voice messages and emails.  A day or two later, we finally reached an agent who said that he was "unable to locate our belongings" but he guessed they were "probably still in Chicago."

Grr.

After some more discussion we then found out the company could probably locate our stuff and probably deliver our stuff within a week... if we paid an extra fee. 

Double grr.
Darn you, movers!  I bite my thumb at you!

After agreeing to pay the extra ransom fee, I tried to make myself feel better by cleaning.  (I know, it sounds strange, but whenever I get stressed I like organizing and cleaning things.  Maybe it helps me to feel like I have some sort of control over things?)

Baby Chuck must have been stressed too, because he was also really keen on cleaning. 


Nice job!   Stress, be gone!

Tuesday, September 25, 2012

He wore it!

Even though the weather was warmer today, sweet hubby still wore a blazer (and my felt flower lapel pin) to work.


Shnazzy!

Sunday, August 31, 2014

DIY Climbing Cardboard Circus Men Toys

I love making interactive toys for Chuck. There's something immensely gratifying about creating something that's beautiful, functional, and fun.... out of recyclable items!  Recently I made these two cardboard climbing circus men toys for Chuck.  You pull on the strings and the men race to the top.

Cardboard Climbing Circus Strong Men Toys

DIY Toys:  Make Climbing Circus Men Toys!

This post contains affiliate links.  Thank you for your support!

Hee hee.  Do you dig their leotards, chest hair, and handlebar mustache?  Yup.  These manly men exude quite a bit of style, don't you think?

Ok.  Let's get making!

Tuesday, December 31, 2013

Light Painting with a Flashlight

Hubby and I love seeing things glow in the dark. We've taken photos with glow sticks (and then cut them up to see what was inside- muah ha ha), made our Christmas lights look like different shapes, and even made glow-in-the dark chalk.

This past Christmas our uncle gave us his old tripod (Thanks Tito Ric!), so hubby wanted to try light painting.  We basically just waved around a flashlight in the air to make lovely "drawings" in the dark.

How to do light painting with kids- Easy and unique way to make art at night!


Wednesday, November 26, 2014

DIY Perler Bead Snowflake Ornaments

Every year I try to make a couple new Christmas ornaments for the tree.   So far I've made hand and feet salt dough ornaments and  felt and milk jug ornaments.  This year I used Perler Beads and pipe cleaners to create easy snowflake ornaments!

Perler Bead and Snowflake Ornaments


perler bead and pipe cleaner snowflake ornaments
This post contains affiliate links.  Thank you for your support!


These were so incredibly easy to make and the colors make me happy.  Keep reading to see how you can make some of your own!


Monday, November 4, 2013

Halloween photos (Past and Present)

How was your Halloween?  Ours was pretty jam packed.  We entertained some out-of-town guests, carved pumpkins, attended a couple of kids' parties, and went trick-or-treating.  I was loving most of it until the very end.  I was definitely burned out by the last Halloween party.   Phew.  Too much candy and partying for this mama.

Here are some photos from our Halloween adventures:


Several pieces of felt and dozens of hot glue sticks later.... I finally finished both Mack and Lightening McQueen costumes.  Chuck and I wore them out when we trick-or-treated around our neighborhood.   (Click here to see how I made the costume and click here to see how I made his matching Lightening McQueen shoes,   Or, click here to see Chuck's previous  Thing 1 Costume and his Mr. Potato Head Costume.)

DIY Mac and Lightening McQueen Halloween Costume

In addition to trick-or-treating, we attended two Halloween parties at the library.  It was uber-cute seeing dozens of toddlers dressed up in costumes.  I also couldn't help but ooh and ahh over the cute treats that some moms made.  Check out these marshmallow monsters.  Too. Darn. Adorable. 


Thursday, October 31, 2013

Happy Halloween from a little Lightening McQueen

Happy Halloween everybody!  

Hope you have a wonderful and magical day!  
As promised, here are some photos of Chuck in his Lightening McQueen costume at a church party.
(And if you want to see my matching Mack costume, click here.)


(Did you see shoes?  Click here to see how I painted his Lightening McQueen Shoes.)

And here are a couple of photos showing how I made it. 

Friday, May 23, 2014

Make Homemade Body Paint

A couple of days ago my sister came over to visit.  Chuck and I were super excited for her to come.  She also enjoys making things so I wanted to try Paging Fun Mom's homemade body paint with her.  I ended up not following their recipe and just winging it.  It still came out and we had lots of fun painting homemade body paint on ourselves.

Make Homemade Body Paint

how to make homemade body paint

 (Note: This post contains affiliate links.  Thanks for your support!)

You just need three ingredients to make this creamy (and very moisturizing) body paint.  Just FYI- it has a completely different consistency then real body paint and it's not meant to stay on.  But that was ok with us.  We ended up painting our pictures, wiping off our artwork, and then painting something else.  Interested?  Let's get making!


Thursday, June 5, 2014

Homemade Body Paint Recipe (2 ingredients Needed!)

Last week I shared a simple 3-ingredient homemade body paint recipe. While we had fun trying it out, I kept wondering if there was another way to make homemade body paint.  Turns out there is!  I peeked around the internet and found this neat series of body paint recipes.  The author shares a couple recipes that involved using washable white paint (which I kind of felt weird using on my skin...)  and one that involved using two ingredients that I already had on hand.  

2 Ingredient Homemade Body Paint Recipe


how to make homemade body paint


Monday, January 9, 2017

DIY Wooden Block Dolls

We've had a box of wooden blocks gathering dust in our closet for a couple of weeks now.  Recently I tried breathing life into them with this fun craft.  We made our own Wooden block dolls!  Armed with stickers and Sharpies, we transformed plain jane blocks into cute characters.  Aren't they adorable?  I love how they're full of personality and charm.


DIY Wooden Block Dolls- Kids transform old blocks into cute characters with this fun art activity!
This post contains affiliate links. Thank you for your support.  For my full disclosure policy, click here.

Thursday, May 26, 2011

The gardens (pt 2)

After visiting the desert and the tropics, we ventured into the children's park.

I used the children's entrance and felt like Alice in Wonderland.

A large mouse greeted me with a kiss!

Hubby tried to reenact this pose with Charlie when we got home.  Charlie was not pleased.

These beautiful tulips reminded us of the Queen of Hearts' garden.

We also awoke a large sleeping dragon.  Lucky for us, he was quite friendly and showed us the way to the airport.

It was such a magical way to end a week with a good friend.

Saturday, February 26, 2011

Mix ins

This morning I woke up and felt inspired. So I scrounged around the cupboard and found some items to add into my Saturday morning pancakes.

Walnuts, bananas, oatmeal, craisins, and oreos, oh my!

The fruit of my labor:
Oreo pancake- is it eaten for breakfast or dessert?

Though the process was immensely enjoyable, the products varied in quality.
  • Banana and walnut pancakes- Tasty but my bananas looked mushy
  • Oatmeal and craisin pancakes- The oatmeal added an interesting gritty texture 
  • Oreo pancakes- Sadly, they just tasted like an oreo dropped in pancake batter 
Mix ins- 1
Home cook me- 0
You've bested me this time, mix ins!

Friday, April 24, 2015

How to Make Colorful Kirigami Flowers

Spring is here! La la la! Although our current grey skies don't exactly scream "warm, sunny, bursting-with-new-life weather," today's kirigami flower craft certainly does!

How to Fold and Cut Kirigami Flowers

How to cut and fold kirigami flowers- super easy and fun spring craft
This post contains affiliate links.  Thank you for your support!


Now, I had a lot of trouble naming this craft.  These flowers kinda felt like origami... and yet they weren't quite origami because I used scissors to make the designs too.  Luckily Mr. Google taught me the term kirigami.  It's a Japanese term that basically describes origami that also involves paper cutting too.  Bingo!  So cool right?

By the way, if you love these flowers, you'll also love these


Wednesday, March 13, 2013

Freezer paper stencil "left" and "right" pants

Nowadays when things get stressful, I get a craftin'.  Last night I freezer paper stenciled a pair of Chuck's pants.

Who knew?  Apparently I have a thing for typography on clothes.

First I stamped "hello" on a pair of pants, then I stenciled a "lucky charm" shirt, and now... well... it just felt like a good time to make some "left" and "right" pants.

Hmm... whose left and whose right? . 

They were pretty easy to make because I used the same freezer paper stencil technique from before.  Here are some photos of the process:


Hrmm... what should I make next?

Tuesday, June 30, 2015

DIY Easy, Breezy Cardboard Rainbow Mobile (Template included)

Rainbows have been on my mind a lot lately. Maybe it has to do with landmark Supreme court ruling?  Or maybe it's just because I've been kinda sick and they make me feel happy.  Hrmm... probably a bit of both reasons, I suspect.  Here on the blog, I've shared a full spectrum of rainbow crafts.  They're colorful, fun, and always put a smile on people's faces.  Today I'm sharing this easy, breezy cardboard rainbow mobile that I whipped up a couple of nights ago.

I really love how it moves in the air.

Cardboard Rainbow Mobile    

How to make an easy, breezy, cardboard rainbow mobile- Super pretty and fun art project to make with kids of all ages!

This post contains affiliate links.  Thank you for your support.