Showing posts with label Food. Show all posts
Showing posts with label Food. Show all posts
Thursday, February 13, 2014
DIY Sprinkles and Hot Glue Cake Toppers
Sprinkles are the happiest decorations in the world. They're super colorful and remind me of sweets and cake. So I made these sprinkle cake toppers to turn boring rice krispies into something a bit more festive and Valentines-y for our toddler group.
They were super easy to make and added a happy touch to my snacks. Keep reading to make them for yourself!
Tuesday, February 11, 2014
Painting Valentine's Day and African Inspired Pasta Necklaces
Alright, this post's title is completely wackadoo, but hear me out. Chuck and I painted pasta necklaces to wear on Valentine's Day. But after painting a bunch of pasta pretty pastel colors, my eyes yearned for primary colors. So while Chuck slept, I peeked online and found some really beautiful beaded African necklaces. And then this mama went to town and painted her own pasta pieces with African inspired colors and designs.
Keep reading to see how we painted them!
Keep reading to see how we painted them!
Monday, February 10, 2014
Make butter by Shaking up Heavy Cream
Did you know that if you shake heavy cream long enough, it will make butter? *Pause for effect* Yup. It's true. It takes about 20-25 minutes to turn 1/2 a pint of heavy cream into butter. You don't even need special equipment to do it! How do I know? Because I roped hubby into making some homemade butter with me this past weekend!
Why this sudden interest in making homemade butter? Don't worry, I'm not swearing off all processed foods. I recently found out that February 7th was Laura Ingalls Wilder's birthday. She was one of my favorite authors as a young girl. I loved reading Little House on the Prairie and thought this would be a great way to celebrate her (and try out some cool food science too.)
Keep reading to see how we made our own homemade butter from heavy cream!
Let's Make Homemade Butter from Heavy Cream!
Why this sudden interest in making homemade butter? Don't worry, I'm not swearing off all processed foods. I recently found out that February 7th was Laura Ingalls Wilder's birthday. She was one of my favorite authors as a young girl. I loved reading Little House on the Prairie and thought this would be a great way to celebrate her (and try out some cool food science too.)
Keep reading to see how we made our own homemade butter from heavy cream!
Wednesday, January 29, 2014
Two Bird Feeder Crafts: Toilet Paper Roll Feeders and Ice Feeders
Earlier this week my posts focused on sending some lovin' to the special people in your life (Click here, here and here.) Well, that's all well and good. But what about sending love to others? How about the birds? With the freezing cold weather outside, our feathered friends are bound to need some loving too. So why not try out these two bird feeder crafts? Chuck and I made some toilet paper roll bird feeders and some heart shaped ice feeders. Both were really easy to make and currently dangling on a tree outside our building.
To see how I made the toilet paper roll feeders and ice feeders, keep reading!
Here's an up-close shot of our Toilet Paper Roll Feeder:
To see how I made the toilet paper roll feeders and ice feeders, keep reading!
Monday, January 27, 2014
DIY Valentine's Day Gifts: Candy, Coffee, and Tea
Right now we're about to celebrate our ninth Valentine's day together... and for some reason I got thinking about that first gift. It was easy to make and didn't cost very much. But, it was really special for both of us. Feeling inspired by that first Valentine's gift nine years ago, here are three really easy, affordable, and sweet DIY gifts to make for your loved ones.
To see the details for each one, keep reading!
Monday, January 13, 2014
6 ways to entertain a toddler at home
Looking for some easy ways to entertain your toddler in the winter?
So... how about that polar votex? Boy, oh boy, that was some crazy weather. With the snow, ice, and freezing cold winds, Chuck and I hunkered down at home.After a couple of hours of reading the same books over and over again, and playing with the same toys over and over again, and listening to the soundtrack of "Planes" for the trillionth time, I finally cracked.
Redrum, redrum?
Thankfully, we didn't make it to that point. But, we definitely bounced off the walls a bit. To maintain some sense of sanity, we had to do something to make the time at home more enjoyable. So here are a couple of fun activities that kept us sane and smiling...
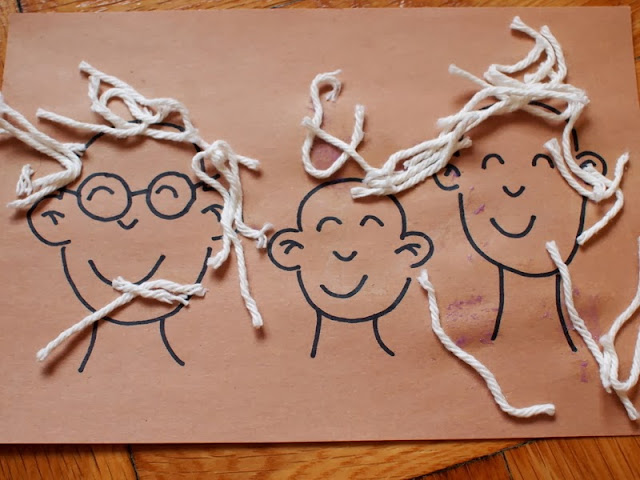
1. Yarn family portrait craft
Chuck loves using scissors and the glue sticks, so this activity was a hit. First he helped me cut tons of short, white yarn strands. Then, I doodled a bald family on a piece of paper. Then, he helped me glue hair onto all of their heads. The result is this cute and funny family portrait.Keep reading to see more ways we entertained ourselves at home...
Sunday, January 5, 2014
Make flowers and leaves from gumdrops
What would you do with a bunch of leftover gumdrops? Would you eat them or toss them out?
Or, would you try something a bit different? Would you burn them... or melt them... or nuke 'em? Eeek. What evil candy torturer would do that? Oh wait, I already did all those things in my 6 strange things to do with gummy bears post... muah ha ha.
This time I took a different route and turned my colorful gummy candy into gumdrop flowers. Why, you ask? Why not! After seeing these lovely gumdrop rose petals I pulled out my candy and got a'smooshing and a'cutting. By the end of the night I had me a lovely bouquet of gumdrop flowers:
Have I intrigued you? Keep on reading to see how these lovely flowers were made...
Or, would you try something a bit different? Would you burn them... or melt them... or nuke 'em? Eeek. What evil candy torturer would do that? Oh wait, I already did all those things in my 6 strange things to do with gummy bears post... muah ha ha.
This time I took a different route and turned my colorful gummy candy into gumdrop flowers. Why, you ask? Why not! After seeing these lovely gumdrop rose petals I pulled out my candy and got a'smooshing and a'cutting. By the end of the night I had me a lovely bouquet of gumdrop flowers:
Friday, January 3, 2014
Sweets, Graham cracker Houses, and the Dentist (Eeek!)
So... I've got a confession.
I was looking through some holiday photos and I realized... eek I may have gonea bit WAY overboard with the sugar. Yikes. Apparently I have a tiny HUGE sweet tooth.
On top of the lovely goodies that we ate at parties, hubby and I also devoured sweets at home. Hrmm... all that sugar.... maybe we're part Elf? Here's a review of some of our homemade holiday goodies...
1. Hubby made us a couple of homemade cafe mochas. He mixed 1T cocoa, 1T hot water, and 1 T sugar in a cup. Then, he added 1 shot of espresso (or double strength coffee) and topped that with with 1/2C of warmed and frothed milk. Sweet and yurmmy...
Keep on reading to see more sweet goodies...
I was looking through some holiday photos and I realized... eek I may have gone
On top of the lovely goodies that we ate at parties, hubby and I also devoured sweets at home. Hrmm... all that sugar.... maybe we're part Elf? Here's a review of some of our homemade holiday goodies...
1. Hubby made us a couple of homemade cafe mochas. He mixed 1T cocoa, 1T hot water, and 1 T sugar in a cup. Then, he added 1 shot of espresso (or double strength coffee) and topped that with with 1/2C of warmed and frothed milk. Sweet and yurmmy...
 |
Friday, December 27, 2013
Christmas Photos
Warning! This post contains a lot of photos! But, I figure it's ok since Christmas only happens once a year.
This year we went to two family get-togethers. We had lunch at one aunt's place and dinner at a cousin's house. Fortunately for us, both houses were only 5 minutes apart. We had a lot of fun hanging out with family and stuffing ourselves silly. Here are some photos from our Christmas adventure:
(Thanks hubby for taking most of these while I played with the kids!)
Click below to see more photos...
This year we went to two family get-togethers. We had lunch at one aunt's place and dinner at a cousin's house. Fortunately for us, both houses were only 5 minutes apart. We had a lot of fun hanging out with family and stuffing ourselves silly. Here are some photos from our Christmas adventure:
(Thanks hubby for taking most of these while I played with the kids!)
 |
| Hubby, Chuck, and I wearing our Christmas headbands, ready to party (thanks Tito Ric for the photo!) |
Click below to see more photos...
Thursday, December 26, 2013
Making different shaped marshmallows
Merry Belated Christmas! How was your holiday? Good, I hope. Ours was filled with family, food, and a ton of fun. Chuck really loved playing with all of his older cousins. I'll upload some photos from the day's event a little later on.
Until then, I thought I'd share this neat food trick that I learned from here. Did you know that you can make your marshmallows into different shapes? Well, you can.... and it's super easy to do.
Aren't these heart shaped marshmallows lovely?
Keep on reading to make your own fun shaped marshmallows...
Thursday, December 19, 2013
Finding beauty in the everyday
Heart shaped candy canes
(bent using this tutorial)Our current car collection
Christmas tree toys
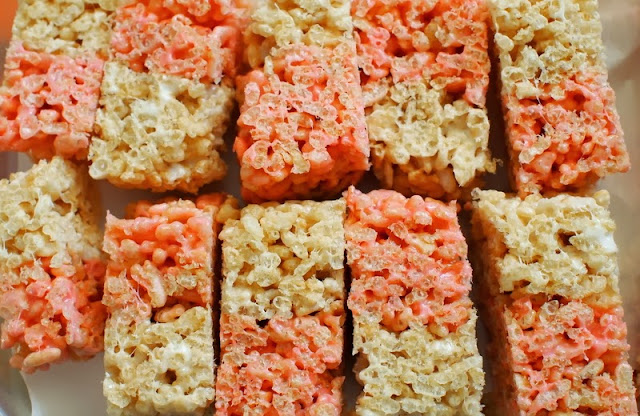
Red and white rice krispy treats
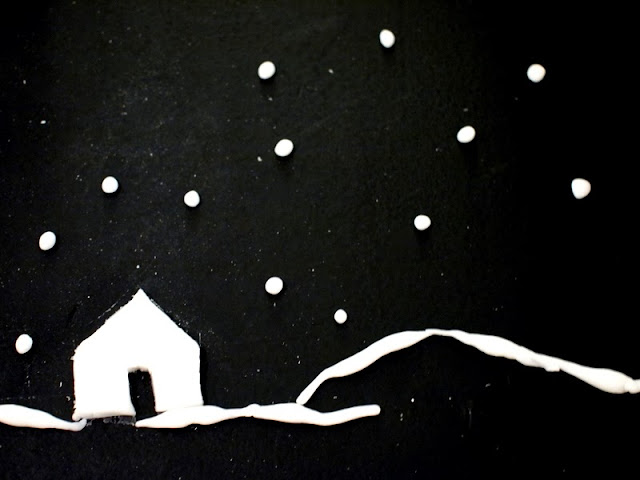
White play dough on our black table
Happy Thursday friends!
Thursday, December 5, 2013
Thanksgiving photos
Hi everyone.
Hubby and I just finished watching Sound of Music. Wow! That was really a marathon of music. I can't believe that the singers had the stamina to last three hours. I felt exhausted just watching them!
(Did you watch it? I completely melted when I heard the head nun singing "Climb every mountain." Wow. Voice as like butter, I tell ya.)
Back to today's post. Here are the promised Thanksgiving photos. Ermm.... looking through them, I realize now that they're mostly of food. I gave hubby the camera for the night while I hung out with the kids. He came back with lots of food photos... so you could tell what he was mostly focused on. :) Just imagine some people congregating around the food and then you've got the gist of our Thanksgiving.
Happy Friday, friends!
 |
| I took this photo before the evening's events. Chuck just looked too adorable and I knew that the outfit would be covered with food by the end of the night. |
 |
| Yum. |
 |
| *Drool* |
 |
| I'm getting hungry again... |
 |
| Yurmmm.... pie...... I wonder what we have in our fridge to snack on.... |
Sunday, November 24, 2013
What's up Chuck? Eately!
Awhile back, hubby, Chuck, and I had lunch with friends at Eately, an Italian marketplace in the city. We loved the food so much that we went again this weekend with another friend.
Oy vey! Oh New York, I love you dearly, but I really don't like your crowds. Eately's shops and restaurants were jam packed with rows and rows of people. Poor hubby struggled to maneuver our stroller through it all. But despite being pushed around, I'm really glad we made the trek across the river. We saw shops lined with rows and rows of yummy goodies and we got to hang out with a dear friend. Oh yeah, and let's not forget about the food. Oh boy, it was just as good I remembered. In fact, I'm drooling now just thinking about our pasta dishes. Yum yum.
Here are some photos from our Italian adventure:
 |
| Cheese and meat shop |
 |
| I love the little hearts on these desserts |
 |
| Cool geometric tile design |
 |
| Italian candies |
 |
| Fresh, handmade pasta |
 |
| Hubby's dish |
 |
| Chuck taking a big bite out of his gluten free pasta |
Sunday, November 10, 2013
What's up Chuck? Canstruction!
Hi everyone! Did you have a good weekend? Ours was kind of a mixed bag. On the one hand we got a chance to relax and hang out as a family... which is especially nice since hubby is still away most of the week for work. But on the other hand, we were just so sad hearing about Typhoon Haiyan's terrible aftermath in the Philippines. (To see how you can help the survivors, click here.)
*Sigh*
Ok, I'm trying to stay positive here. Hearing about such destruction and devastation reminds me to be thankful for all the things I usually take for granted. So I'm thankful for moments that we get to share together as a family:
 |
| Pretending to be monsters |
 |
| Showing off our non-existent yoga moves |
 |
| Enjoying the warm weather (Look! No coat!) |
 |
| Chasing each other around the park |
I'm also thankful that we were able to see Canstruction at the Brookfield Place Winter Garden. It's a joint competition and food drive where teams of engineers, architects, designers, and students create sculptures out of nonperishable foods. Sculptures will be up until November 13th and admission is free (just bring some canned food to donate). Then, they'll be taken apart and the food will be donated to City Harvest, an organization dedicated to feeding the hungry in New York City.
The sculptures were amazing. I left feeling quite inspired seeing how people's artistic and creative skills were used to highlight the very real problem of hunger in New York City.
Have a safe Monday, friends!
Thursday, November 7, 2013
DIY Kids' Portable Stove top
Sometimes when I'm cooking in the kitchen, Chuck pretends to cook alongside me. It's pretty cute. I'll give him one of my unused pots and a large plastic spoon, and he'll whip up something for me to try.
Lately he's been cooking for his toy cars. With this new interest in entertaining, I thought it was high time he got his own stove. Taking inspiration from this Pack-n-Go Kids Play Stove, I made him a mini portable stove top.
Since we live in a small apartment, I'm always hesitant to purchase large toys for Chuck. I loved this simple DIY toy because it supports his imaginative play and doesn't take up too much space! The storage container's lid becomes the "stove top" and all his cooking toys are stored inside.
Materials:
Directions:
1. Doodle some burners and knobs onto your contact paper using your Sharpie marker.
2. Cut out your doodles.
3. Stick them onto your plastic storage container.
That's it! Now you've got an easy-peasie DIY stove for cooking. Pretty awesome!

Happy crafting!
Lately he's been cooking for his toy cars. With this new interest in entertaining, I thought it was high time he got his own stove. Taking inspiration from this Pack-n-Go Kids Play Stove, I made him a mini portable stove top.
DIY Portable Kids Stove Top Toy
Since we live in a small apartment, I'm always hesitant to purchase large toys for Chuck. I loved this simple DIY toy because it supports his imaginative play and doesn't take up too much space! The storage container's lid becomes the "stove top" and all his cooking toys are stored inside.
Materials:
- Plastic storage container
- Sharpie Marker
- Scissors
- Contact Paper
Directions:
1. Doodle some burners and knobs onto your contact paper using your Sharpie marker.
2. Cut out your doodles.
3. Stick them onto your plastic storage container.
That's it! Now you've got an easy-peasie DIY stove for cooking. Pretty awesome!

Happy crafting!
Monday, October 7, 2013
Trip to Baltimore
Hi everyone! How was your weekend? (Good, I hope!)
This past weekend I left hubby and Chuck to fend for themselves (eek!). I had a mini adventure and rode the bus to visit a friend in Baltimore. We met there while we were both college students. I guess our goofy personalities just clicked because we're still friends ten years later. Here are some photos from our Baltimore adventure...
This past weekend I left hubby and Chuck to fend for themselves (eek!). I had a mini adventure and rode the bus to visit a friend in Baltimore. We met there while we were both college students. I guess our goofy personalities just clicked because we're still friends ten years later. Here are some photos from our Baltimore adventure...
 |
| Fried green tomato, avocado, egg, bacon, and cheese on pumpernickel bread... yum! |
Wednesday, October 2, 2013
Make your own gummy candies
Did you know that you can make your own gummy candies? I didn't know that it could be done so easily until I saw this fruit juice gummy candy recipe on Instructables.
Last week I roped my sister into trying the recipe out. Using just four ingredients, we made homemade gummy candies in a little over an hour. Here are our results:
Ingredients:
Directions:
1. Combine gelatine, sugar, and juice in a pot. Let the mixture sit there for a minute.
2. Lightly oil your mold. (If you skip this part your gummy candies will break apart as they pop out of the molds.)
3. Bring the mixture to a boil. Let it boil for 10 minutes. The liquid will become more viscous.
4. Spoon the hot liquid it into your molds.
Notes:

6. Pop your gummies out and enjoy!


Can you believe that the recipe worked? I was super stoked because the resulting gummies had a great texture and easily slid out of their molds. I also liked that they weren't too sweet. Next time I'll probably try using fruit juice concentrate instead of juice (as recommended by the original recipe.) That should give them a more intense flavor.... and maybe they'll taste more like the store bought ones.
Happy Wednesday!
Last week I roped my sister into trying the recipe out. Using just four ingredients, we made homemade gummy candies in a little over an hour. Here are our results:
Ingredients:
- 2 envelopes of Knox Original Unflavored Gelatine
- 1 tablespoon of sugar (or more if you want them sweeter)
- 1 C of juice
- Canola oil
Directions:
1. Combine gelatine, sugar, and juice in a pot. Let the mixture sit there for a minute.
2. Lightly oil your mold. (If you skip this part your gummy candies will break apart as they pop out of the molds.)
3. Bring the mixture to a boil. Let it boil for 10 minutes. The liquid will become more viscous.
4. Spoon the hot liquid it into your molds.
Notes:
- I placed my mold on top of a plate before I did this to catch my spills.
- I had some extra liquid, so I lined a glass baking dish with saran wrap and then poured the liquid into that. Once the liquid hardened, it was easy to pop out a very large gummy candy.

6. Pop your gummies out and enjoy!


Can you believe that the recipe worked? I was super stoked because the resulting gummies had a great texture and easily slid out of their molds. I also liked that they weren't too sweet. Next time I'll probably try using fruit juice concentrate instead of juice (as recommended by the original recipe.) That should give them a more intense flavor.... and maybe they'll taste more like the store bought ones.
Happy Wednesday!
Subscribe to:
Posts (Atom)


