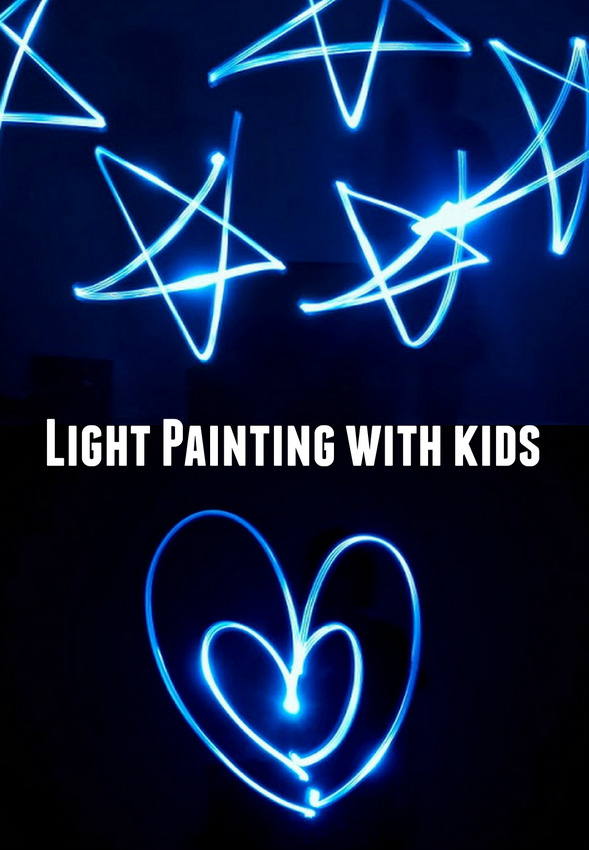
Hubby and I love seeing things glow in the dark. We've taken photos with glow sticks (and then cut them up to see what was inside- muah ha ha), made our Christmas lights look like different shapes, and even made glow-in-the dark chalk.
This past Christmas our uncle gave us his old tripod (Thanks Tito Ric!), so hubby wanted to try light painting. We basically just waved around a flashlight in the air to make lovely "drawings" in the dark.
Showing posts sorted by date for query Christmas. Sort by relevance Show all posts
Showing posts sorted by date for query Christmas. Sort by relevance Show all posts
Tuesday, December 31, 2013
Friday, December 27, 2013
Christmas Photos
Warning! This post contains a lot of photos! But, I figure it's ok since Christmas only happens once a year.
This year we went to two family get-togethers. We had lunch at one aunt's place and dinner at a cousin's house. Fortunately for us, both houses were only 5 minutes apart. We had a lot of fun hanging out with family and stuffing ourselves silly. Here are some photos from our Christmas adventure:
(Thanks hubby for taking most of these while I played with the kids!)
Click below to see more photos...
This year we went to two family get-togethers. We had lunch at one aunt's place and dinner at a cousin's house. Fortunately for us, both houses were only 5 minutes apart. We had a lot of fun hanging out with family and stuffing ourselves silly. Here are some photos from our Christmas adventure:
(Thanks hubby for taking most of these while I played with the kids!)
 |
| Hubby, Chuck, and I wearing our Christmas headbands, ready to party (thanks Tito Ric for the photo!) |
Click below to see more photos...
Thursday, December 26, 2013
Making different shaped marshmallows
Merry Belated Christmas! How was your holiday? Good, I hope. Ours was filled with family, food, and a ton of fun. Chuck really loved playing with all of his older cousins. I'll upload some photos from the day's event a little later on.
Until then, I thought I'd share this neat food trick that I learned from here. Did you know that you can make your marshmallows into different shapes? Well, you can.... and it's super easy to do.
Aren't these heart shaped marshmallows lovely?
Keep on reading to make your own fun shaped marshmallows...
Tuesday, December 24, 2013
Merry Christmas!
We wish you all a merry, merry Christmas.
May your homes be filled with love, joy, and peace this holiday season.
And in case you need a little extra holiday cheer, here are some goofy photos of Chuck and me wearing a lovely Santa/Gnome beard. (I just cut out a beard shape from felt and hot glued elastic to both sides.)
Happy Holidays! (And happy crafting!)
Happy Holidays! (And happy crafting!)
Monday, December 23, 2013
Holiday Train Show at Grand Central Terminal
One of the best things about this Christmas is that Hubby is off the entire week. Hooray! With all of his traveling last month, it's really nice having him around. I also especially love seeing Chuck and Daddy playing like best buddies.
This past weekend we finally got a chance to visit the Holiday Train Show at Grand Central Terminal. Even though it was pretty crowded, the display itself was enchanting. Everything was meticulously crafted and I kept "oohing" and "ahhing" over all the lovely details.
Here are some photos from our trip into the city:
 |
| The miniature taxis were too adorable! Can you spot the tiny Santa? |
 |
| As you can see, this little guy really wanted to get inside |
 |
| I loved seeing the sparkly Christmas light-night sky, King-Kong, and tiny, tiny nuns |
 |
| Ack! Look at that adorable mini Christmas tree! |
 |
| We then got some yummy gluten free pizza at Two Boots Pizza. I love this little guy's sweet kisses |
 |
| Since it was such a nice day, we walked back to our bus stop. On our way across town, Daddy and Chuck posed underneath the Bryant Park Christmas tree |
 |
| It's a family portrait. Can you find all of us? |
Sunday, December 22, 2013
Four Winter Toddler Crafts and Activities
Looking for some easy toddler winter crafts and activities?
I'm officially over winter. Buh-bye shortened days! Buh-bye cold weather! Buy-bye staying inside! Oh, how I wish it were already spring. But, until warmer, sunnier days come, Chuck and I are going to persevere and have fun indoors. Here are four crafts and activities that have kept us busy, happy, and sane for the past couple of weeks.1. Cereal Box Gingerbread Men
I cut out a whole bunch of gingerbread men from my empty cereal box stash. (Yes, I'm a proud cardboard hoarder!) Then, I brought them to the library and let the kids decorate them with googly eyes and foam stickers. The older 2-year olds had fun making funny men and the babies just watched their moms do the craft.
Chuck's attention span: He probably spent about 5-10 minutes on this activity before he lost interest.
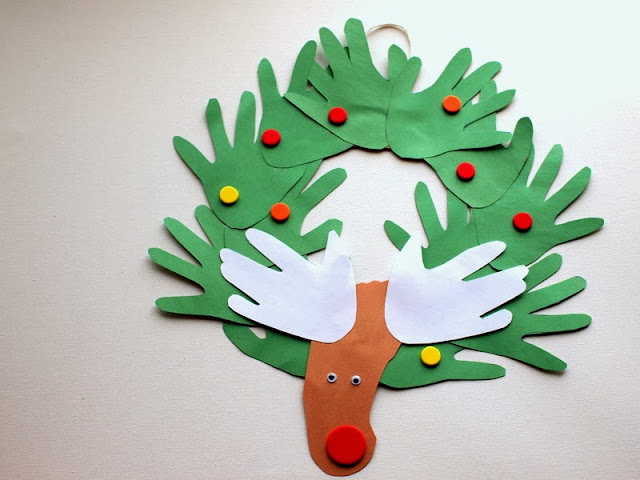
2. Hand and Foot Reindeer Wreath
Here are the different components of the wreath:
Chuck's attention span: He probably spent about 10 minutes on this activity before he lost interest.
3. Homemade Play Dough
I followed this craft clay recipe and we had tons of fun rolling, cutting, and shaping our clay. Unfortunately, our ornaments cracked when they dried. Boo. But, we had such fun manipulating the stuff that I kept leftovers in a sealed bag in the fridge. It didn't dry out and we got to play with it another day. (Right now the "play dough" is still in our fridge... so we'll try it out again this week.)
He used a blunt plastic knife, measuring spoons, measuring cup, and an olive jar (our makeshift rolling pin) to play with the dough.
Chuck's attention span: This activity was a hit! We spent about 30-45 minutes on two separate days playing with our "play dough."
4. Water Bead Play
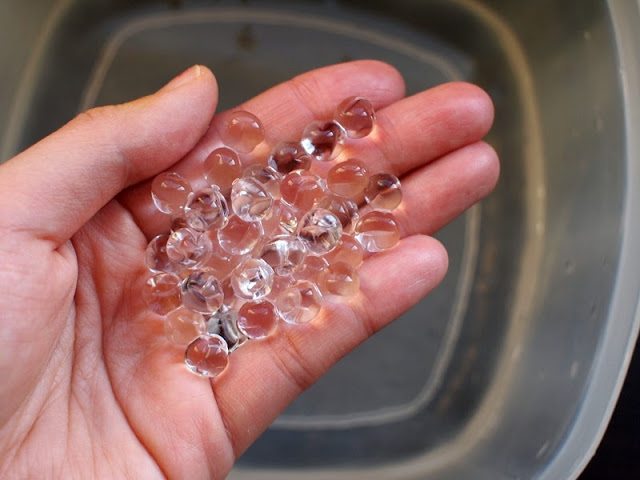
Here's what the water beads initially looked like ...
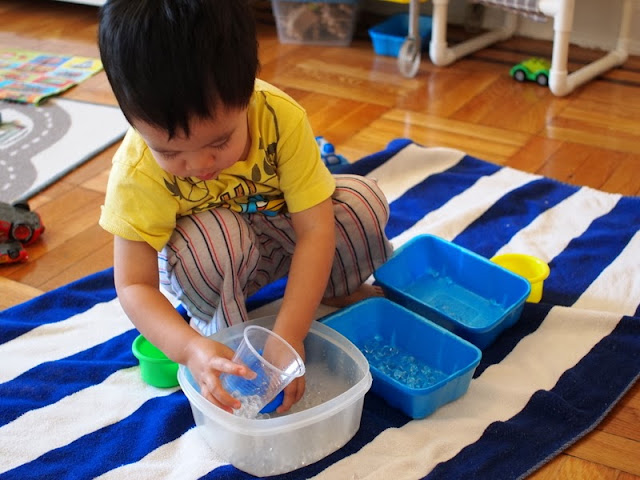
After a couple of hours, our beads grew and Chuck had a blast scooping them from container to container.
Warning: Yes, they can be a choking hazard. I repeatedly told him that the beads weren't food and I made sure to watch him while he played. Once we were done with the beads, I threw them away in the garbage can. (You can't pour them down the drain because they can clog your pipes.)
Chuck's attention span: This activity was a hit! He spent about an hour just scooping the beads from container to container.
So, for all you mamas out there who are also stuck at home with young ones... stay strong! We can make it through winter! Hopefully one of these ideas will help keep you sane this week.
Happy crafting, friends!
Thursday, December 19, 2013
Finding beauty in the everyday
Heart shaped candy canes
(bent using this tutorial)Our current car collection
Christmas tree toys
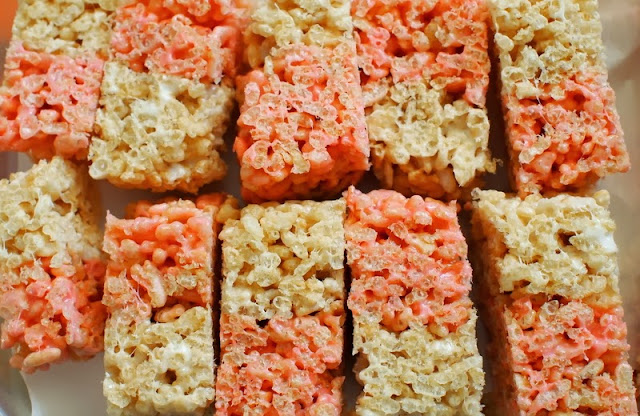
Red and white rice krispy treats
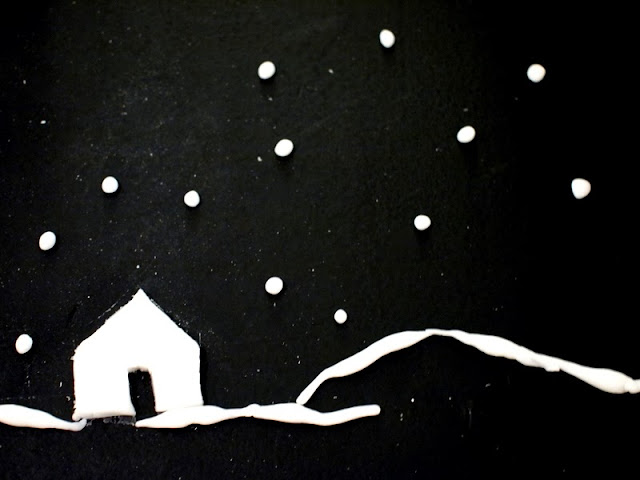
White play dough on our black table
Happy Thursday friends!
Tuesday, December 17, 2013
DIY Earmuffs? (A craft flop)
A couple of weeks ago I couldn't sleep.
Did I drink too much coffee? Nope. Was I worried about Christmas shopping? Nope.
Don't laugh, ok? *Big breath* I couldn't sleep because I kept thinking about how I could crapt myself a pair of earmuffs using stuff in our apartment.
Weird right? I don't even wear earmuffs... but for some reason I kept wondering if I could make them. So the next day I played around with some materials ... and I ended up with a pair of these:
I have kind of mixed feelings about them. On the plus side, they look like earmuffs and they also block out some of the cold. However, they feel a little too light and stiff around my ears.
So, while I'm proud that I made a pair of semi-working earmuffs, I think this is probably a craft flop. Now if for some reason you want to see how I crapted these earmuffs (or you wanna see Chuck wearing the earmuffs), keep on reading!
Sunday, December 15, 2013
What's up Chuck? Weekend Recap
This weekend we had plans to go into the city to see the train show at Grand Central Terminal. Unfortunately, it snowed all day Saturday (eep!) and I was battling a cold, so we ended up hanging out at home. At first I was pretty bummed out, but thankfully everything turned out alright in the end.
Chuck and I played with his cars.... a lot....
We re-enacted scenes from the movie "Mater's Tall Tales..."
Keep on reading below!
Friday, December 13, 2013
Make a felt and cardboard gingerbread house
Today's craft was inspired by gingerbread houses. It's a little cardboard and felt "gingerbread" house with felt "candy" decorations. Pretty neat, right? All the decorations can be easily placed on and taken of, so you can decorate and re-decorate to your heart's content.
If you'd like to make your own, keep on reading!
DIY Felt and Cardboard Gingerbread House Toy
This post contains affiliate links. Thank you for your support.
Wednesday, December 4, 2013
Homemade gift: DIY Felt Board
Do you remember playing with felt boards as a kid? (Is that too old school? Maybe kids nowadays play with fancy touch screens instead ... hrmm....) Anyway, I remember using a felt board in school and LOVING it. So I thought I'd try making a homemade felt board for Chuck. After consulting a couple of tutorials online, here's what I came up with:
Now, in full disclosure, I wish I could say that Chuck loved it and played hours and hours with it while I took a nap on the couch. Errrm..... It didn't quite turn out that way. He played with the car parts for a bit, but then seemed much more interested in rolling around real cars.
But I won't call this a craft fail just yet. I'm hoping (cross your fingers!) that he'll grow to love the felt board as much as I did. But if not, no big deal. The entire thing only cost about 4 dollars to make because I already had most of the materials lying around the apartment. Score!
Now if you have a felt-loving child in your life, you can try making your own felt board too! (I bet it would make a great Christmas gift.) Here's how I made mine:
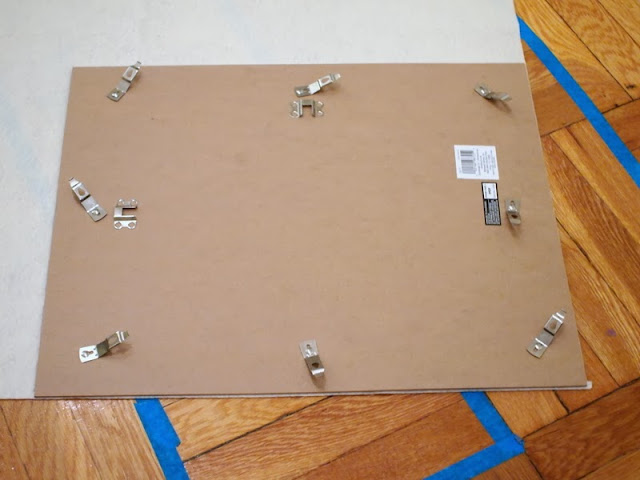
2. Take out the back of your photo frame. Discard the glass. Place the back on your piece of felt and trace it. Cut the rectangle out.
3. Optional: If your felt is a bit wrinkly, carefully iron it. (I turned my iron to a lower setting and placed one of those protective ironing pressing pads over my felt before ironing it so I wouldn't melt or burn the felt.)
4. Place your piece of felt directly over the photo frame back. Make sure the sides all line up. To help with the gluing, fold one side of the felt over the other. Then, use your sponge brush and brush a bit of Mod Podge right next to the fold. Press the fabric down over the glue. Then, spread a little more Mod Podge next to your new fold and press the felt down again. Keep repeating this procedure until one side is fully glued down. Then, repeat the procedure with the other side.
5. Once the Mod Podge dries, put your board back into the frame. That's it!
Now comes the fun part- making your felt pieces. Doodle your designs onto paper. Then, trace them onto felt and cut them out. I chose to make a set of Christmas tree felt pieces and a set of car part pieces.
Let's make a DIY Felt Board
(This post contains affiliate links. Thank you for your support!)
Now, in full disclosure, I wish I could say that Chuck loved it and played hours and hours with it while I took a nap on the couch. Errrm..... It didn't quite turn out that way. He played with the car parts for a bit, but then seemed much more interested in rolling around real cars.
But I won't call this a craft fail just yet. I'm hoping (cross your fingers!) that he'll grow to love the felt board as much as I did. But if not, no big deal. The entire thing only cost about 4 dollars to make because I already had most of the materials lying around the apartment. Score!
Now if you have a felt-loving child in your life, you can try making your own felt board too! (I bet it would make a great Christmas gift.) Here's how I made mine:
Materials to make a DIY Felt Board:
- Large poster frame
- Felt
(Background felt large enough to cover frame and Other pieces)
- Scissors (Fabric and normal)
- Paper
- Pen
- Mod Podge
- Sponge Brush
Directions to make a DIY Felt Board:
1. Clean your work area. Felt attracts stuff. (I worked on the floor, so I swept it first.)2. Take out the back of your photo frame. Discard the glass. Place the back on your piece of felt and trace it. Cut the rectangle out.
3. Optional: If your felt is a bit wrinkly, carefully iron it. (I turned my iron to a lower setting and placed one of those protective ironing pressing pads over my felt before ironing it so I wouldn't melt or burn the felt.)
4. Place your piece of felt directly over the photo frame back. Make sure the sides all line up. To help with the gluing, fold one side of the felt over the other. Then, use your sponge brush and brush a bit of Mod Podge right next to the fold. Press the fabric down over the glue. Then, spread a little more Mod Podge next to your new fold and press the felt down again. Keep repeating this procedure until one side is fully glued down. Then, repeat the procedure with the other side.
5. Once the Mod Podge dries, put your board back into the frame. That's it!
Now comes the fun part- making your felt pieces. Doodle your designs onto paper. Then, trace them onto felt and cut them out. I chose to make a set of Christmas tree felt pieces and a set of car part pieces.
Happy crafting!
Tuesday, December 3, 2013
Make mini Christmas trees from Pipe Cleaners and Cardboard
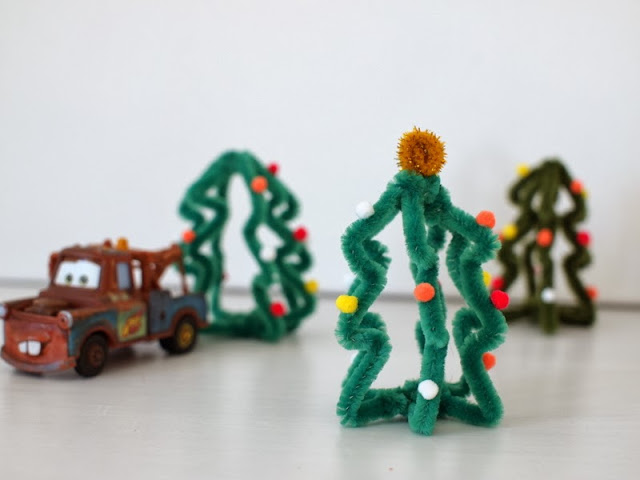
Yesterday I shared how I made a miniature Christmas village out of plaster of paris. Today I just wanted wanted to show how I quickly made these uber cute cardboard and pipe cleaner Christmas trees for my village.
(And if you like these trees, check out my tutorial for mini paint chip trees!
Directions:
Pipe Cleaner Christmas Trees
Materials:
Directions:
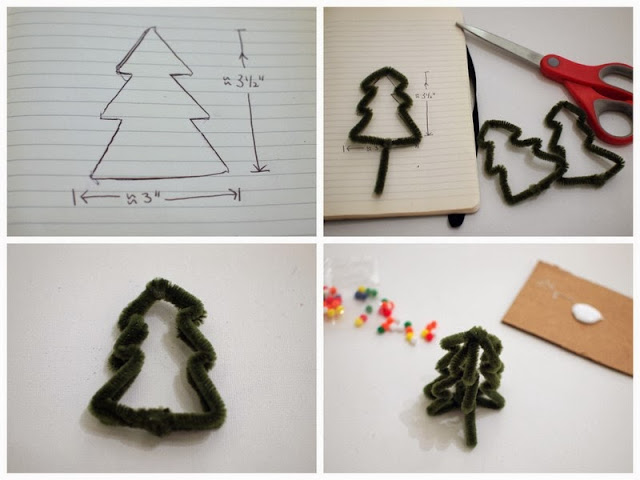
1. Doodle out a tree on a piece of paper.
2. Bend a green pipe cleaner around your doodle. Wrap both ends together to secure your tree. Trim excess bits off. Repeat this for all three tree shapes.
3. Tie the three trees together by wrapping the tops and bottoms together with pipe cleaner.
4. Gently separate the branches and glue small pom poms on with tacky glue.
That's it! Happy crafting! (Chuck was the artistic director for this photo shoot. Can you tell?)
(And if you like these trees, check out my tutorial for mini paint chip trees!
Cardboard Christmas Trees
Materials:- Cardboard
- Cutting Mat
- Pattern (see below)
- Pen/pencil
- Exacto knife
- Scissors
Directions:
- Print out the template to make one large and one small tree.
- Cut out the Christmas tree parts.
- Trace them onto cardboard.
- Cut our your parts with an exacto knife.
- Slide both pieces together and you've got yourself a mini tree!
Pipe Cleaner Christmas Trees
Materials:
- Paper
- Pen
- Scissors
- Pipe cleaners (three per tree)
- Pom Poms
- Tacky glue
Directions:
1. Doodle out a tree on a piece of paper.
2. Bend a green pipe cleaner around your doodle. Wrap both ends together to secure your tree. Trim excess bits off. Repeat this for all three tree shapes.
3. Tie the three trees together by wrapping the tops and bottoms together with pipe cleaner.
4. Gently separate the branches and glue small pom poms on with tacky glue.
That's it! Happy crafting! (Chuck was the artistic director for this photo shoot. Can you tell?)
Monday, December 2, 2013
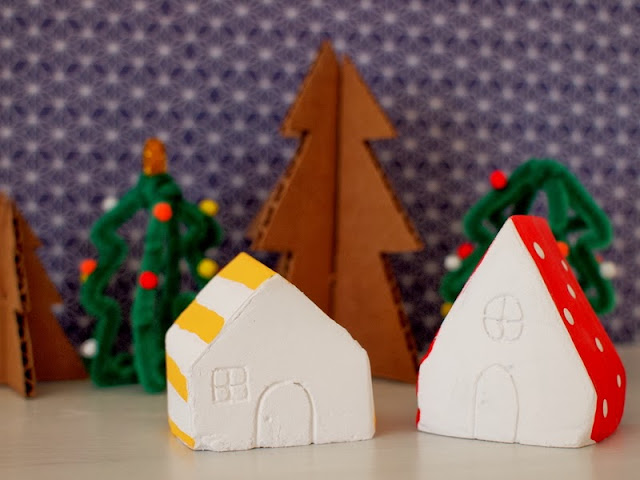
DIY Mini Plaster of Paris Christmas Village
I've always loved Christmas. It's the time of year when twinkly lights decorate the dark
nighttime sky. And, it's the time of year that I'm reminded to hope because of God's great love for us.
Nowadays, Chuck and I love looking at the miniature Christmas village on display at our local craft store. We always walk around oohing and ahhing over the little houses, ferris wheel, and tiny dog playing in snow. It's magical.
So that's why I made us our own miniature Christmas village out of materials that we had lying around our apartment.
This post contains affiliate links. Thank you for your support!
(Psst- Click here to see see how I made the pipe cleaner and cardboard trees.)
Nowadays, Chuck and I love looking at the miniature Christmas village on display at our local craft store. We always walk around oohing and ahhing over the little houses, ferris wheel, and tiny dog playing in snow. It's magical.
So that's why I made us our own miniature Christmas village out of materials that we had lying around our apartment.
Let's Make a DIY Mini Christmas Village!
This post contains affiliate links. Thank you for your support!
(Psst- Click here to see see how I made the pipe cleaner and cardboard trees.)
Wednesday, November 20, 2013
Geometric Popsicle Stick Christmas Tree Ornament Craft
Christmas tree ornaments? What?
Yurp. I know that we haven't celebrated Thanksgiving yet.... and this craft is for Christmas... but please bear with me. I was bored one night and began playing around with leftover mini craft popsicle sticks. After messing around with them for a bit, I came up with this easy, geometric looking Christmas tree ornament.
It was really easy to make, so if you like the design, the kiddos can certainly help out too. (Ooh. Did you notice the sequins? Bling bling!)
Here's what I did:
Materials:
Directions:
1. Cover your work area. Paint 18 of your popsicle sticks shades of green. Paint 4 of your popsicle sticks shades of brown. (I only painted the front and the sides of the sticks, but you might want to paint the backs too if your ornament is going to twirl around.)
2. Once your paint dries, begin hot gluing your sticks together. (I made sure to hot glue on top of parchment paper so my glue won't stick to my work surface. Cheapie crapter tip: You can reuse this parchment paper for other project too!) To ensure that my triangles looked the same, I made one triangle first, then traced the corners onto the parchment paper. I then used those corners as guidelines when hot gluing other triangles.)
3. Hot glue your "trunk" sticks on.
4. Hot glue your sequins onto the green triangles' corners.
Smaller versions would like nice as ornaments or strung together as a garland. Right now my bigger tree is just hanging outside of our door, waiting for December.
Happy Wednesday!
Yurp. I know that we haven't celebrated Thanksgiving yet.... and this craft is for Christmas... but please bear with me. I was bored one night and began playing around with leftover mini craft popsicle sticks. After messing around with them for a bit, I came up with this easy, geometric looking Christmas tree ornament.
It was really easy to make, so if you like the design, the kiddos can certainly help out too. (Ooh. Did you notice the sequins? Bling bling!)
Here's what I did:
Materials:
- Mini Popsicle Sticks (I used 22)
- Scrap paper
- Paint Brush
- Paint (Shades of green and brown)
- Hot glue gun
- Parchment paper
- Sequins
- String or ribbon
Directions:
1. Cover your work area. Paint 18 of your popsicle sticks shades of green. Paint 4 of your popsicle sticks shades of brown. (I only painted the front and the sides of the sticks, but you might want to paint the backs too if your ornament is going to twirl around.)
2. Once your paint dries, begin hot gluing your sticks together. (I made sure to hot glue on top of parchment paper so my glue won't stick to my work surface. Cheapie crapter tip: You can reuse this parchment paper for other project too!) To ensure that my triangles looked the same, I made one triangle first, then traced the corners onto the parchment paper. I then used those corners as guidelines when hot gluing other triangles.)
3. Hot glue your "trunk" sticks on.
4. Hot glue your sequins onto the green triangles' corners.
Smaller versions would like nice as ornaments or strung together as a garland. Right now my bigger tree is just hanging outside of our door, waiting for December.
Happy Wednesday!
Thursday, October 24, 2013
DIY Sugar Skull (Day of the Dead) Milk Jug Luminaries
Currently my college friend Kim is visiting us for the week. It's been really nice having someone else here while hubby is away. Time just passes by much quicker when you're having fun with a friend.
And just how have we been having fun? Well, we've been playing with Chuck... and eating... and watching tv... and crafting... a lot... a whole lot... Halloween and Dia De Los Muertos are right around the corner, so all of our crafts have been centered around those two holidays.
I'm currently on a sugar skull kick. I just love the way they look. So when I was staring at an old milk jug the other day, an idea dawned on me. Ding! Why not use them to make some sugar skull luminaries? So tada, here's what I came up with:
I'd seen tons of posts for ghost milk jug luminaries for awhile, so I figured this was a nice twist on that craft. It uses skulls and colorful lights instead of ghost faces and white lights. I just love how this little guy turned out. He's so cute and smiley... and gosh darn it, I've just got a big ol' soft soft for any craft that involves twinkly, colorful lights.
Friday, October 11, 2013
10 Adorable DIY Slippers
It's finally getting cold here in Jersey. And boy, oh boy, I'm so glad the cooler weather is finally here. I love me some sunshine, but I've been chomping at the bit to pull out the jackets, socks, and boots. (Somehow it just didn't feel like fall when I was still in shorts and flip flops.)
Has the colder weather has got you thinking about warm nights by the fire place, pink onsie pajamas, and cocoa too? Why not throw in a fun DIY slipper project where you get to make something cute and cozy?
Rawr. These slippers that I embellished are the cat's meow. (Hardy har har.) Check out BuzzFeed to see directions on how to make these and nine other super cute slippers. (I'm personally very excited to try making slippers out of old sweaters. I feel some ugly Christmas sweater slippers coming on....)
Happy crafting!
Tuesday, February 19, 2013
Make a bubble snake
We don't drink much soda so when hubby finally brought a Pepsi home I snatched up his empty bottle quicker than a hungry child grabbing at freshly baked Christmas cookies.
Why? Well, I had been dying to make a bubble snake blower. And honestly, could you blame me? Look at the long foamy chain of bubbles I was able to blow.
To blow awesome foamy snake-like bubble chains, I just needed a couple of materials:
Materials:
- empty plastic bottle
- wash cloth
- scissors
- rubber band
- dish detergent
- water
- plastic container
Directions:
1. Cut off the bottom of the bottle.
2. Cut a circle out of the wash cloth that's about 1-2 inches larger than the bottom of the bottle.
3. Use a rubber band to attach your washcloth circle to the bottle. That's it!
4. Dip the bottle (wash cloth bottom) into dish detergent that's been mixed with a bit of water.
5. Blow. A foamy bubble snake will appear before your eyes.
(Warning: Do not inhale, only exhale. Otherwise you'll end up drinking dish detergent like I did. Yuck.)
Here are some photos of Baby Chuck and I playing with our bubble snake blower. (You may be wondering why we're in the bath tub. Or why my bathtub is so dirty.... Hmm.. Well, we fully intended to blow bubbles outside, but it was just too cold. The bath tub served as a nice place to try the activity out, since the bubbles created quite a sticky mess on the ground. As for why my bathtub is so dirty... I've neglected to clean it.... eek.)

Let me know if you try this out with your kids. I can't wait till the weather gets warmer. We'll definitely try blowing more bubble snakes outside.
Why? Well, I had been dying to make a bubble snake blower. And honestly, could you blame me? Look at the long foamy chain of bubbles I was able to blow.
 |
| Wowzers. This photo makes my inner child squeal with delight |
To blow awesome foamy snake-like bubble chains, I just needed a couple of materials:
Materials:
- empty plastic bottle
- wash cloth
- scissors
- rubber band
- dish detergent
- water
- plastic container
Directions:
1. Cut off the bottom of the bottle.
2. Cut a circle out of the wash cloth that's about 1-2 inches larger than the bottom of the bottle.
3. Use a rubber band to attach your washcloth circle to the bottle. That's it!
4. Dip the bottle (wash cloth bottom) into dish detergent that's been mixed with a bit of water.
5. Blow. A foamy bubble snake will appear before your eyes.
(Warning: Do not inhale, only exhale. Otherwise you'll end up drinking dish detergent like I did. Yuck.)
Here are some photos of Baby Chuck and I playing with our bubble snake blower. (You may be wondering why we're in the bath tub. Or why my bathtub is so dirty.... Hmm.. Well, we fully intended to blow bubbles outside, but it was just too cold. The bath tub served as a nice place to try the activity out, since the bubbles created quite a sticky mess on the ground. As for why my bathtub is so dirty... I've neglected to clean it.... eek.)

Subscribe to:
Posts (Atom)



.JPG)


