Showing posts sorted by relevance for query rock. Sort by date Show all posts

Thursday, April 28, 2011

Brownie study

Yesterday night I baked two boxes of brownies for my students.  
Name brand, meet generic.

I baked both boxes, let them cool overnight, and then asked hubby to try one piece of each. 
Can you guess which is which?

After trying both, he couldn't tell the difference!  They tasted the same.

Update:  My students loved the brownies and they couldn't tell the difference either.  Generic Spartan brand, you rock!

Friday, January 31, 2014

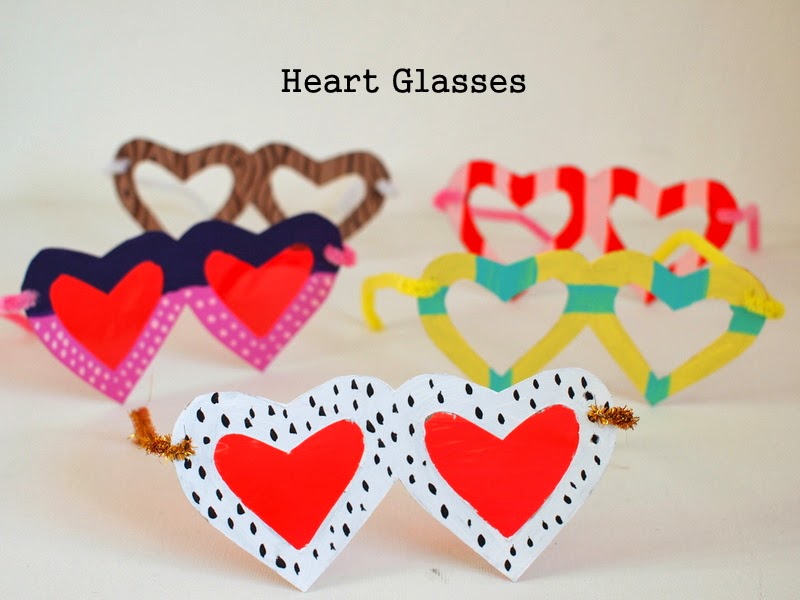
Two Heart themed Valentine's Crafts- Heart Glasses and Painted Heart Rocks

Note:  This post is sponsored by Plaid, but the opinions are 100% mine.

Did you know that the heart is my favorite shape?  (Is it weird that I have a favorite shape?)  I know that triangles and hexagons are super trendy right now, but I'm an old-fashioned romantic.  Hearts will always have a special place in my... well heart.  (Tee hee hee.)  So when Plaid sent me a box of Apple Barrel Craft Paint to create a Valentine's Day School Craft, I knew that it had to be heart related. 


So I came up with these Cereal box Heart Glasses and Heart Painted Rocks.  Both crafts are super colorful and fun to make.   

Cereal box Heart Glasses


DIY Heart Shaped Glasses


Keep reading to see directions and template!

Monday, June 8, 2020

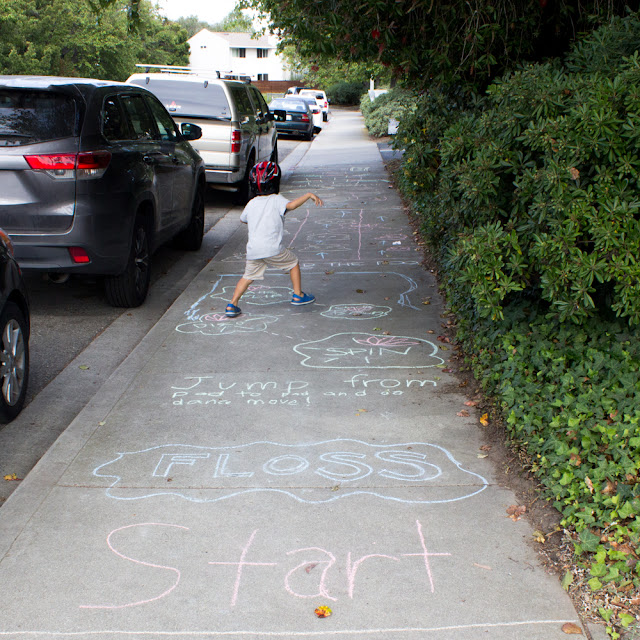
Sidewalk Chalk Obstacle Course Ideas

Hi friends! How are you doing during the Quarantine? Are you looking for ways to get the kids out of the house? My boys miss seeing their friends, so we found a fun way to entertain ourselves (and possibly the other kids in the neighborhood too!) Last week, we pulled out our trusty sidewalk chalk and designed an easy chalk obstacle course. The boys enjoyed thinking up different activities to include, so I'm sharing it here today! This would be a super fun artsy outdoor activity for kids of all ages.

How to Design an Easy Sidewalk Chalk Obstacle Course with Kids


How to Design an Easy Sidewalk Chalk Obstacle Course with Kids- Fun Outdoor Quarantine Activity


Friday, March 13, 2015

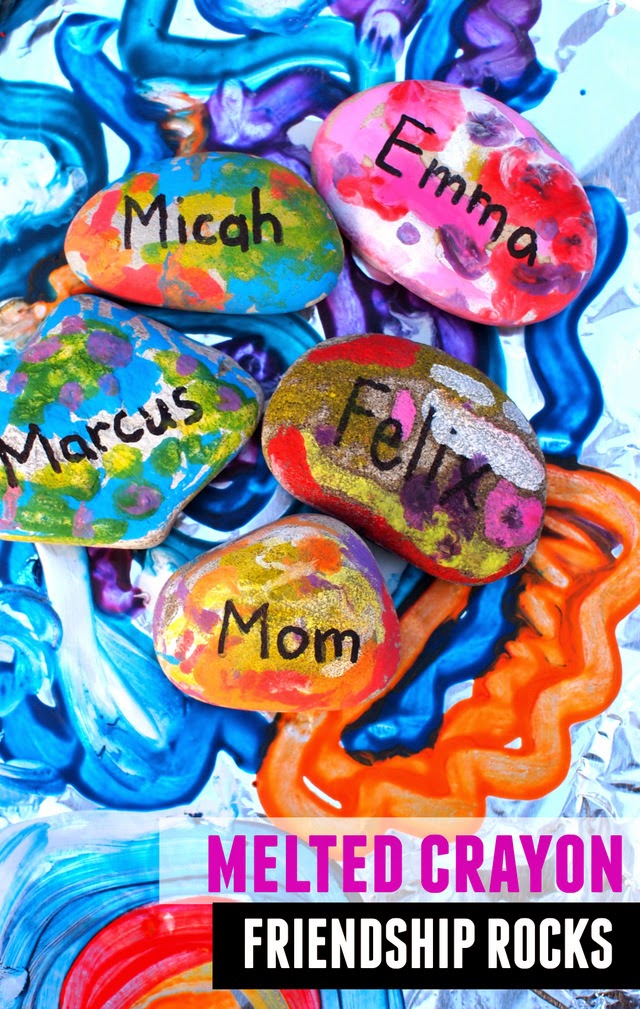
The Artful Year and Melted Crayon Friendship Rocks

Chuck doesn't always enjoy making things with me.  (What? Yup.)  A lot of days he would just rather that we read books or race airplanes together.   And I'm really trying harder to let go and follow his lead.  But I love crafting.  So I keep putting out those invitations in hopes that he'll join me.  And on those special occasions when he's interested and involved in a craft... boy oh boy... those days are really magic.


The Artful Year
This post contains affiliate links.  Thank you for your support!

We recently received a copy of Jean Van't Hul's The Artful Year to review.  Jean is an artist, mom of 2, and author of the amazing kids' art blog Artful Parent.  (She's also the author of another great kids' art book The Artful Parent. ) 

In her newest book, Jean shares a whopping 175 family-friendly crafts, and recipes!  The photos are dreamy and beautiful; the crafts span through all the seasons and holidays of the year; and the recipes look really, really yummy.  I love this book.  But those things aren't what I love the most about her book.

What I love the most about the book is her voice.  In the beginning she shares this beautiful quote-

"We need to be more intentional than ever as we carve out quality time together, celebrate in meaningful ways, build traditions and memories and create stronger families.  It's not about doing more.  It's about making choices, fostering creativity, and building family connection."  

Wow.  That just hit so close to home.  I don't want to just make things with Chuck.  Things eventually break down, get lost, or tossed away.  I want to foster creativity.  I want to build our relationship.  I want to make lasting memories.

Ok.  This was a super long intro, I know. But I just had to get that all out there.  Because it really is a beautiful, beautiful book.

Here's the craft that we chose to try out first from the book:

Melted Crayon Friendship Rocks


Melted Crayon Friendship Rocks- A craft inspired by The Artful Year


Wednesday, May 8, 2013

Homemade watercolor paints

Yesterday it rained a whooole lot.

Luckily, my homemade watercolor paints finally set (after two days of waiting), so Chuck and I spent the morning painting.

Overall, the directions I used were pretty good, but I made two changes:
1.  I only used half of the materials recommended... and I still had plenty of water color paints.
2.  I added drops of food coloring to each of the ice cube trays.  (Looking back, maybe I should have compensated for the extra liquid by adding a bit more cornstarch to shorten my drying time.)


As you can see, Chuck enjoyed painting.  He also enjoyed repeatedly dipping the Q-tips into the water... and sneakily trying to drink the dirty water.  (Ick.)  I probably had more fun painting than he did because I was so delighted that the paints actually worked.

Here are our two joint paintings:

The paints weren't chalky when they dried.  We'll probably cut up the cards to make a birthday card for a niece.  Right now the leftover paints are sitting in the fridge.  We'll keep using them throughout the week because I'm curious how long they'll last.    

UPDATE:  5/24- I pulled the paints out of the fridge yesterday and they were rock hard.  I was worried, but after I didn't need to be.  After adding a couple drops of water into each well, they became paints again.  The colors didn't seem as vibrant as before, so Chuck and I ditched the q-tips and just used our fingers to paint. We got some lovely results.  Now they're back in the fridge again, and I'll pull them out in another couple of weeks to see if they last.

Have you ever tried to make homemade watercolors before?

Tuesday, May 31, 2016

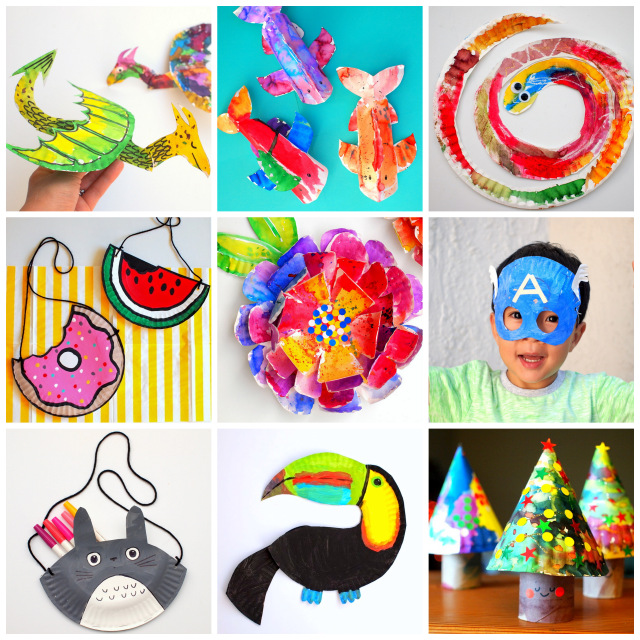
30+ Awesomely Unique and Fun Paper Plate Crafts for Kids!

It's no secret that I LOVE paper plate crafts!   Wanna make my heart sing?  Hand me a bunch of blank paper plates.  Seriously.  No joke. (Ok- Crafter confessional here- I've even snuck interesting paper plates out of parties before to craft with... shhhh... )

If you follow me on Instagram you'll see that I'm this week's #kidscrafts101 judge! Yup!  Every week there's a fun challenge to craft with a different material.  This week's theme is... drum roll please... paper plates! I know all of you and your kids have such creative ideas, so I'd love to see your ideas on IG!  (Just use the #kidscrafts101 so I can see your great ideas!)

And in honor of this week's theme, I thought I'd also share my absolute favorite paper plate crafts!

30+ Super Fun and Unique Paper Plate Crafts for Kids!


30+ Super Fun and Unique Paper plate Crafts for Kids
This post contains affiliate links.  This means I make a teeny tiny bit of money from any purchases made through the Amazon links below.   Thank you for your support! For my full disclosure, click here.


Wednesday, September 25, 2019

Fall Forest Paper Chains

So... apparently, I have a paper chain obsession. I know, I know. I just posted these sweet Halloween paper chains earlier...but I had to share this adorable bear and fox version too. They're SOOOO cute and such a perfect fall craft to do with the kiddos.

So if you're looking for an adorable and easy fall craft, THIS IS IT.

Let's make some...

Fall Forrest Paper Chains!

fun fall bear and fox paper chains- such an adorable paper craft to do with the kids to decorate your home or classroom


Monday, November 3, 2014

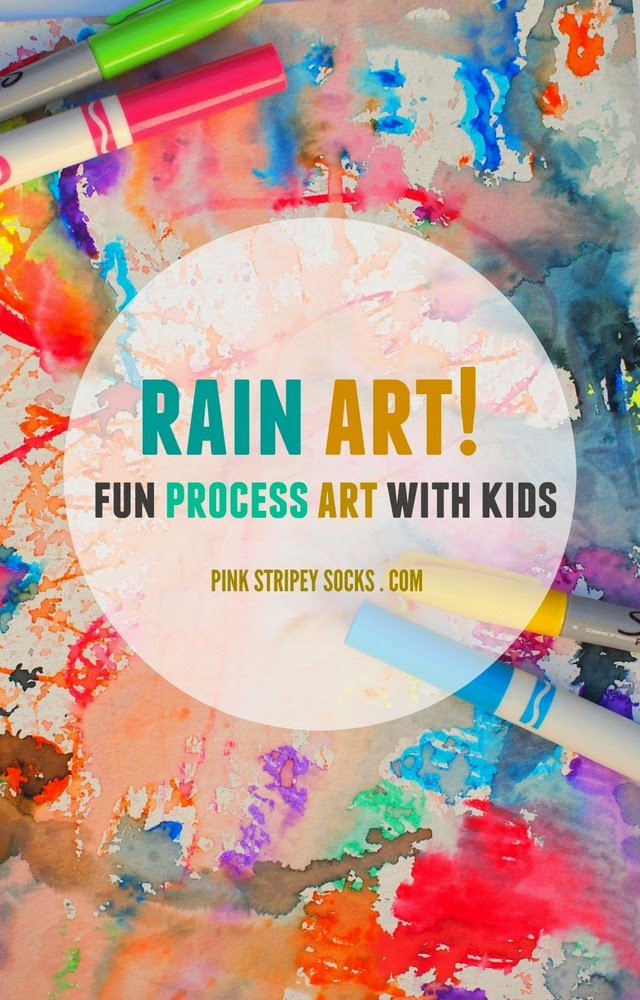
Rainy Day Process Art

We got rain!  We got rain!  Whoopie!  This was a pretty big deal here in SoCal because we've been in the middle of a drought for a looooong time. Since I love trying easy art projects with Chuck, we took advantage of the rain and collaborated with Mother Nature to create some beautiful rainy day process art.

Let's Make Rainy Day Process Art!

Rain Art:  Fun Rainy Day Process Art with Kids

This post contains affiliate links.  Thank you for your support!

This was a really fun and easy art project.  I really enjoyed it because we didn't concern ourselves so much with the final product.  Instead, we just really enjoyed making art together and then watching Mother Nature add her bit too.

Here's how we made our rainy day process art!


Friday, January 16, 2015

Send High Fives to your Valentine!

Are you looking for a unique and simple idea for a Valentine's day card?  Or, are you looking for a quick way to send someone some encouragement?  How about sending them some high fives?

Funny Valentine's Day Craft 3:  Send someone high fives!


Make High five valentines for someone


This is the 3rd installment in my funny Valentine's Day craft series.  (To see the other ideas, check out my "Valentine, you rock!" Rocks and "You set my heart aflutter" Butterfly Notebooks.)

Lately Chuck hasn't really wanted to do any crafting.  But I loooove making things, so I've been trying hard to figure out other ways we can craft together.  I've noticed that while he may not like painting or drawing, he does seem to like using technology.  Light bulb moment!  So instead of usign paint or plaster of paris to make traditional hand print crafts, we used technology!


Wednesday, February 26, 2020

Cupcake Liner Dumpling Craft (and our 10+ favorite Asian Food Picture Books!)

A couple of weeks ago, our family celebrated New Year (and made a ton of Chinese New Year Crafts.) Even though the celebrations are over, I've still been in the mood to eat lots of yummy Asian food. The boys and I recently tried making dumplings (using this super easy recipe). Today I thought it would be fun to put together a fun list of Asian food inspired picture books + share a cute cupcake liner dumpling craft. Enjoy!

10+ Awesome Asian Food Inspired Picture Books AND a Cupcake Liner Dumpling Craft


10+ Awesome Asian Food Inspired Picture books and directions for a cupcake liner dumpling preschool craft


This post contains Amazon affiliate links. This means I make a tiny bit of grocery money from each purchase made at no cost to you. Thank you for your support! For my full disclosure policy, click here.


Tuesday, May 6, 2014

Painted Twig Wall Hanging


Painted Twig Wall Art 


Chuck's still too young to completely understand the idea of Mother's Day.  But if he were going to give me a handmade gift this Sunday, I'd venture to say that this Painted Twig Wall Hanging would probably be it.  My little guy has an eye for twigs.  Whenever we go for a walk outside, we inevitably bring back a twig, or a rock, or a leaf (luckily, he hasn't asked to bring back any bugs yet.  I might have to put my foot down there.)  Our nature collection tends to grow pretty quickly.  That's why I really like this twig wall art.  It's a beautiful way to remember walks outside, showcase his collection, and do some fun mommy-son crafting too.

Thursday, August 8, 2019

Balancing + Rocking Origami Tutorial

Did you enjoy playing with those balancing bird toys (aff link) as a kid? Well, if you did, today's origami project will be highly satisfying. We're balancing a piece of paper on our hands... using the power of origami! Fold and then place your creation on your finger. It will balance, rock back and forth, and even turn... without falling!

How to Fold Balancing, Rocking, and Turning Origami!


easy instructions showing how to fold balancing origami for kids

This post contains affiliate links.  This means I make a small bit of money for any purchases made through the links at no additional cost to you.  Thank you for your support.  For my full disclosure policy, click here.


Friday, May 20, 2016

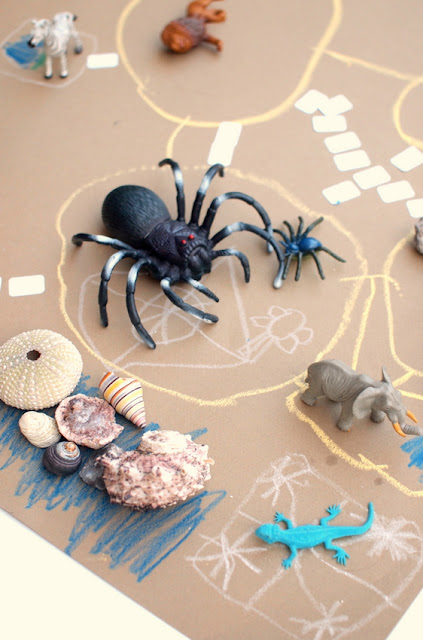
Let's design a zoo! (And our 15+ favorite zoo books!)

Are you looking for an easy, open-ended prompt to encourage children's play and creativity?  How about a building challenge?  We've designed and built playdough and rock houses , cardboard bridgesboats from recycled materials, and super hero hideouts.  Today, we're designing and building a zoo!

Designing a Zoo with Kids!


Designing a zoo with kids- Great STEAM project for kids of all ages, plus our 15+ favorite zoo books


This post contains affiliate links.  Thank you for your support!  For my full disclosure policy, click here.

Thursday, October 23, 2014

Halloween Art: No Carve Colorful Pumpkins

Looking for an easy way to colorfully decorate your Halloween pumpkins this year?  Then this no-carve method is right up your alley!  Here's one great way to make some fabulous, colorful Halloween art with the kids!

Halloween Art:  No Carve Colorful Pumpkins!

Halloween Art:  No Carve, Colorful Pumpkins, rocks, and pine cones!
This post contains affiliate links.  Thank you for your support!


Thursday, February 7, 2013

DIY Eggshell Sidewalk Chalk

Yes. You read the title correctly.  Last week I tried making sidewalk chalk out of eggshells... and it worked!  Here's the proof:

DIY Eggshell Sidewalk Chalk


how to make sidewalk chalk with eggshells


This post contains affiliate links.  Thank you for your support! 


Tuesday, June 12, 2018

Play-dough and Cardboard Mazes

Hello friends!  I'm currently on the lookout for easy (and not too messy) ways to keep the kids entertained.  Today I'm sharing a fun preschool STEAM activity that kept both my boys entertained.  We've made outdoor rock mazesedible candy mazes, and Lego mazes.  Today we're keeping the theme going with these super easy play-dough mazes!

Let's Make Play-Dough Mazes!


How to Make Play Dough and Cardboard Mazes- Such a great STEAM activity for kids of all ages (preschool + elementary!)


Note:  This post contains affiliate links.  This means I make a small bit of change when you purchase items through the links.  Thank you for your support and the grocery money! For my full disclosure policy, click here.


Wednesday, January 30, 2013

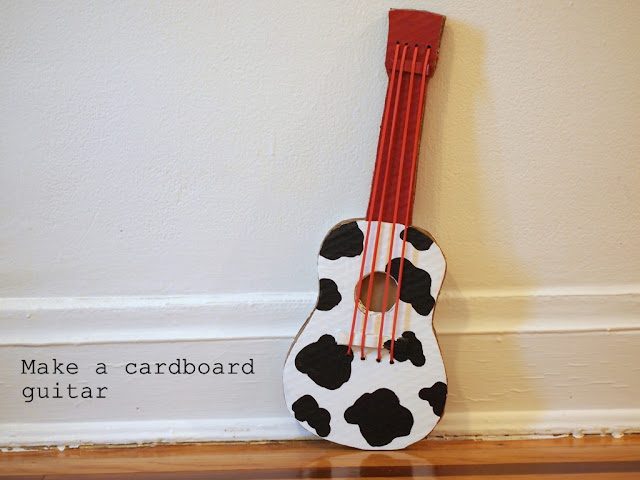
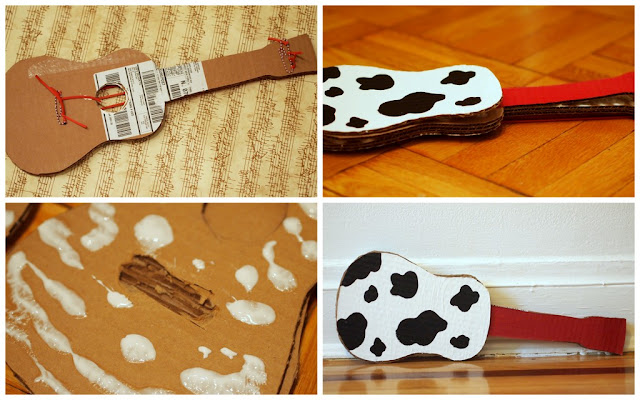
Make a cardboard guitar

Whenever I play the guitar, Baby Chuck seems keen to join in.  He pulls on strings, turns the tuning keys, and inevitably drops picks (and possibly raisins- ick) into the body.  I figured he'd like his own guitar, so I made him this black and white cutie.  It's the size of a ukulele.

(Why cow print?  Well, whenever we ask him "What does a cow say?" he responds "Mmm mmm."  Then we always cheer because that's close enough for us.)

Want to make your own guitar?  Read on!

DIY Cardboard KidsGuitar

how to make a cardboard guitar for kids

(Disclaimer:  I got the template and directions from Make It and Love It.  They wrote a really comprehensive set of directions packed full of lovely photos.  Check out their post for detailed directions and cute kid pics.  I'm posting up this set of directions because I did things slightly differently.)

(Disclaimer 2:  This project takes a long time.  Crapting helps me to relax, so I didn't mind.)

Materials Needed to Make a DIY Kids Guitar

- Already cut out and assembled guitar template (follow her directions on how to resize, cut, and assemble pieces)
- Exacto knife
- Aleene's tacky glue (you'll need something stronger than Elmer's, hot glue didn't quite work for me)
- Scissors
- Nice cardboard (no bends or stains) <-- crap
- Ruler
- Drill
- Paint, paint brushes, Mod Podge
- 4 jumbo 7 inch rubber bands (purchased at Staples)
- 2 paperclips (I used jumbo sized ones, but I think 1 inch ones would work too)
- heavy books

Directions to Make Your Own DIY Cardboard Guitar:

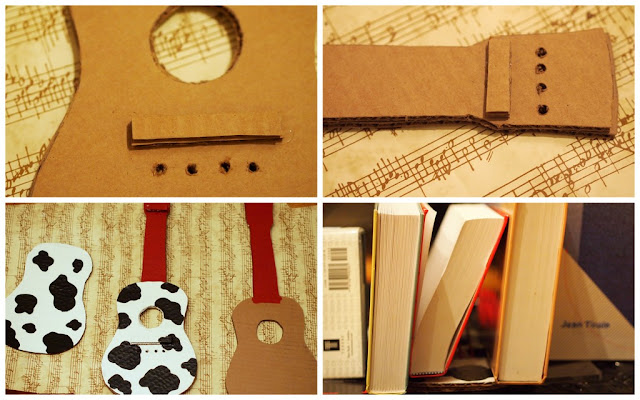
1.  Trace and cut out 4 guitar pieces out of your cardboard:

  • 3 full length guitar cutouts (with holes cut out of the center of them)
  • 1 body only guitar cutout (cut your template at the dotted line and just trace out the bottom portion)


2.  Glue together two of your full length guitar pieces.  Now you have a nice sturdy  base.  (You don't want your rubber bands to bend the cardboard.)

3. Cut out 4 rectangles out of cardboard:

  • 2 larger rectangles- approximately 3 inches x 1/4 inch
  • 2 smaller rectangles- approximately 1 3/4 inches x 1/4 inch

4.  Glue your two large rectangles, one on top of each other, about 1 inch below the cutout circles on your previously glued together guitar cutouts.  Glue your two smaller rectangles, one on top of another, around the neck of your previously glued together guitar pieces.


cut out cardboard guitar shapes

5.  Now it's drilling time. (Aka- Time to call hubby because drills totally freak me out.)  Drill four holes approximately 1/3 inch below your larger rectangles and about 1/2 inch above your smaller rectangles.  Honestly, the measurements aren't that important.  You can just eyeball it.  Just make sure that (a) your holes are evenly spaced and (b) four rubber bands could potentially be strung from one set of holes to the other.  Oh yeah, when drilling the holes on the head of the guitar, try not to place the end holes too close to the edge of the cardboard.  Otherwise your rubber band will periodically slide off...

6.  Now it's painting time (Aka- Let's get funky and creative!)

  • Completely paint one side of the smaller guitar body  (I painted it cow print)
  • Completely paint one side of your glued together guitar cutouts.  (I painted it red and cow print.) 
  • Paint the neck of your third guitar cutout (That's the only part that will be showing in your final product
Once your paint dries, apply Mod Podge to protect your lovely work.  Let Mod Podge dry.

7.  You may notice that your cardboard starts bending.  This isn't good because it will prevent your cardboard pieces from properly sticking together.  Don't worry!  Just use some heavy books to flatten your cardboard out.  (Sadly, my two previously glued together guitar pieces were coming undone.  I reattached them by squeezing in more glue between the crevices.)  Let glue dry.


drill, paint, and complete your DIY cardboard guitar toy for kids

8.  Now let's string the guitar!  Cut your four jumbo sized rubber bands to make four long strands.  Double knot each rubber band to a paperclip.  Then, string your four strands through the holes in the neck of the guitar.  Pull to make sure that your paperclip sits flush against the cardboard.  Pull those strands down one by one through the holes in the body of your guitar.  Double knot the strands to another paperclip.  (I had some problems tying my middle rubber bands to the paper clip, so I just double knotted them to each other.)  Trim all your excess rubber band bits.

9.  Make four small indentations in your cardboard rectangle bits (on the front of the guitar) to keep rubber bands in place.

10.  What? Aren't we done yet?  No way. Crapting is not for the weary. Time to cover up the ugly rubber band ends and paper clips.  Spread a thick layer of glue on the back of your newly strung guitar and glue on your third full guitar piece.  Make sure the painted neck is shown.  Apply pressure to make sure the pieces stick together.  Then, glue on your small guitar body on top of that.  Again, apply pressure.

11.  Note:  I found that my pieces wouldn't stay glued together because my jumbo paper clips were pretty thick.  If you find yourself with this problem too, you may need to cut out two "wells" in your cardboard so that the paperclips have a nice place to rest.  Then your cardboard pieces should sit nicely together.

12.  Enjoy and rock out.

how to make a DIY cardboard guitar for kids


And here are our two new cardboard instruments:
(Click here for directions to make a cardboard rattle-drum.)
DIY cardboard instruments kids craft

Phew.  I'm exhausted.  Time for bed.  Goodnight!

Thursday, July 11, 2013

Two-ingredient homemade ice-cream

What can I say?  The title pretty much says it all.

A couple of days ago, I found Kevin and Amanda's recipe for homemade ice-cream. It immediately caught my eye because it didn't require an ice-cream machine or rock salt.  Plus, you only needed two ingredients to make the basic vanilla recipe.

Say what?  You must be kidding.

Nope.  They were serious.... ice-cream serious.

So of course I had to try it out for myself.  The results?  Take a look below:


It was yummy and had a light texture and super creamy taste.

Chuck ab-so-lutely loved it.

We tried their cinnamon bun ice-cream recipe.  I've put the recipe below, but you can find other yummy flavors on their blog like Nutella peanut butter chip, Krispy cream, and hazelnut mocha fudge swirl.  Yum, yum, and double yum.

Cinnamon Bun Ice-cream Recipe (from Kevin and Amanda):

Ingredients:
2 C heavy cream
1 14 oz can of sweetened condensed milk
3 T of melted butter
1/2 tsp ground cinnamon
1/2 tsp vanilla extract

Directions:
1.  Whip heavy cream into stiff peaks.
2.  Thoroughly whisk the butter, cinnamon, vanilla, and condensed milk together in a very large bowl.
3.  Fold the whip cream into your butter/cinnamon/vanilla/condensed milk mixture.
4.  Pour everything into a 2-qt tupperware container.  Cover and freeze until firm.  (I waited overnight.)

Then, enjoy (and feel like a cool foodie because you just made ice-cream from scratch).

Have a great weekend.  See you next week!

Sunday, June 17, 2012

Happy father's day


Dear Dads of the world,

You rock.  

Love,
me


Photos via Tito Ric and Tita Tina

Tuesday, September 10, 2013

Make Homemade Sidewalk Chalk

I'd been meaning to try my hand at making homemade sidewalk chalk out of plaster of paris for awhile now.  But I never got up the nerve to try it out until this past weekend.   As I stared at my craft cabinet filled with dozens of empty toilet paper rolls, I felt the crafting itch take over.

Armed with my Michaels coupons, I took the plunge and bought myself some plaster of paris.  Then, a day later, Chuck and I made these:

Like the two colors?  Me too.  Now we get both pink and blue all in one piece of chalk.  Whoa.  Mind blowing.