Friday, January 31, 2014

Two Heart themed Valentine's Crafts- Heart Glasses and Painted Heart Rocks

Note:  This post is sponsored by Plaid, but the opinions are 100% mine.

Did you know that the heart is my favorite shape?  (Is it weird that I have a favorite shape?)  I know that triangles and hexagons are super trendy right now, but I'm an old-fashioned romantic.  Hearts will always have a special place in my... well heart.  (Tee hee hee.)  So when Plaid sent me a box of Apple Barrel Craft Paint to create a Valentine's Day School Craft, I knew that it had to be heart related. 


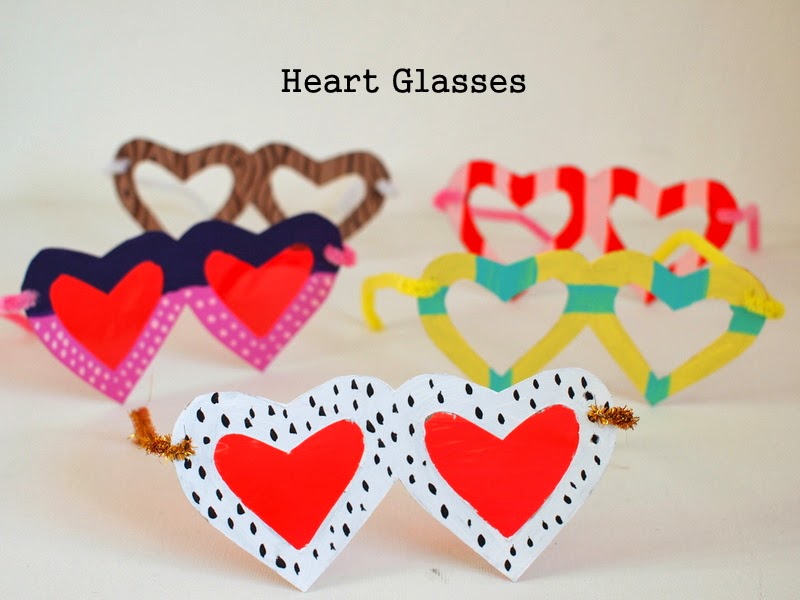
So I came up with these Cereal box Heart Glasses and Heart Painted Rocks.  Both crafts are super colorful and fun to make.   

Cereal box Heart Glasses


DIY Heart Shaped Glasses


Keep reading to see directions and template!

Thursday, January 30, 2014

Why I'm thankful for all of my Craftgawker Rejections

This is the last week of our #RiskRejection series.  (New to the series?  About 20 or so bloggers have been bravely taking risks and sharing about them every Thursday on their blogs.)

So far, I've risked by
  • sharing that I'd like a career as a craft blogger 
  • sharing that I was overwhelmed by what it took to become a professional craft blogger
  • taking Chuck out sans diaper for the first time

This past week I've been reflecting about rejection quite a bit.  Specifically, I was thinking about being rejected by Craftgawker.   Have you heard about this site?  It's a lovely, curated compilation of crafts.  Crafters and artists submit their best project photos hoping that the site will showcase their work and send readers to their sites.  Craftgawker is EXTREMELY PICKY about the photos they accept.  Only bright and beautiful photos are showcased. 

My first submission to the site was this fortune cookie advent calendar photo...


It  was rejected and I was crushed.  I may have cried.... I'm not sure, but I definitely remember eating carbs to cheer myself up.  

Yup, I was really hurt.  I'd like to say that all of my following submissions were accepted... but I'd be lying.  Out of my approximately 80 submissions, only about 40 were accepted.  Yup, I have a 50% acceptance rate.  Pretty poor right?  But, you know what? 

I'm really REALLY thankful for those rejections.  They pushed me to take better photos.

You see, every time I received a rejection, I also received a reason for the rejection.  Maybe my lighting was too dull, or my composition was too tight, or I had white balance issues. 

When I first started blogging, I would have had no idea what they were talking about.  I took photos like a cave person.  "Ooh, ooh.  Me click button.  Magic picture on screen.  Me got whole face in picture and eyes are open.  Me likey."


Now I'm able to decipher those terms.  I look at white balance and composition.  I'm learning how to take brighter photos at night time.

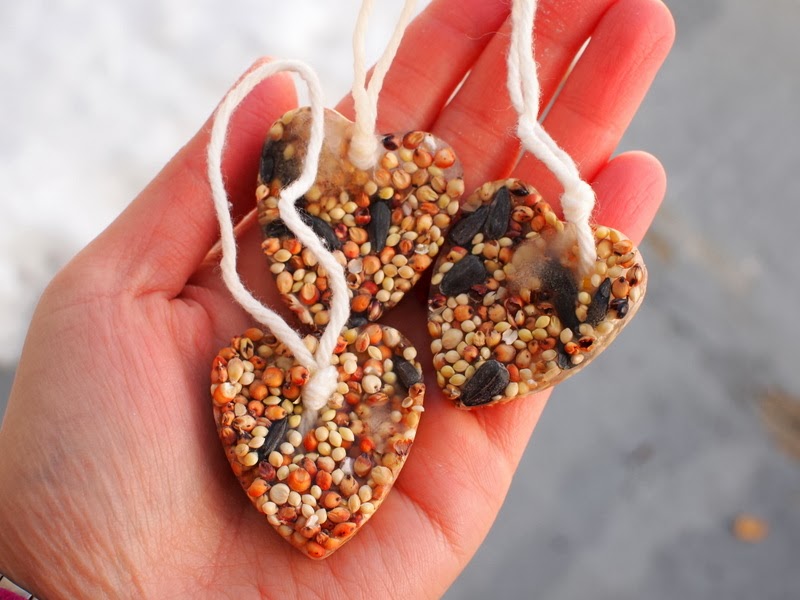
Here's a photo of my latest submission (Ice Bird Feeder Craf):


Can you see the difference between these two photographs?  I can.

That's why I'm really REALLY thankful for all my Craftgawker rejections.  Rejection stings, no question about that.  But each one pushes me to become a better photographer and a more resilient and determined blogger.

(By the way, if you've ever felt frustrated by Craftgawker, check out this post  from Dream a Little Bigger.  Allison offers helpful and easy-to-follow insight on how to improve your photos.)

 So even though our #RiskRejection month is over, let's continue to be brave and risk together, dear friends!

Wednesday, January 29, 2014

Two Bird Feeder Crafts: Toilet Paper Roll Feeders and Ice Feeders

Earlier this week my posts focused on sending some lovin' to the special people in your life (Click herehere and here.)  Well, that's all well and good.  But what about sending love to others?  How about the birds?  With the freezing cold weather outside, our feathered friends are bound to need some loving too.  So why not try out these two bird feeder crafts?  Chuck and I made some toilet paper roll bird feeders and some heart shaped ice feeders.  Both were really easy to make and currently dangling on a tree outside our building.

Here's an up-close shot of our Toilet Paper Roll Feeder:
Toilet Roll Bird Feeder Craft

To see how I made the toilet paper roll feeders and ice feeders, keep reading!

Tuesday, January 28, 2014

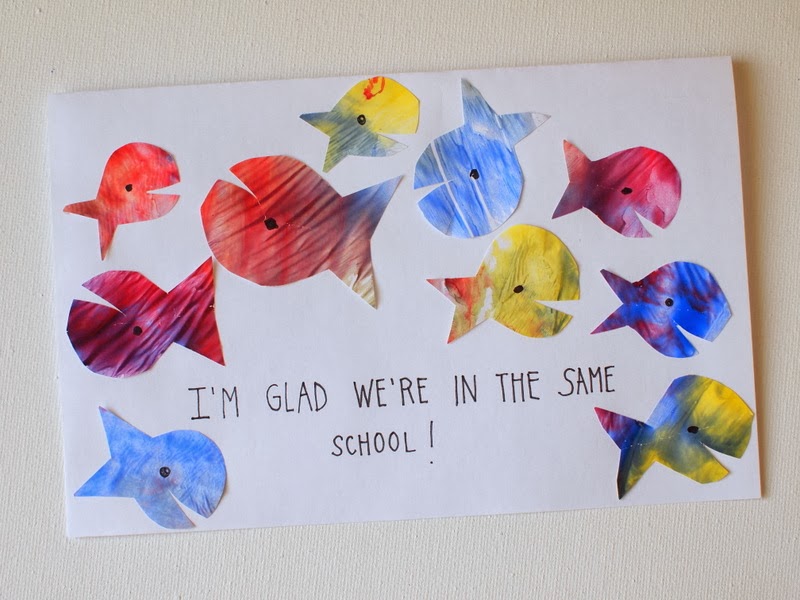
Toddler Painted Valentine's Day Cards (for a Teacher and Parent)

(Hubby- Please don't read this post because the bottom card is for you.)

Illness + freezing cold temperatures = A LOT of time spent cooped up in a two-bedroom apartment

To help pass the time, Chuck and I have been doing tons of arts and crafts projects.  Luckily, he's got a new interest in painting and gluing. (Yes!  My son finally shows some interest in crafting with mommy!  Woo hoo!) Here are two Valentine's Day cards that we made together for Chuck's Sunday School teachers and hubby.

(So hubby, once again, do NOT read the bottom of this post...)

1.  Painted Fish Valentine's Day Card


Keep reading to see how we made this card (and to see hubby's card....shhh... it's a surprise)...

Monday, January 27, 2014

DIY Valentine's Day Gifts: Candy, Coffee, and Tea

When hubby and I first started dating, we were grad students and super strapped for cash.  For our first Valentine's day, I gave hubby Hershey Kisses with little slips of paper stuck to their bottoms.  Each slip of paper contained a special memory that we had shared together or was simply blank (symbolizing memories that we were still going to make.)

Right now we're about to celebrate our ninth Valentine's day together... and for some reason I got thinking about that first gift.  It was easy to make and didn't cost very much.  But, it was really special for both of us.  Feeling inspired by that first Valentine's gift nine years ago, here are three really easy, affordable, and sweet DIY gifts to make for your loved ones.


To see the details for each one, keep reading!

Sunday, January 26, 2014

DIY Valentine's Day Gift: Hair Tie Lollipop

With Valentine's Day right around the corner,  I thought it would fun to make some easy and cute DIY Valentine's Day Gifts.  Here's one idea that I whipped up last night.  It's a hair tie lollipop! 


Isn't it colorful and cute?  I bet it would be perfect for any little (or big) gal in your life.  Keep reading to see how I made it!

Friday, January 24, 2014

My Scarlet Letter and Taking hazy plastic bag photos


A couple of days ago, Chuck and I went to Target and I was super nervous. (Like armpit sweat nervous.) For the past week and a half, we had a breakthrough in potty training.  He was telling me when he needed to use the bathroom.  (Finally!  Yes!  Insert choir of angels.)  But, I was still putting him in pullups when we went out.  I was afraid that he would have an accident outside.  


But since we're on week 3 of Amy's #RiskRejection challenge (where bloggers embrace risk even if it involves getting rejected), I felt emboldened.  If other ladies could risk big and start businesses and non-profits, apply to become foster parents, write books, and move to other states and countries, then certainly Chuck could wear underwear outside.   

So Chuck and I both put on our big kid pants and went to Target sans pullups.  In the beginning, everything seemed was fine.  I kept reminding him to let me know when he needed to potty and he said that he would. 


But then we entered the toy section... that terrible black hole in the store where logic and reason escape and wails and tears (Mom's silent ones and children's vocal ones) are heard in every aisle.  We got to the Cars section and Chuck hopped out, super excited.

And then he peed.  


Oof.

It was just a tiny accident, but I still felt so bad.  We cleaned up in the bathroom and then I told the workers.  I expected to see a smirk, a roll of the eyes, a shaking of the head, or the accusation of "Bad Mommy!  Now you have to wear the scarlet P!"  But none of this happened.

They were actually... nice about the whole thing.  Within a couple of minutes everything was cleaned up and no one was the wiser.

I was hesitant to share this risk as part of my #RiskRejection Challenge because I wasn't moving mountains.  My risk was small.  But maybe that's ok?  Maybe taking small risks like this one will still mold me to be a better, braver person and mom.


Psst- If you want to see how I took this hazy photo, keep on reading!

Wednesday, January 22, 2014

Indoor Snow Painting (Make Rainbow snow!)

How are you enjoying this snowy weather?  Since Chuck was sick, we stayed inside.  But, the snow was just too tempting, so I let him play with it inside the apartment.  Currently there are so many blogs showcasing indoor snow painting, but this one from Housing a Forest really inspired me to do this activity.


Indoor snow painting activity 

Indoor snow painting activity setup

Keep reading to see our artwork!

Tuesday, January 21, 2014

DIY: 5 Ways to update your old beanie

Hubby's away and Chuck and I are currently stuck at home, sick.  Boo.  We're watching the lovely fluffy flakes falling outside and I'm soooo tempted to bundle him up to play outside.  But, I'm holding myself back until he gets better. 

(Hrmm... but maybe I could bring some snow inside for us to play with.... thanks Lisa for that idea!)

Anyway, here's a short cold weather post in honor of the snow.

Do you have an old beanie just lying around? Maybe you never really wear it, but you just can't bring yourself to give it away just in case you need it one day?  Well, here are five super easy ways to update your drab head wear.   And bonus!  None of these are permanent changes, so you could potentially wear all five looks this winter! 

  1. Pom Pom Beanie

This update was my favorite.  Chuck is beginning to recognize Micky Mouse.  So when I saw Eugenia Kim's Pom pom beanie (for $185- holy empty wallet!), I knew that I had to make my own cheapie version.  I followed this pom pom tutorial  from Crafted.  Then, I sewed the two semi-identical (eek!) pom poms onto the corners of my beanie.  Bam.  Instant mousekateer cool.

And here I am modelling the four other updates....
2.  "Hi" Beanie:  I cut out the letters "H" and "i" from felt.  Then, I just sewed them onto the front of the beanie for some friendly headwear.  Make sure you sew the letters closer together because they will stretch apart when you wear the hat.

3.  Polka dot Pom Pom Beanie:  I bought a pack of mini pom poms from the craft store and then sewed them onto the hat.  To help with placement, I marked the hat with chalk first so I would know where to sew.

4.  Spiked Beanie:  I poked a couple of screwback cone spikes through the front of the beanie.  I thought the hat made me look like a punky Statue of Liberty. 

5.  Sparkly heart Beanie:  I cut out a heart shape from felt.  Then, I hot glued some rhinestones onto the heart.  Then, I sewed the heart back onto the hat.   Wouldn't this version be nice for Valentine's Day?  

 Alright that's it.  Time to take a nap. Stay warm and well, friends!

Monday, January 20, 2014

Two Chinese New Year Dragon Crafts


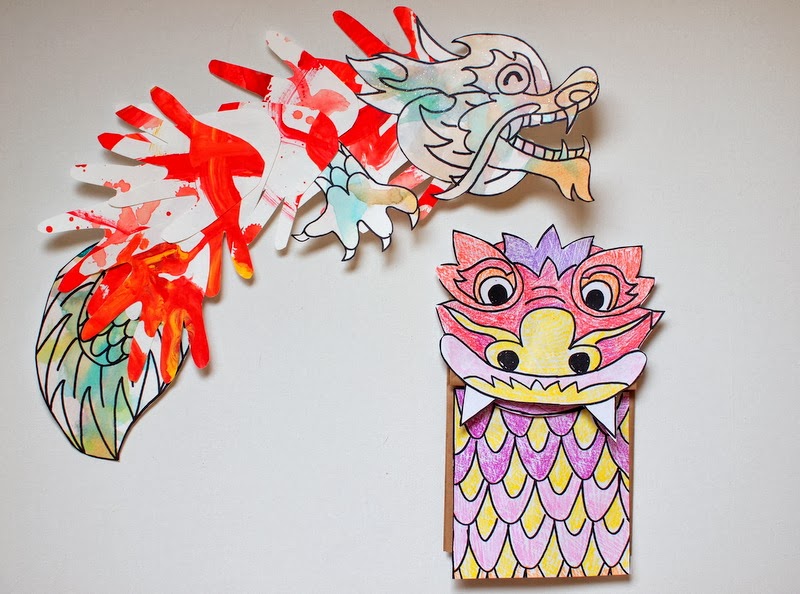
Ready for a fun Chinese New Year Craft?  Chinese New Year is one of those really fun holidays that I enjoyed celebrating as a kid.  Yummy food, wearing new clothes, red envelopes filled with money, and watching cool dragon and lion dancing?  Come on, what's not to love?  Since the holiday is just around the corner, I showed Chuck some lion dancing videos (Youtube to the rescue!) and then thought it'd be fun if we did some dragon crafts together:

Two Chinese New Year Dragon Crafts

Chinese New Year Dragon Crafts


Little background about me- Growing up I always felt like a "twinkie."  Yellow on the outside, white on the inside.  You see, I looked Asian, but I didn't always feel that way.  Now that Chuck's getting a bit older, hubby and I are trying to figure out how two twinkies like us pass down their cultural traditions. (Ehh... it's a work in progress....)

This craft is one way that we're trying to pass down our tradition.  And, in the interest of full disclosure, Chuck really enjoyed making the handprint dragon.... but he wasn't too keen on coloring my paper bag dragon pieces.  However, once I colored and glued everything down for him, he enjoyed playing with it like a puppet.

So, do you wanna see how we made these two dragons?  (I've got templates too!  Ooh la la!)  Keep on reading!

(And if you like this craft, definitely check out this dancing Chinese Dragon Puppet.  It actually dances and is made from recycled materials!)


Sunday, January 19, 2014

Make a Valentine's Day "Arrow through the Head" Headband

Oh no!  Chuck's been shot...
(With Cupid's arrow.. teee hee hee)

Valentine's Day "Arrow through the Head" Headband


DIY "Arrow through the head" Headband

Looking for a cute Valentine's Day accessory that is affordable, easy-to-make, kid friendly, and boy friendly?  Well, you could always try making this "Arrow through the head" headband...

Friday, January 17, 2014

I took the risk... so now what?

Last Thursday, I shared with you my secret, well now not-so-secret dream to make a career as a craft blogger.  Today I just wanted to briefly share what's been happening since then...  

Ehh... a lot of hard work.
End of post.

Image by Marc Johns, found here
What, you're still here?  Ok, ok, maybe I was kind of vague.

Wednesday, January 15, 2014

Make a Cardboard Bridge for Trains and Cars

We bought an Ikea train set awhile back and Chuck loves it.  The only problem is that our poor Thomas train is too big and doesn't fit under the train set's tunnel.  So I poked through my trusty cardboard stash and made him a cardboard mountain bridge.  

Cardboard Bridge for Trains and Cars

Aha!  Problem solved.
cardboard bridge for trains and cars

Now all the trains can fit underneath the mountain while his cars drive over the train track.  Yay! 

Wanna make a bridge too?  Well then keep on reading! 

Make milk jug rings

Lookie lookie!  


Me:  Hey friend!  A couple of nights ago, I made these three rings out of milk jugs.

You:  No way!  Come on, now.  I don't believe you.

Me:  Oh yes.  Believe me, friend.  These crapty cool rings were inspired by La Factoria Plastica's cardboard play rings and Lana Red's shrinky dink rings.

You:  Oh yes.  I remember seeing those on your Pinterest Board.  Well dagum!  How did you make them?

Me:  Keep reading to find out!

Monday, January 13, 2014

6 ways to entertain a toddler at home

Looking for some easy ways to entertain your toddler in the winter?

So... how about that polar votex?  Boy, oh boy, that was some crazy weather.  With the snow, ice, and freezing cold winds, Chuck and I hunkered down at home. 


After a couple of hours of reading the same books over and over again, and playing with the same toys over and over again, and listening to the soundtrack of "Planes" for the trillionth time, I finally cracked.

Redrum, redrum?

Thankfully, we didn't make it to that point.  But, we definitely bounced off the walls a bit.  To maintain some sense of sanity, we had to do something to make the time at home more enjoyable.  So here are a couple of fun activities that kept us sane and smiling...

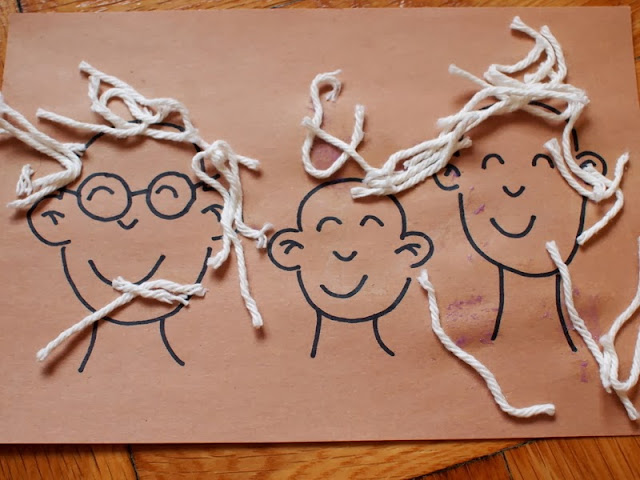
1.  Yarn family portrait craft

yarn hair family portrait craft
Chuck loves using scissors and the glue sticks, so this activity was a hit.  First he helped me cut tons of short, white yarn strands.  Then, I doodled a bald family on a piece of paper.  Then, he helped me glue hair onto all of their heads.  The result is this cute and funny family portrait. 

Keep reading to see more ways we entertained ourselves at home...

Sunday, January 12, 2014

Reveal hidden lampshade silhouettes


Before I start today's post, I just wanted to say thank you for all the kind words, support, and love you sent my way after my last post.  *Gulp*  Sharing my dream was a bit REALLY scary.  I kept waiting for the rotten fruit and pies to be thrown, but nothing came by.  So, thank you.

Ok!  Now onto today's post. We own two lamps that are covered with ho-hum white shades.  I kept wanting to do something to the lamps to give them a bit more pizazz, but couldn't settle on a permanent solution.  Then, I saw this nifty decorating idea at How About Orange, and had to try it out. 

Look!  When the light is off, you just see a white shade.  But when the light turns on, a secret silhouette is revealed! 

 Magic?  Nope.  Keep reading to see how it was done...

Thursday, January 9, 2014

Risking Rejection.... while wearing sparkly tights


Eeek!  My legs... for all the world to see....

Today's post is a departure from my normal craft/diy posts.  Now, if you just want to see how I made these sparkly tights, scroll directly to the bottom of the post.  But if you want to read about a neat, new Thursday blogging series and a bunch of courageous gals, read on!


Tuesday, January 7, 2014

Quick way to jazz up old pens

As a kid I remember loving the way new pens and notebooks looked at the start of the school year.  I also remember that by January, things just didn't look as good anymore.  Today's post shows one quick and easy way to update boring school supplies.

Tada!  Check out these clear pens that I jazzed up with colorful magazine pages.   

Let's Jazz Up Old Pens!

(This post contains affiliate links.  Thank you for your support!)


 Materials:

Directions:


1.  Take your pens apart so that the tube of ink is out of the clear plastic barrel.

2.  Cut out a scrap piece of paper that, when curled up, will fill the clear barrel.  Once you know what size paper to use, use this as a template to cut out from colorful magazine pages.


3.  Curl up your colorful paper and slide it into the barrel.  Then, put your pen back together. Now you've got yourself a set of "new" and colorful pens.  (And it didn't cost you one dime! *High five!*)

Happy crafting!

Monday, January 6, 2014

Make Toilet Roll Airplanes (template included)

Make Toilet Paper Roll Airplanes

Initially, I titled this post "Bad Mamas make toilet roll airplanes" because I wanted to admit something to you.

I'm a baaaad mama.

Yup, you read that right.  I'm a bad mama... a really bad mama...  why?  Well, the other day we were playing around with Chuck and we started humming different songs for him to guess.  At first we hummed his favorite song ("Life is a Highway" from the movie Cars) and he guessed it!  Intrigued, we kept humming other songs from Cars 1, Cars 2, and Planes (his faves.)  He couldn't name the songs specifically, but he could identify the movie that each song came from. 

And then I started humming "ABC" to him, thinking that it would be a breeze for him to guess.   I got through the entire song and then my son... my dear, sweet, transportation-loving child, looked up at me and said "Me no know mama."

What?! "Me no know?"  He knows songs from movie soundtracks... but can't recognize ABC?  We sing ABC to him at least twice a day when we brush his teeth.  Oof.  Double oof.

I guess we're not as entertaining as talking vehicles...

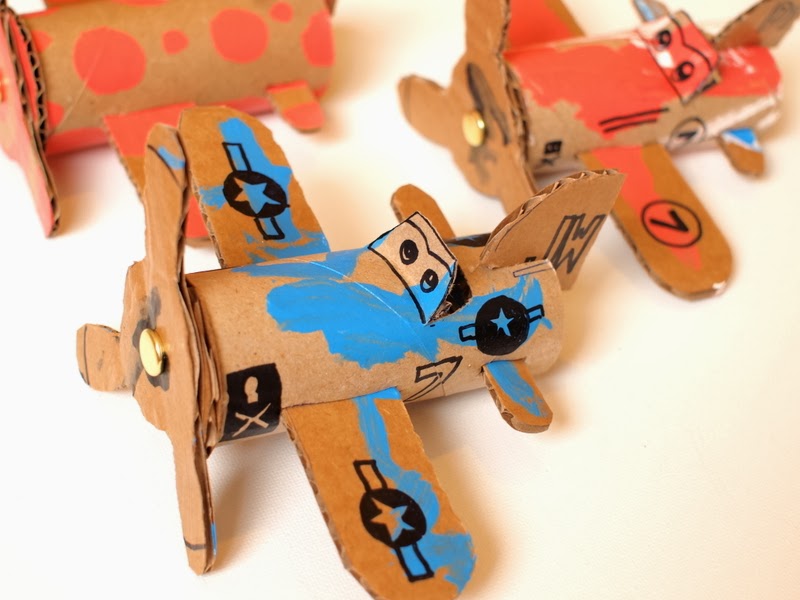
So... this reeeeeeaaaaally long intro was just my way of saying that my son loves cars, planes, trucks, trains... erm... basically anything that moves.  So I thought I'd try to foster his love with a toilet paper airplane craft.  These planes were inspired by the characters Dusty Crophopper and Skipper from the movie "Planes."  


Toilet paper Roll Planes Skipper and Dusty Crophopper


(This post contains affiliate links.  Thank you for your support.)

Keep reading to see how we made these planes ( plane template included!)...

Sunday, January 5, 2014

Make flowers and leaves from gumdrops

What would you do with a bunch of leftover gumdrops?  Would you eat them or toss them out?

Or, would you try something a bit different?  Would you burn them... or melt them... or nuke 'em?  Eeek. What evil candy torturer would do that?  Oh wait,  I already did all those things in my 6 strange things to do with gummy bears post... muah ha ha.

This time I took a different route and turned my colorful gummy candy into gumdrop flowers.  Why, you ask?  Why not!  After seeing these lovely gumdrop rose petals I pulled out my candy and got a'smooshing and a'cutting.  By the end of the night I had me a lovely bouquet of gumdrop flowers:

Ooooh.  Perrrrrty....

Have I intrigued you?  Keep on reading to see how these lovely flowers were made...

Friday, January 3, 2014

Sweets, Graham cracker Houses, and the Dentist (Eeek!)

So... I've got a confession.

I was looking through some holiday photos and I realized... eek I may have gone a bit  WAY overboard with the sugar.  Yikes.  Apparently I have a tiny HUGE sweet tooth.

On top of the lovely goodies that we ate at parties, hubby and I also devoured sweets at home.  Hrmm... all that sugar.... maybe we're part Elf?  Here's a review of some of our homemade holiday goodies... 

1.  Hubby made us a couple of  homemade cafe mochas.  He mixed 1T cocoa, 1T hot water, and 1 T sugar in a cup.  Then, he added 1 shot of espresso (or double strength coffee) and topped that with with 1/2C of warmed and frothed milk.  Sweet and yurmmy...

Keep on reading to see more sweet goodies...


Thursday, January 2, 2014

Wreath Interpretations Exhibit

A couple of days ago, we went into the city to meet up with old friends and see "Wreath Interpretations."  This exhibit showcased Christmas wreaths that were made out of nontraditional materials.  After seeing all the artist's creativity, I definitely left with some ideas for next year's Christmas decorations (note to self- start saving milk caps!)

Now if you're in the city and you've got some time to spare, be sure to check the exhibit out!  It's located on the 3rd floor of the Arsenal Building in Central Park.  It's free (Yes!) and open from 9am-5pm, M-F until January 9th. 

Here are a couple of my favorites from the exhibit:

(Psst- Wanna see what else we did in the city that day?  You can find other photos from our trip on my Instagram.)


Keep reading to see more wreaths!

Wednesday, January 1, 2014

Review of 2013

Happy 2014! 

Before starting this post, I just wanted to say a big thank you for visiting this blog.  Thank you, thank you, thank you!  Thank you for joining in our family's daily adventures and thank you for appreciating my crafts.  Honestly, blogging wouldn't be as fun without you.  Your support really means the world to me. 

Ok, ok, enough mushy stuff.  Ahem, now onto today's post.

Since I enjoyed last year's 2012 review post, I put together something similar together for 2013.  Looking back, I'm amazed by how many crafts I made (oy vey- thanks hubby for being so supportive!) and how much Chuck has grown.  My baby is gone.... he's a little boy now.  Sheesh, time just flew by.   

Are you ready to grab hold onto 2014?  Hope your New Year is off to a good start!  

 January


Memorable events: Choosing to try new things and attending a wedding
Favorite kid activity:  Painting with cornstarch paint
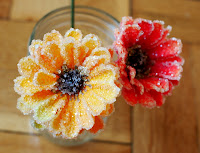
Favorite craft:  Dying flowers rainbow colors


February
 
Memorable event: Attending this bridal shower
Favorite kid activity:  Making bubble snakes
Favorite craft:  Whale Tissue Box Holder


March

Memorable event:  Selling goods at the craft fair
Favorite kid activity:  Feeding birds outside
Favorite craft: Sumo Plastic Bottle Bowling Pins


 April

Memorable events:  Attending a Mehndi ceremony and wedding ceremony
Favorite kid activity:  Blowing humongous bubbles with Chuck
Favorite crafts: Tattooing a banana and Painting an umbrella 


May
 
Memorable events:  Attending a lovely wedding and hanging out with Aussie family  (in DC and NYC)
Favorite kid activity:  Attending a niece's birthday party
Favorite crafts:  Good Night, Bonne Nuit Pillow Cases


June

Memorable event:  Visiting Colonial Williamsburg (1 and 2)
Favorite kid activities:  Making cornstarch paint and Grass Egg Heads
Favorite crafts:  Making a Mosaic Styrofoam Picture Frame  and painting a galaxy umbrella


July

Memorable event:  Reflecting on faith and crafting
Favorite kid activity:  Visiting The Children's Museum
Favorite crafts:  Painting a rainbow fan


August
 
Memorable event:  Having a house guest and being part of a craft e-zine
Favorite kid activity:  Painting with toys
Favorite crafts:  Tattooing bananas and Orange peel canola candle

September


Memorable events:  Visiting the zoo and Maker Faire (1 and  2)
Favorite kid activities: Blowing up balloons with baking soda and Cardboard spaceship toy
Favorite craft: Making crystal flowers


October
 
Memorable events:  Visiting Lancaster and Baltimore
Favorite kid activity: Celebrating Halloween!
Favorite craft: Making a tulle mask


November

Memorable event:  Thanksgiving!
Favorite kid activity:  Craft stick dominoes
Favorite craft:  Heart stenciled shoes and Making roses out of autumn leaves


December


Memorable event:  Christmas!
Favorite kid activity:  Playing with Chuck in the snow
Favorite crafts: Hiding a jump drive in a rubber toy and Making reindeer antlers