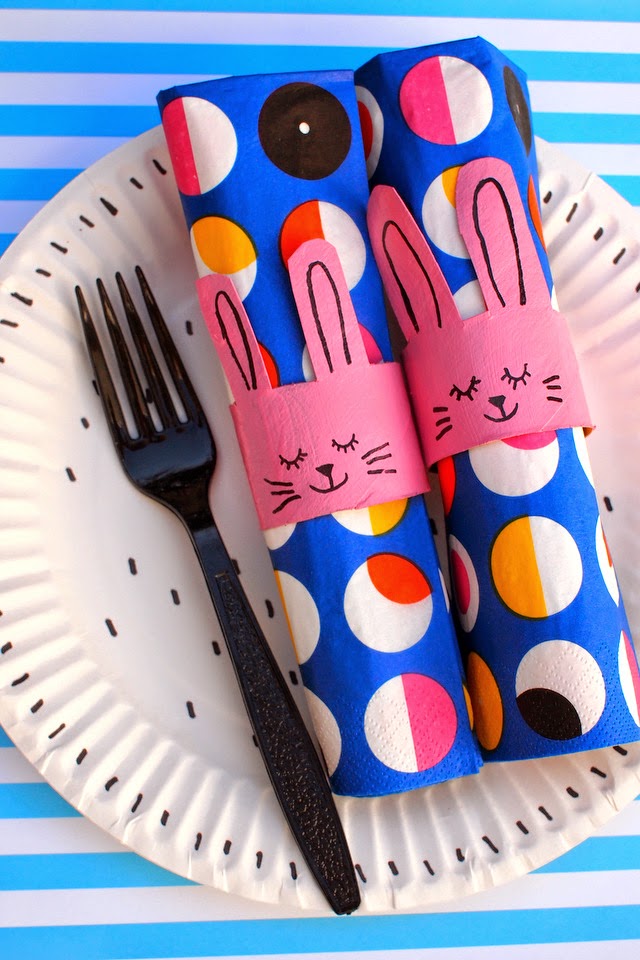
Try as I may, I don't think I'll ever achieve that kind of amazing Martha Stewart-esque domestic achievement. Cooking for large groups of people freaks me out. But if we were to ever host a large Easter meal, it'd probably involve paper plates, plastic cutlery, paper napkins, and maybe these bunny toilet roll napkin rings. (You know, to fancy the meal up just a tad bit.)
Showing posts sorted by relevance for query sharpie. Sort by date Show all posts
Showing posts sorted by relevance for query sharpie. Sort by date Show all posts
Sunday, March 8, 2015
Bunny Toilet Roll Napkin Rings
Does your family have fancy Easter dinners? That was never really the tradition in my family. Once I got married, we started attending hubby's aunt's Easter meals. Boy, oh boy- they were really, really special. We dined with fancy cloth napkins, silverware, and china. And we gorged ourselves on yummy ham, savory side dishes, and a large sampling of desserts. (Wow. I can't believe I'm actually drooling just thinking about that meal.)
Try as I may, I don't think I'll ever achieve that kind of amazing Martha Stewart-esque domestic achievement. Cooking for large groups of people freaks me out. But if we were to ever host a large Easter meal, it'd probably involve paper plates, plastic cutlery, paper napkins, and maybe these bunny toilet roll napkin rings. (You know, to fancy the meal up just a tad bit.)
Try as I may, I don't think I'll ever achieve that kind of amazing Martha Stewart-esque domestic achievement. Cooking for large groups of people freaks me out. But if we were to ever host a large Easter meal, it'd probably involve paper plates, plastic cutlery, paper napkins, and maybe these bunny toilet roll napkin rings. (You know, to fancy the meal up just a tad bit.)
Thursday, November 21, 2013
DIY Crapted Wrapping paper (Plastic Bag Printing and Cat Stencils) and DIY Washi Tape
Alright, this post's title is rather crazy. In my defense, I just put everything up there because I couldn't figure out a better way to incorporate all the ideas into one slick title.
Hrmm... let's take a step back and start again.
*Breathes*
My sister's birthday is coming up next week. I already bought her a gift and thought it would be nice to crapt the wrapping paper. So, I cut up a paper bag (the kind that you get from a store when you buy stuff) and made these two crapty wrapping paper patterns:
The design on the left was made using this Plastic Bag printing method. It was inspired by my sister's love of turtles. (That's what the green blobs are.)
The design on the right is made using cereal box stencils. It's a bit more modern. (Psst- Can you tell that it's a bunch of golden cat faces?)
Would you like to see how I printed the patterns? If so, read on! If not, you can always eat some ice-cream. Yum.
Directions:
1. Doodle your cat face on a piece of cereal box. Cut the face out.
2. To keep your design even, first use a pencil to lightly mark where you want your cat faces. (I used my stencil as a guide.) Then, stencil your design over your pencil marks. When you're stenciling, don't load too much paint onto your sponge brush and keep your hand steady as you hold down the stencil so you don't smudge your design. If you're worried, you can always do a couple of trial runs on a piece of scrap paper first.
3. Let your design dry and you're done! Meow!
1. "Ink" your plastic bag by painting over a portion of it. (If you're a clutz like me, only paint in the middle of your bag. This way your hands won't smear the paint when you flip the bag over.)
2. Use a Q-tip (or the back of your paint brush) to remove bits of paint and create a design.
3. Flip your bag around and press the painted side on top of your wrapping paper. Rub your hand over the design to make sure it transfered.
4. Repeat this step to add other blocks of colors or designs. (I used the same bag throughout and simply wiped off excess paint with a paper towel.)
You can also paint little shapes onto your bag and then use those to make prints too.
And since I was already making the wrapping paper, I figured I might as well make fake washi tape out of masking tape. I simply took pieces of masking tape, stuck them to parchment paper, and then doodled on them with Sharpie markers. The ends of the tape don't completely adhere to the parchment paper, but that's ok because I used the tape up right away.
Did you make it this far? Phew. *High five.* This was a long post. Here's a photo of the final product. (I chose the cat design because it looked cooler. Plus, my sister really loves her cat.)
Here's a photo of the back. Yurp. I went crazy with my fake washi tape because the patterns were just too cute.
Happy Thursday!
Hrmm... let's take a step back and start again.
*Breathes*
My sister's birthday is coming up next week. I already bought her a gift and thought it would be nice to crapt the wrapping paper. So, I cut up a paper bag (the kind that you get from a store when you buy stuff) and made these two crapty wrapping paper patterns:
The design on the left was made using this Plastic Bag printing method. It was inspired by my sister's love of turtles. (That's what the green blobs are.)
The design on the right is made using cereal box stencils. It's a bit more modern. (Psst- Can you tell that it's a bunch of golden cat faces?)
Would you like to see how I printed the patterns? If so, read on! If not, you can always eat some ice-cream. Yum.
How to make cat stenciled wrapping paper:
Materials:
- Cereal box
- Pen
- Pencil
- Exacto Knife
- Scissors
- Cutting mat
- Paint
- Sponge brush
- Paper towel
Directions:
2. To keep your design even, first use a pencil to lightly mark where you want your cat faces. (I used my stencil as a guide.) Then, stencil your design over your pencil marks. When you're stenciling, don't load too much paint onto your sponge brush and keep your hand steady as you hold down the stencil so you don't smudge your design. If you're worried, you can always do a couple of trial runs on a piece of scrap paper first.
3. Let your design dry and you're done! Meow!
How to make a plastic bag printed wrapping paper design:
Materials:
- Sandwich bag
- Paint
- Paint brush
- Q-tip
- Paper Towel
Directions:
2. Use a Q-tip (or the back of your paint brush) to remove bits of paint and create a design.
3. Flip your bag around and press the painted side on top of your wrapping paper. Rub your hand over the design to make sure it transfered.
4. Repeat this step to add other blocks of colors or designs. (I used the same bag throughout and simply wiped off excess paint with a paper towel.)
You can also paint little shapes onto your bag and then use those to make prints too.
And since I was already making the wrapping paper, I figured I might as well make fake washi tape out of masking tape. I simply took pieces of masking tape, stuck them to parchment paper, and then doodled on them with Sharpie markers. The ends of the tape don't completely adhere to the parchment paper, but that's ok because I used the tape up right away.
Did you make it this far? Phew. *High five.* This was a long post. Here's a photo of the final product. (I chose the cat design because it looked cooler. Plus, my sister really loves her cat.)
Here's a photo of the back. Yurp. I went crazy with my fake washi tape because the patterns were just too cute.
Happy Thursday!
Wednesday, March 18, 2015
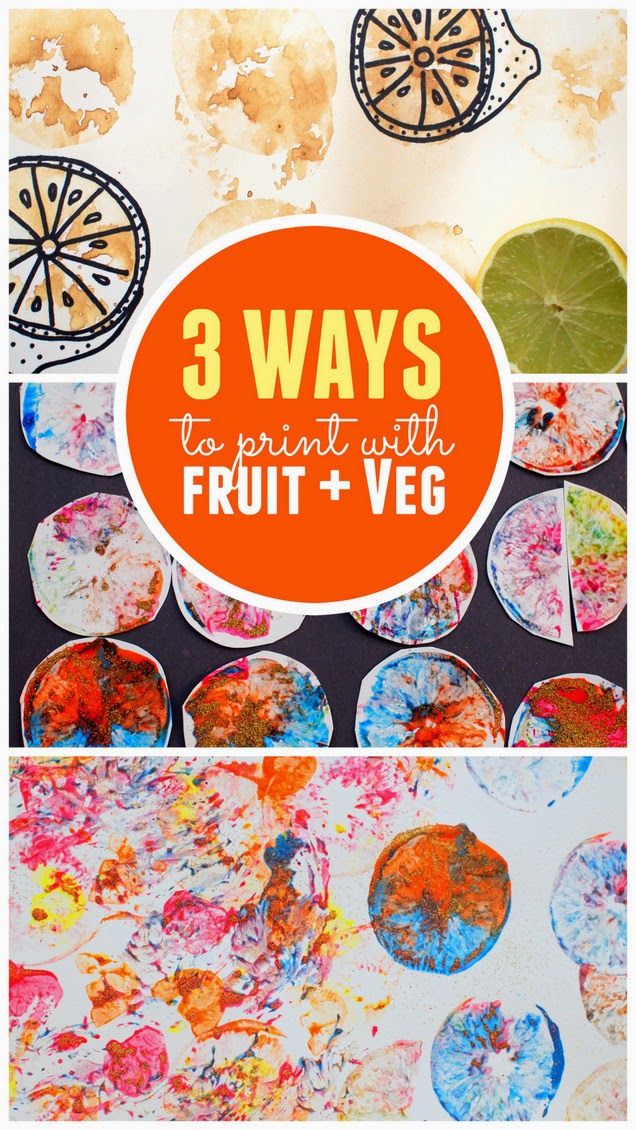
3 Ways to Make Fruit and Vegetable Prints with Kids
Hey! Are you going to throw away that shriveled carrot? Got a few limes rolling around in the fridge and not sure what to do with them? Then today's post is for you! Today I'm going to share 3 fun ways to make fruit and vegetable print artwork! And just to give you a heads up... one of the methods combines art AND science together to create prints that .... MAGICALLY APPEAR when you heat them. Whoa.....
Today several other kid craft-loving bloggers and I are sharing cute and fun crafts involving fruit and vegetable prints. So scroll down to the bottom of the page for 10 MORE fun and crafty fruit and vegetable print ideas!
Let's get started!
3 Ways to make Fruit and Vegetable Prints!
This post contains affiliate links. Thank you for your support!
Today several other kid craft-loving bloggers and I are sharing cute and fun crafts involving fruit and vegetable prints. So scroll down to the bottom of the page for 10 MORE fun and crafty fruit and vegetable print ideas!
Let's get started!
Friday, January 31, 2014
Two Heart themed Valentine's Crafts- Heart Glasses and Painted Heart Rocks
Note: This post is sponsored by Plaid, but the opinions are 100% mine.
Did you know that the heart is my favorite shape? (Is it weird that I have a favorite shape?) I know that triangles and hexagons are super trendy right now, but I'm an old-fashioned romantic. Hearts will always have a special place in my... well heart. (Tee hee hee.) So when Plaid sent me a box of Apple Barrel Craft Paint to create a Valentine's Day School Craft, I knew that it had to be heart related.
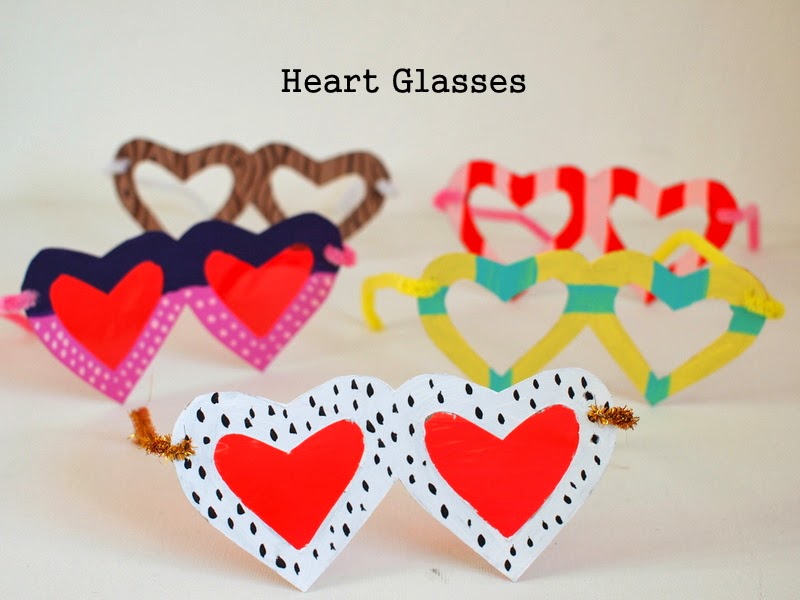
So I came up with these Cereal box Heart Glasses and Heart Painted Rocks. Both crafts are super colorful and fun to make.
Keep reading to see directions and template!
Did you know that the heart is my favorite shape? (Is it weird that I have a favorite shape?) I know that triangles and hexagons are super trendy right now, but I'm an old-fashioned romantic. Hearts will always have a special place in my... well heart. (Tee hee hee.) So when Plaid sent me a box of Apple Barrel Craft Paint to create a Valentine's Day School Craft, I knew that it had to be heart related.
So I came up with these Cereal box Heart Glasses and Heart Painted Rocks. Both crafts are super colorful and fun to make.
Cereal box Heart Glasses
Keep reading to see directions and template!
Wednesday, September 4, 2013
DIY Animal Nose Paper Cups
While looking around for animal themed party accessories for Chuck's birthday, I spotted these Pick Your Nose Paper Cups, Pick Your Nose Animal Cups, and Pig Nose Cup.
Super cute, right?
But being an uber cheapie, I figured I could just make similar looking cups formuch less free. All I used were a couple of paper cups (taken from Whole Foods- Thanks!), Sharpie markers, and crayons.
With only a couple minutes of doodling and coloring, I came up with these lovelies:
They're not as nice as the originals, but they were free and cute... so I didn't mind one bit!
Ultimately we ended up just using boxed juices and bottled water for the party. So Chuck is currently getting a kick out of using the cups at home. (His favorite one is the bird beak.)
Happy Wednesday!
Super cute, right?
But being an uber cheapie, I figured I could just make similar looking cups for
With only a couple minutes of doodling and coloring, I came up with these lovelies:
They're not as nice as the originals, but they were free and cute... so I didn't mind one bit!
Ultimately we ended up just using boxed juices and bottled water for the party. So Chuck is currently getting a kick out of using the cups at home. (His favorite one is the bird beak.)
Happy Wednesday!
Thursday, January 28, 2016
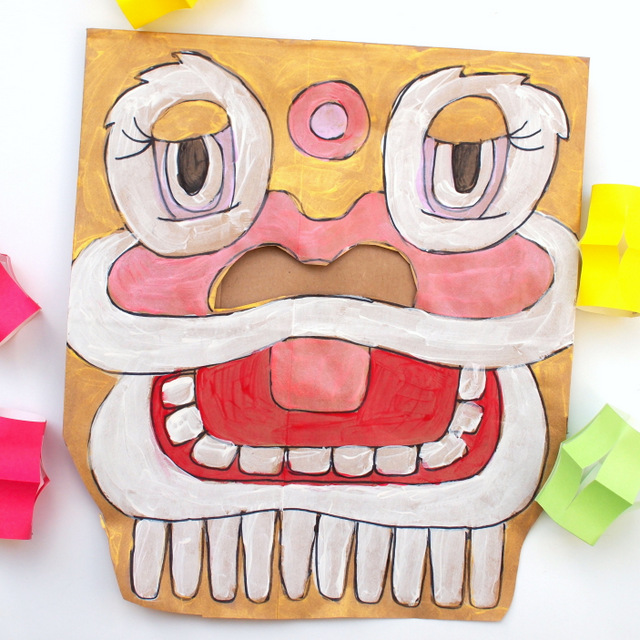
Chinese New Year Paper Bag Lion Masks (And a book list!)
One of the nicest things about having kids is seeing things through their eyes. I remember loving Chinese New Year as a child. The lion dance, the dragons, the red envelopes, the yummy food, the time spent with family... those are all the traditions and memories that I'd like to pass onto my sons as well. Recently we've been knee deep in Chinese New Year Crafts and today's is my son's favorite so far. We turned paper bags into our very own lion masks to wear and dance around in!
Paper Bag Lion Masks for Chinese New Year!
This post contains affiliate links. Thank you for your support!
Friday, November 23, 2012
Crapty Cat Wreath
Our aunt loves cats.
And I like making wreaths out of crap.
So it was a natural fit for me to whip up this cat wreath for her.

Materials:
- cereal boxes (<--crap)
- scissors
- craft paint
- paint brush
- glue/tape/some sort of adhesive
- thin Sharpie marker
- pencil
Directions:
This was super easy to make, so I'll just show some photos from my crapty night.
Happy crapting (and black Friday)!
Tuesday, May 31, 2016
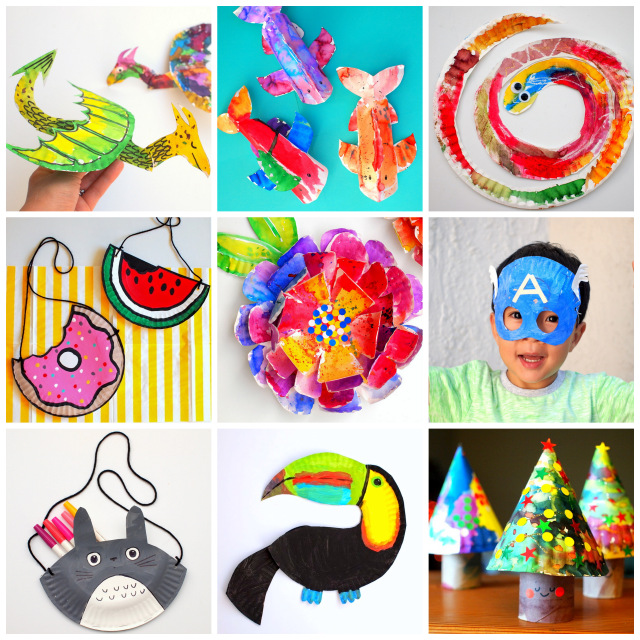
30+ Awesomely Unique and Fun Paper Plate Crafts for Kids!
It's no secret that I LOVE paper plate crafts! Wanna make my heart sing? Hand me a bunch of blank paper plates. Seriously. No joke. (Ok- Crafter confessional here- I've even snuck interesting paper plates out of parties before to craft with... shhhh... )
If you follow me on Instagram you'll see that I'm this week's #kidscrafts101 judge! Yup! Every week there's a fun challenge to craft with a different material. This week's theme is... drum roll please... paper plates! I know all of you and your kids have such creative ideas, so I'd love to see your ideas on IG! (Just use the #kidscrafts101 so I can see your great ideas!)
And in honor of this week's theme, I thought I'd also share my absolute favorite paper plate crafts!
This post contains affiliate links. This means I make a teeny tiny bit of money from any purchases made through the Amazon links below. Thank you for your support! For my full disclosure, click here.
If you follow me on Instagram you'll see that I'm this week's #kidscrafts101 judge! Yup! Every week there's a fun challenge to craft with a different material. This week's theme is... drum roll please... paper plates! I know all of you and your kids have such creative ideas, so I'd love to see your ideas on IG! (Just use the #kidscrafts101 so I can see your great ideas!)
And in honor of this week's theme, I thought I'd also share my absolute favorite paper plate crafts!
30+ Super Fun and Unique Paper Plate Crafts for Kids!
This post contains affiliate links. This means I make a teeny tiny bit of money from any purchases made through the Amazon links below. Thank you for your support! For my full disclosure, click here.
Friday, September 26, 2014
Make and Play with Shape Dice!
Are you looking for some fun and educational activities to do with your preschooler? Right now Chuck's home with me and we try to squeeze in at least one educational activity in each day. So far we've tested out cardboard rigidity by building bridges, explored art materials like scientists, and learned about shapes with a shape touch and feel game.
While I enjoy thinking up new activities to do with Chuck, sometimes I do get burned out. It's hard finding new activities everyday day! So that's why I'm excited to announce a new collaboration that I'm doing with 4 other fabulous bloggers. Twice a month we will be presenting 5 different takes on preschool learning themes. Yup. Isn't that neat? I'm super stoked. So in addition to seeing one great idea here, you'll also see links to 4 other really creative and fun preschool learning activities.
Our first collaborative preschool theme is Shapes and here's my activity! (Definitely check out the 4 other ideas at the end of the post!)
Cool right? Instead of using a normal dice to play board games, here's a fun twist. Switch out the numbers and use shapes instead! Now your child can learn counting and shapes at the same time.
So let's make a dice and see how we can play with it!
While I enjoy thinking up new activities to do with Chuck, sometimes I do get burned out. It's hard finding new activities everyday day! So that's why I'm excited to announce a new collaboration that I'm doing with 4 other fabulous bloggers. Twice a month we will be presenting 5 different takes on preschool learning themes. Yup. Isn't that neat? I'm super stoked. So in addition to seeing one great idea here, you'll also see links to 4 other really creative and fun preschool learning activities.
Our first collaborative preschool theme is Shapes and here's my activity! (Definitely check out the 4 other ideas at the end of the post!)
DIY Shape Dice
This post contains affiliate links. Thank you for your support!
Cool right? Instead of using a normal dice to play board games, here's a fun twist. Switch out the numbers and use shapes instead! Now your child can learn counting and shapes at the same time.
So let's make a dice and see how we can play with it!
Monday, November 3, 2014
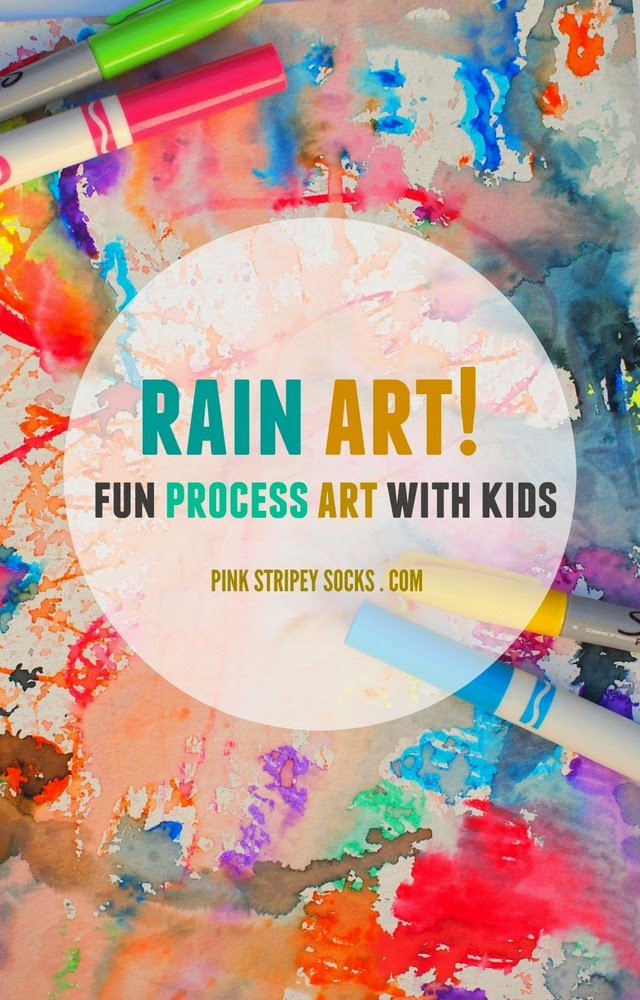
Rainy Day Process Art
We got rain! We got rain! Whoopie! This was a pretty big deal here in SoCal because we've been in the middle of a drought for a looooong time. Since I love trying easy art projects with Chuck, we took advantage of the rain and collaborated with Mother Nature to create some beautiful rainy day process art.
This was a really fun and easy art project. I really enjoyed it because we didn't concern ourselves so much with the final product. Instead, we just really enjoyed making art together and then watching Mother Nature add her bit too.
Here's how we made our rainy day process art!
Let's Make Rainy Day Process Art!
This post contains affiliate links. Thank you for your support!
This was a really fun and easy art project. I really enjoyed it because we didn't concern ourselves so much with the final product. Instead, we just really enjoyed making art together and then watching Mother Nature add her bit too.
Here's how we made our rainy day process art!
Monday, February 24, 2014
Cereal Box Fireman's Hat (Template included)
Currently Chuck loves pretending to be a fireman. He tells me that random things are on fire and then sprays them with an imaginary hose to put the fire out. To help encourage his play, we recently made this fireman's hat out of an old cereal box.
Got a pretend firefighter in your family too? Curious to see how a cereal box turned into a fireman's hat? Keep reading to see how we did it!
(Of course, we had to make a fireman's hat for his best friend Piggy too!)
Got a pretend firefighter in your family too? Curious to see how a cereal box turned into a fireman's hat? Keep reading to see how we did it!
Monday, July 29, 2019
Easy Origami Emoji Face Changers
Ever look at an origami project and think... gosh, that's cool but way too difficult to fold? Well, today's origami project bucks that trend. It's unique AND easy to fold. These origami face changers show emoji faces flipping expressions from fold to fold! (Neat, right?) The kids are sure to have fun folding, drawing, and changing their faces around!
This post contains affiliate links. This means I make a small bit of money for any purchases made through the links at no additional cost to you. Thank you for your support. For my full disclosure policy, click here.
How to Fold Easy Origami Face Changers
This post contains affiliate links. This means I make a small bit of money for any purchases made through the links at no additional cost to you. Thank you for your support. For my full disclosure policy, click here.
Monday, January 27, 2014
DIY Valentine's Day Gifts: Candy, Coffee, and Tea
Right now we're about to celebrate our ninth Valentine's day together... and for some reason I got thinking about that first gift. It was easy to make and didn't cost very much. But, it was really special for both of us. Feeling inspired by that first Valentine's gift nine years ago, here are three really easy, affordable, and sweet DIY gifts to make for your loved ones.
To see the details for each one, keep reading!
Monday, September 3, 2012
Hungry Caterpillar party prep: DIY birthday banner
Ok, this will be the last of the party DIYs, I promise! With the party only a couple of days away, we round off our DIY series with a Hungry Caterpillar birthday banner:
It was really simple and fun to make. I cut out various shapes from cereal boxes. Then, I just painted them with craft paint "Eric Carle" style and used Sharpie markers to write the letters.
To see all the items we made for the party, click here
It was really simple and fun to make. I cut out various shapes from cereal boxes. Then, I just painted them with craft paint "Eric Carle" style and used Sharpie markers to write the letters.
To see all the items we made for the party, click here
Thursday, April 30, 2020
Underwater Ocean Search and Find Preschool Craft and Activity
Does your child love the ocean? One of my preschooler's favorite places is our local sea center. Today I'm sharing a fun ocean themed craft that also doubles as a game! It was inspired by this amazing FB video by kidzwiz. This activity involves doodling sea creatures and then going on an underwater adventure to find them all! Ready to go on a crafty sea adventure?
Ocean Search and Find Craft and Activity!
(Perfect for Preschoolers)
Wednesday, June 3, 2015
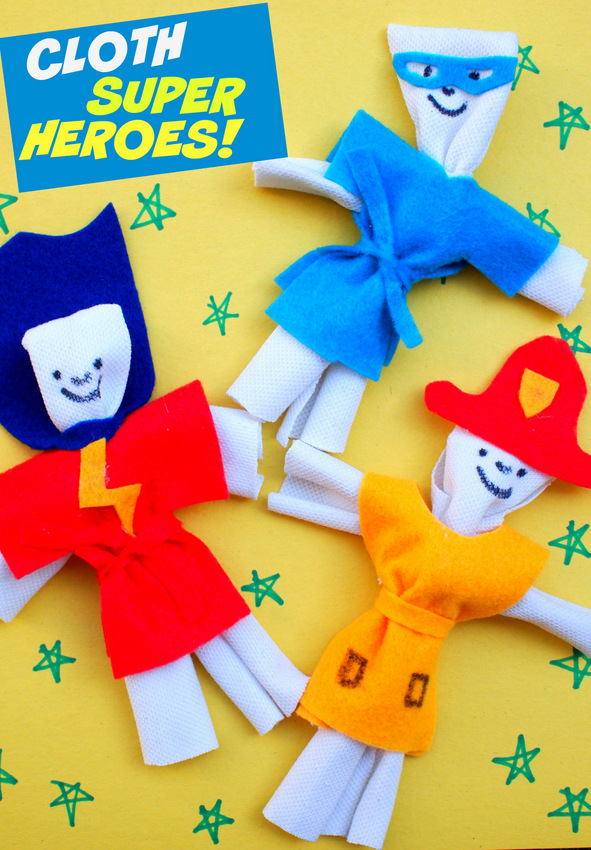
No-Sew Cloth Super Hero dolls!
Lately, my preschooler has really gotten into super heroes. I find this pretty funny because we never watch any super hero shows on tv... yet somehow he knows characters like Batman, Wolvarine, Super Man, and Spiderman! (Weird, right?) So today I wanted to share this really easy, no-sew cloth super hero doll tutorial. This quick and simple craft doesn't need any special items and you can make your very own dolls within minutes!
And if your kid loves super heroes too.... be sure to check out my other Super Hero Crafts!
And if your kid loves super heroes too.... be sure to check out my other Super Hero Crafts!
No-sew Cloth Super Hero Dolls!
This post contains affiliate links. Thank you for your support!
Thursday, March 21, 2013
Make a Cardboard Bunny Tissue Box Holder
With Easter just around the corner, bunnies, chicks, and carrots seem to be popping up everywhere. Since I had some practice crapting a whale tissue box holder, I thought I'd try making a bunny tissue holder for Easter.
Want to crapt your own? Read on!
Materials:
- cardboard (not bent, in good condition)
- pencil
- exacto knife
- self healing cutting mat
- scissors
- packing tape
- ruler
- paint
- paint brushes
- Sharpie markers
- Mod Podge
Directions:
Step 1: Measure and cut out your pieces from cardboard. (See pdf below) You'll need:
a. 1 long rectangular piece (15 3/4 inches x 5 1/2 inches)
- folded lengthwise every 5 1/4 inches
- with two tiny, thin rectangular holes cut out from middle section (for ears)
- with two rectangles cut out from each side (for feet)
b. 2 identical ear pieces (about 4 1/2 inches tall)
- bent 1/2 inch from bottom
- two tabs cut at bottom (tape tabs down to attach ears)
c. 1 bottom piece (5 1/4 inch x 5 1/2 inch)
- sides will probably be trimmed down and corners rounded when you assemble pieces
d. 1 front and 1 back piece (5 1/4 inch x 5 1/4 inch)
- rectangle cut out from bottom of both pieces (for feet)
- circle (approx 1 1/2 inch in diameter) cut out from back piece (for tissue tail)
Bunny Tissue Holder Measurements
Step 2: Bend the long piece into three equal 5 1/4 inch parts. (I found that it helped if I first scored the cardboard with my ruler or scissors).
Step 3: Carefully tape front piece in front of your bent piece (It was easier to maneuver smaller pieces of packing tape. Try your hardest to make sure that the tape sits right against the cardboard.)
Step 4: Attach bottom piece with tape. Before taping, make sure that your tissue box fits into your construction. You may need to trim the edges of the bottom piece and round off some corners to make sure that it fits. (Honestly, I wish I trimmed a bit more off my bottom piece. It's still slightly too wide and it pushed the sides out in a funny way. So, I ended up taping them down from the outside... which ruined the effect a bit... )
Step 5: Place your tissue box into the cardboard container. Then, attach the back piece with packing tape. (First I taped the top of the back piece to the bent long piece. This created a nice hinge effect and the back piece could open and close. I could have left it like that, but with Chuck on the loose it was safer if I taped the feet portions together too.)
Step 5: Paint your piece. (Honestly, I liked the au natural look. But, pink just felt more spring-y, so I went with it.) To protect the tissue tail, push a plastic bag into your hole. Pull it out when you're done. Don't forget to use Mod Podge to protect your paint job.
And there you have it- some bunny to hand you tissues when you need them. (Har, har, har.... )
Meet Pinky.
This little rabbit is my newest cardboard animal creation.
She's super girly and cute.
And bonus- her tail provides comforting tissues when you sneeze.
 |
| Chuck can't resist pulling on her tail... |
Want to crapt your own? Read on!
Materials:
- cardboard (not bent, in good condition)
- pencil
- exacto knife
- self healing cutting mat
- scissors
- packing tape
- ruler
- paint
- paint brushes
- Sharpie markers
- Mod Podge
Directions:
Step 1: Measure and cut out your pieces from cardboard. (See pdf below) You'll need:
a. 1 long rectangular piece (15 3/4 inches x 5 1/2 inches)
- folded lengthwise every 5 1/4 inches
- with two tiny, thin rectangular holes cut out from middle section (for ears)
- with two rectangles cut out from each side (for feet)
b. 2 identical ear pieces (about 4 1/2 inches tall)
- bent 1/2 inch from bottom
- two tabs cut at bottom (tape tabs down to attach ears)
c. 1 bottom piece (5 1/4 inch x 5 1/2 inch)
- sides will probably be trimmed down and corners rounded when you assemble pieces
d. 1 front and 1 back piece (5 1/4 inch x 5 1/4 inch)
- rectangle cut out from bottom of both pieces (for feet)
- circle (approx 1 1/2 inch in diameter) cut out from back piece (for tissue tail)
Bunny Tissue Holder Measurements
Step 3: Carefully tape front piece in front of your bent piece (It was easier to maneuver smaller pieces of packing tape. Try your hardest to make sure that the tape sits right against the cardboard.)
Step 4: Attach bottom piece with tape. Before taping, make sure that your tissue box fits into your construction. You may need to trim the edges of the bottom piece and round off some corners to make sure that it fits. (Honestly, I wish I trimmed a bit more off my bottom piece. It's still slightly too wide and it pushed the sides out in a funny way. So, I ended up taping them down from the outside... which ruined the effect a bit... )
Step 5: Place your tissue box into the cardboard container. Then, attach the back piece with packing tape. (First I taped the top of the back piece to the bent long piece. This created a nice hinge effect and the back piece could open and close. I could have left it like that, but with Chuck on the loose it was safer if I taped the feet portions together too.)
Step 5: Paint your piece. (Honestly, I liked the au natural look. But, pink just felt more spring-y, so I went with it.) To protect the tissue tail, push a plastic bag into your hole. Pull it out when you're done. Don't forget to use Mod Podge to protect your paint job.
And there you have it- some bunny to hand you tissues when you need them. (Har, har, har.... )
Wednesday, October 1, 2014
Easy DIY Kids Spider Costume
We really love reading and it's always fun to create crafts and activities to go along with our favorite books. Today I'm joining forces with other kid bloggers to present a Halloween Read and Play Blog hop! This means that today, over 25 kid bloggers are posting great activities and crafts to go along with Halloween themed books. (You can see links to all the great ideas at the bottom of the post!) We made a DIY spider costume for our post. It was inspired by a beloved book character, Splat the Cat!
Have you heard of the Splat the Cat Series? We love these books. For Halloween, we read Scaredy-Cat, Splat!
I don't want to ruin the story for you, so here's just a snippet to explain today's craft. Splat the Cat's initial costume gets ruined and his mom has to quickly whip up a homemade spider costume from socks and string.
I love the idea of making something from nothing, so we tried our hand at quickly whipping up a spider costume just like Splat the Cat's mom!
Let's get making!
Easy DIY Spider Costume
This post contains affiliate links. Thank you for your support.
Have you heard of the Splat the Cat Series? We love these books. For Halloween, we read Scaredy-Cat, Splat!
I don't want to ruin the story for you, so here's just a snippet to explain today's craft. Splat the Cat's initial costume gets ruined and his mom has to quickly whip up a homemade spider costume from socks and string.
I love the idea of making something from nothing, so we tried our hand at quickly whipping up a spider costume just like Splat the Cat's mom!
Let's get making!
Monday, October 8, 2018
How to Doodle Frisbees
Hi everyone! Quick fun art idea here- I wasn't sure what to call this post originally. Doodle Frisbees? Art frisbees? Mandala frisbees? "Sharpies-are-so-cool-they-draw-on-everything" frisbees? Oh well. Names were never my strong suit. But I had to pop in and share this craft because I think it'd be a fun one to do for a party on during a playdate.
Note: This post contains affiliate links. This means I make a small bit of change when you purchase items through the links. Thank you for your support and the grocery money! For my full disclosure policy, click here.
How To Doodle on Frisbees
(aka "Gosh. Sharpies really do draw on everything.")
Note: This post contains affiliate links. This means I make a small bit of change when you purchase items through the links. Thank you for your support and the grocery money! For my full disclosure policy, click here.
Tuesday, July 1, 2014
Cardboard and Pom Pom Soccer Game
Are you watching the World Cup? Hubby's been keeping track of the games, but Chuck and I haven't been paying too much attention to the scores. However, because it's soccer season, I still felt inspired to make something soccer-related. So that's why I crafted this mini cardboard and pom pom soccer game for us to play.
Cardboard and Pom Pom Soccer Game
(This post contains affiliate links. Thank you for your support!)
Subscribe to:
Posts (Atom)
