Showing posts sorted by relevance for query felt. Sort by date Show all posts

Monday, May 14, 2018

Gorgeous "Painted" Oil Pastel Crystal Sun catchers

Have you ever tried "painting" with oil pastels?  Every so often I feel all artsy-smartsy and pull out my big 'ol box of oil pastels and do an easy oil pastel craft with my kids.  This past week I felt the urge and we made these crystal suncatchers by "painting" with oil pastels.  The results were pretty gorgeous and the process was fun too!

"Painted" Oil Pastel Crystal Sun Catchers

"Painting" with oil pastels to create beautiful "crystal" sun catchers with kids

Note:  This post contains affiliate links.  This means I make a small bit of change when you purchase items through the links.  Thank you for your support and the grocery money! For my full disclosure policy, click here.

Wednesday, August 26, 2015

7 Tips for Taking Preschoolers to the Art Museum

Ever take your children to the art museum?  A couple weeks ago my friend and I brought our 3 preschool boys to our local art museum.  Can I admit something to you?  I was kinda  SUPER nervous about how it would go.  Three active boys walking around a building of beautiful, priceless, breakable artwork?  What could go wrong?  (Ha!)

Pre-mom years, I loved  visiting art museums with my husband.  But once I had Chuck... I put aside those visits because of my fears.  But oh, how I love looking at beautiful things.... and oh, how I love making art and crafts with my son.  Now that he's a bit older I figured it was time to give it a try.  So I asked for suggestions on FB... and we bravely visited the art museum with our 3 very active and curious kids.

Guess what?

It went pretty well!  We had fun and the art stayed unharmed!  Huzzah!  So here's a post detailing 7 things that we did to make our art museum experience more enjoyable (and educational) for the kiddos.

7 Tips for Taking Preschoolers to the Art Museum


7 Tips for Bringing Preschoolers to the Art Museum


This post contains affiliate links. Thank you for your support!

(Hey! Who's that boy in the photo?  Not Chuck. It's one of our friends!)


Thursday, December 5, 2013

Thanksgiving photos

Hi everyone.

Hubby and I just finished watching Sound of Music.  Wow!   That was really a marathon of music.  I can't believe that the singers had the stamina to last three hours. I felt exhausted just watching them! 

(Did you watch it?  I completely melted when I heard the head nun singing "Climb every mountain."   Wow.  Voice  as like butter, I tell ya.)


Back to today's post.  Here are the promised Thanksgiving photos.  Ermm.... looking through them, I realize now that they're mostly of food.  I gave hubby the camera for the night while I hung out with the kids.  He came back with lots of food photos... so you could tell what he was mostly focused on. :)   Just imagine some people congregating around the food and then you've got the gist of  our Thanksgiving.

Happy Friday, friends!

I took this photo before the evening's events.  Chuck just looked too adorable and I knew that the outfit would be covered with food by the end of the night.

Yum.

*Drool*


I'm getting hungry again...

Yurmmm.... pie...... I wonder what we have in our fridge to snack on....

Thursday, January 30, 2014

Why I'm thankful for all of my Craftgawker Rejections

This is the last week of our #RiskRejection series.  (New to the series?  About 20 or so bloggers have been bravely taking risks and sharing about them every Thursday on their blogs.)

So far, I've risked by
  • sharing that I'd like a career as a craft blogger 
  • sharing that I was overwhelmed by what it took to become a professional craft blogger
  • taking Chuck out sans diaper for the first time

This past week I've been reflecting about rejection quite a bit.  Specifically, I was thinking about being rejected by Craftgawker.   Have you heard about this site?  It's a lovely, curated compilation of crafts.  Crafters and artists submit their best project photos hoping that the site will showcase their work and send readers to their sites.  Craftgawker is EXTREMELY PICKY about the photos they accept.  Only bright and beautiful photos are showcased. 

My first submission to the site was this fortune cookie advent calendar photo...


It  was rejected and I was crushed.  I may have cried.... I'm not sure, but I definitely remember eating carbs to cheer myself up.  

Yup, I was really hurt.  I'd like to say that all of my following submissions were accepted... but I'd be lying.  Out of my approximately 80 submissions, only about 40 were accepted.  Yup, I have a 50% acceptance rate.  Pretty poor right?  But, you know what? 

I'm really REALLY thankful for those rejections.  They pushed me to take better photos.

You see, every time I received a rejection, I also received a reason for the rejection.  Maybe my lighting was too dull, or my composition was too tight, or I had white balance issues. 

When I first started blogging, I would have had no idea what they were talking about.  I took photos like a cave person.  "Ooh, ooh.  Me click button.  Magic picture on screen.  Me got whole face in picture and eyes are open.  Me likey."


Now I'm able to decipher those terms.  I look at white balance and composition.  I'm learning how to take brighter photos at night time.

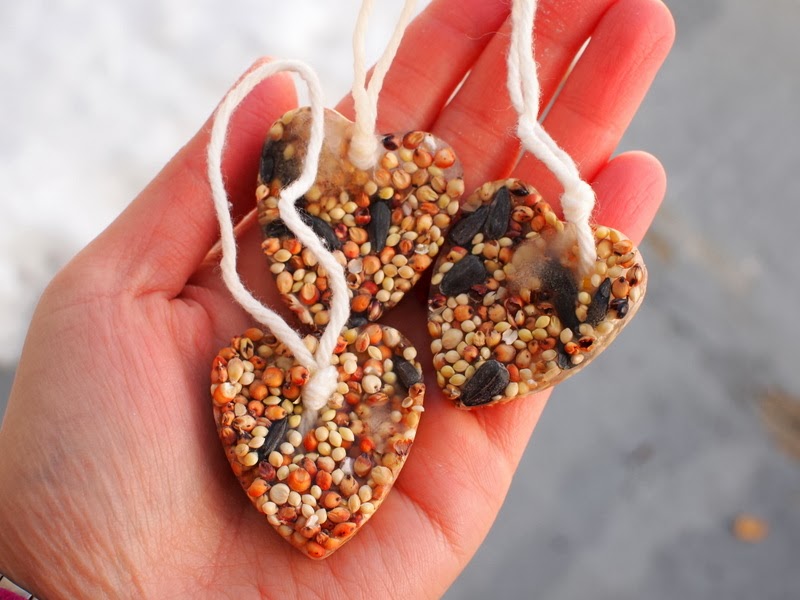
Here's a photo of my latest submission (Ice Bird Feeder Craf):


Can you see the difference between these two photographs?  I can.

That's why I'm really REALLY thankful for all my Craftgawker rejections.  Rejection stings, no question about that.  But each one pushes me to become a better photographer and a more resilient and determined blogger.

(By the way, if you've ever felt frustrated by Craftgawker, check out this post  from Dream a Little Bigger.  Allison offers helpful and easy-to-follow insight on how to improve your photos.)

 So even though our #RiskRejection month is over, let's continue to be brave and risk together, dear friends!

Tuesday, January 24, 2017

DIY Rainbow Notebook (And Review of a book!)

It's been raining cats and dogs over here.  So I felt like we needed a rainbow craft to cheer us up!  Here's a quick and easy rainbow notebook to bring fun and color to this drab winter season.

How to make a rainbow notebook with kids
This post contains affiliate links. Thank you for your support! For my full disclosure policy, click here.


Monday, December 10, 2012

Hand and feet salt dough ornaments

(Warning:  If your name is Nana, Pops, Gong-gong, Puo-puo, or Tita Tina- STOP!  Please do not read this post.  Please do not look at the photos.  Baby Chuck wants you to be surprised by the gifts he made you.)


Are they gone?  Good.  Now, for the rest of you-
This Christmas season I find myself crafting, and crafting, and crafting some more.  It's like someone opened up my blocked crafty gates.  My mind keeps churning and my hands making.  Mind you, not everything turns out the way it's supposed to (like the time I boiled cashmere for hours to felt it... big mistake... we just ended up a horribly smelly sweater), but it's just fun to make stuff.

Since Christmas (or as I now dub it "Craft-mas" get it?  Tee hee...) is just a couple of weeks away, I'm crafting more holiday items.  First I made the fortune cookie advent calendar and the geometric straw ornaments.  This week we tried our hand at making salt dough ornaments.  Patty from Make it Cozee posted such clear directions and cute photos that it was easy to get super cute results.  (Thanks, Patty!)

We painted the hand prints gold and we had a whole bunch of dough left so we made some tinier ornaments too.


Hopefully we can make this a yearly tradition.  Then we can see Baby Chuck growing.. and growing.. and growing... (Hmm... does this mean we need plate sized ornaments?  Oh well, we'll cross that bridge when we  get there.)

Monday, October 8, 2018

How to Doodle Frisbees

Hi everyone! Quick fun art idea here- I wasn't sure what to call this post originally.  Doodle Frisbees?  Art frisbees?  Mandala frisbees?  "Sharpies-are-so-cool-they-draw-on-everything" frisbees?  Oh well.  Names were never my strong suit.  But I had to pop in and share this craft because I think it'd be a fun one to do for a party on during a playdate.

How To Doodle on Frisbees

(aka "Gosh. Sharpies really do draw on everything.")

How to Doodle on Frisbees with Kids


Note:  This post contains affiliate links.  This means I make a small bit of change when you purchase items through the links.  Thank you for your support and the grocery money! For my full disclosure policy, click here.


Tuesday, July 1, 2014

Cardboard and Pom Pom Soccer Game

Are you watching the World Cup?  Hubby's been keeping track of the games, but Chuck and I haven't been paying too much attention to the scores.  However, because it's soccer season, I still felt inspired to make something soccer-related.  So that's why I crafted this mini cardboard and pom pom soccer game for us to play.

Cardboard and Pom Pom Soccer Game

make a cardboard and pom pom soccer game
(This post contains affiliate links.  Thank you for your support!)


Wednesday, December 12, 2012

Guest Post at About Proximity


Today I'm writing a guest post on my friend Lisa's blog, About Proximity.  Lisa and I met in Michigan and she's seriously one of the warmest and kindest people I've ever met.  Because of her openness to share about her faith and life, I felt that her blog was the perfect place to share about my decision to quit my PhD program.

Click here to read my guest post.


Buy Now

Monday, November 26, 2012

Cakesgiving

Are you more of a sweet or savory person?

I've always been a savory type of gal.  I like eating sweets occasionally, but I always have room in my tummy for salty snacks.

(By the way, sorry hubby for devouring that bag of chips the other day.)

Anyway, back to this post.  This Thanksgiving (which shall hereafter be called "Cakesgiving"), everything changed.  Our aunt (yah, the same one that made Chuck's Hungry Caterpillar cake) fully embraced our new dietary restrictions and made a gluten-free triple layer carrot-cheesecake-carrot cake.

Oh.
My.
Goodness.

One bite and I felt myself leaving my body and floating away to sugar heaven.

Carrot cake?  Ooh yeah, it was delicious and moist.
Cheesecake center?  Um, yes please.  It's was creamy with just a bit of tang.
And that cream cheese frosting?  To.  Die.  For.

(Just thinking about that cake now makes my toes curl.)

I never got a chance to get the recipe.  Rats.  But fortunately, I did take tons of photos of her making it.  (This was me "helping" out with Thanksgiving preparations.)  So, dear reader, I present to you some delicious cake photos.

(Warning- If you're on a diet or thinking about going on a diet, please avert your eyes.  Read another post.  Take a walk.  Eat a rice cake.  Just turn away and don't look at the photos.)
  
Ooh, mix it!


Yeah, crack those eggs...

Ooh, sugar...

Softened cream cheese... yuuuuuuuum....

Take a whiff.  Can you smell it?  Yup, that's warm carrot cake fresh from the oven...

I'm totally drooling.  Oh baby, whisk that icing!

Oh. My.  Goodness.   My pulse just quickened...

Ack.  My toes are curling. 

If only they I had taste-o-vision.  Then I could reach in and take one more delicious bite. 


It was really the best cake I've ever had.
Ever.
Ever ever.


Phew.

I don't know about you, but it's time for me to cool myself off with a nice cold glass of milk.

Happy (yummy) Monday!

Sunday, January 20, 2013

Cowboy party


When we first moved back to New Jersey, I was afraid that we wouldn't find community.
Silly me.

Last week our toddlers group held a cowboy party for the kids.
Costume?  Party?
Yup.  I've found my kind of people.

Psst- Tomorrow I'll share how I crapted Baby Chuck's cowboy costume from felt, cardboard, and a cake tin. 

Wednesday, April 23, 2014

Easter Photos

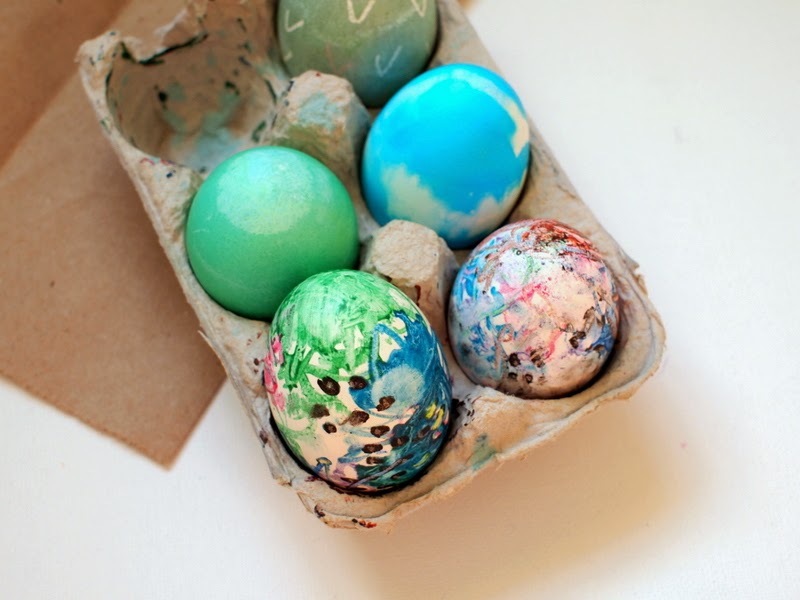
Melted crayon easter eggs
Melted Crayon Easter Eggs


Since we were away in Australia for a bit, Easter really snuck up on me this year.  I felt like I didn't have time to prepare my heart for what it meant, and I didn't have time to prepare too many Easter crafts for the kids to do.  Fortunately, the holiday still came and went with a lot of joy, fun, and crafting.  This year we attended two Easter celebrations, one with a couple of good mommy friends, and the other with family.

As a mommy (and a blogger), I always try to bring my camera whenever we attend get-togethers.  I think those events are special and I want to capture all the beautiful memories, yummy food, and funny moments that inevitable occur.  But lately, I've noticed that when I pull out the camera to snap photos, I also miss out on a bit of the moment's magic.  Sure, I've captured a memory in photograph, but I also wasn't really a part of it (probably because I'm fiddling around with camera knobs... blech technology).  Does that make sense? Does anyone feel that way too?

Anyway, I guess this was a really long intro to just explain why this year's photos were kind of lacking... and why my shots were mostly of crafts.  We loved celebrating Easter with friends and family this year.... and I was just having a bit too much fun beiing in the moment to stop and capture the moment.


Thursday, October 11, 2012

Missing smiles

For the past couple of days Baby Chuck has been pretty sick.  He's consistently had a fever and suffered from some tummy problems.  Our poor boy was fussy, tired, and warm as a toasty loaf of bread.  Hubby and I were really worried and we felt helpless.

Last night we finally got the fever down. 

Right now he's napping and I'm crossing my fingers that his temperature stays down this time...
Oh how I missed seeing his smile.

Tuesday, May 1, 2012

DIY- Baking Soda Deoderizer

I have a love-hate relationship with Baby Chuck's cloth diapers.  I love using them because they help us to save money and they allow us to put less waste into landfills.  Plus, they're so colorful! 

Ah, ain't nothing prettier than a bunch of newly washed cloth diapers.


And yet, I also find myself hating them.  When they're soiled, they're just so darn stinky.  Pee eww.  Ever since Baby Chuck started eating solid foods, his waste has taken on a different odor.  Hubby describes the smell like "cinammony dead cat," whereas I think it's more of a "sweet week-old fish."  

Our last load of soiled diapers was so pungent that I almost passed out on my way down to the laundry room.  Hubby suggested that I wear a double vent gas mask next time, but I figured I'd just open a box of baking soda and leave it next to our diaper pail.  But then, after finding this deodorizer and this DIY air freshener, I felt inspired to make something similar.  I poured baking soda into an old jam jar, cut out two heart shaped vents from a piece of fabric, and then sealed the jar up. 


Smells, be gone!

Friday, August 29, 2014

Shape Touch and Find Game

Now that Chuck is almost 3 I'm trying to do more educational activities with him.  Besides learning our numbers, we're also working on identifying different shapes.  Here's a fun shape activity that we've recently been doing together.        

Let's learn about shapes!


Shape Touch and Find Game:  A great way to teach shapes and math to little kids

(This post contains affiliate links.  Thank you so much for your support!)


Early childhood mathematics education is something I feel quite strongly about.  Before I was a mommy, I was working on my doctorate degree in education. Although I never finished writing my dissertation (for reasons that you can about here),  I did spend  many years observing and studying how preschool children learn mathematics.  I also had the wonderful opportunity to work on a research-based preschool math curriculum called  Big Math For Little Kids.

This Touch and Find Shape game is one of my favorites from that curriculum.  It's a great activity because it helps young children to learn the number of sides and corners in shapes in a really fun and interactive way. 

Let's play the touch and find shape game!


Friday, January 22, 2016

Origami Conversation Heart Corner Bookmarks

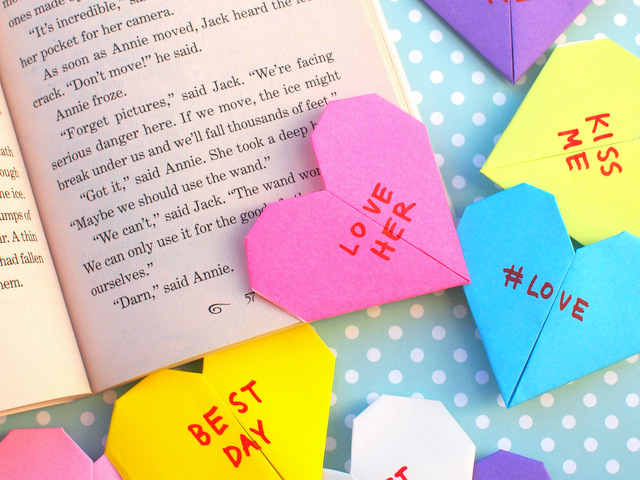
Origami Crafts + Valentine's Day Crafts are some of my favorite to make!  I love transforming a sheet of paper into something else... and today's super easy craft combines both of these loves.  Tada!  We're making...

Origami Conversation Heart Bookmarks!


origami conversation heart corner bookmarks- great valentine's day craft for kids
This post contains affiliate links.  Thank you for your support!

Sunday, January 19, 2014

Make a Valentine's Day "Arrow through the Head" Headband

Oh no!  Chuck's been shot...
(With Cupid's arrow.. teee hee hee)

Valentine's Day "Arrow through the Head" Headband


DIY "Arrow through the head" Headband

Looking for a cute Valentine's Day accessory that is affordable, easy-to-make, kid friendly, and boy friendly?  Well, you could always try making this "Arrow through the head" headband...

Friday, February 16, 2018

Let's Build Beautiful 3D Card Structures!

What happens when you have access to the internet, shortened daylight hours, a craft-and-math loving kid, and a deck of old playing cards?  Well,  if you're me... you rally everyone together to do a STEAM activityYeah!

Tired of bouncing off the walls one night, our family tried our hands at making these nifty 3D Card Sculptures.  They came out pretty cool and I thought I'd share them today with you!

Let's Make Beautiful 3D Card Sculptures


how to make cool card sculptures from playing cards- such a fun STEAM activity to try out with kids!


Thursday, December 18, 2014

DIY Toy Car Ornaments

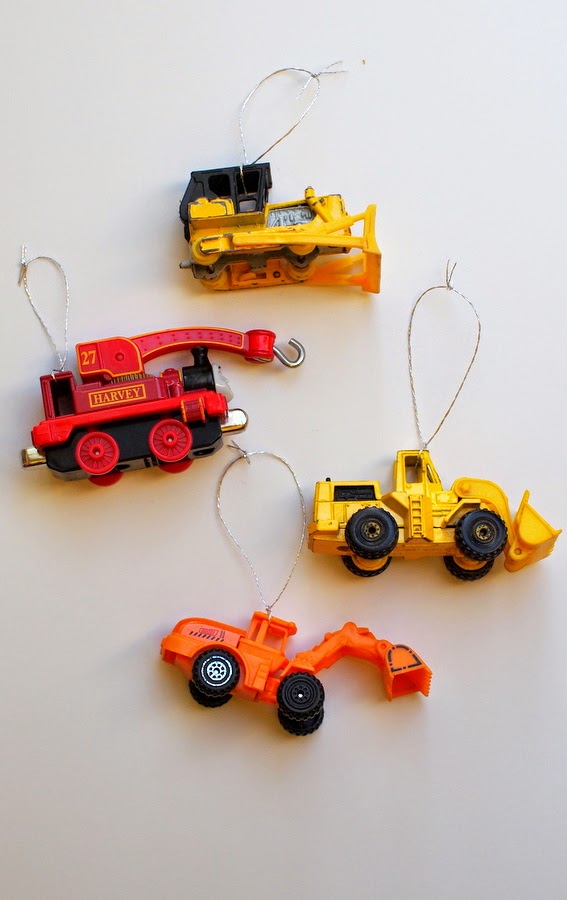
We have a TON of toy cars, trains, and trucks over here.  (Chuck's kinda got a thing for transportation toys.)  And lots of them have open windows.  I was staring at them the other day and realized... wouldn't they make fun (and cheap) ornaments?

DIY Car Ornaments


Easy DIY toy Car Ornaments- Turn toy cars into ornaments


Friday, October 26, 2012

Crapty Friday- Faux metal magnets made with glue, aluminum, and cardboard

I can't believe it's Friday already.  Time is really whizzing by!  We're still doing some last minute Halloween preparations over here.  I just finished sewing Baby Chuck's super simple costume.  We're also planning on picking out and carving pumpkins this weekend.  Hopefully we aren't too late and there are still good pumpkins to be found.  Eek!   

This week I crapted two kitty magnets.  I was inspired to try out this crapt after seeing this awesome  post.  My kitty magnets were made out of aluminum foil, cereal boxes, and old magnets that I saved from  a magnetic notepad.  (After finishing the last page of the magnetic notepad, I saved the magnets and used them again.)  

Here are the materials that I used:
- magnets  <-- crap
- cereal boxes
- pencil
- Sharpie
- glue
- glue stick
- aluminum foil
- Q-tip
- paper towel
- scissors
- black craft paint (the original set of directions used shoe polish, but we didn't have any so I improvised)
- hot glue gun

Directions:
Step 1:  I cut out two rectangles from the cereal boxes.  These became the base of my magnets.  I doodled images on both and then traced my doodle with glue.  I let the glue dry overnight.  (Note:  I made very simple designs because glue lines are pretty thick.  Later I used a pencil to add details.)

Step 2:  I cut out two pieces of aluminum foil that were bigger than my rectangles.  I glued the aluminum foil onto each rectangle.  Then, I carefully rubbed the aluminum foil to reveal the raised cat shape underneath. (Note: I placed a paper towel between my fingers and the aluminum foil to make sure that I wouldn't rip or scratch the foil.)

Step 3:  I used a Q-tip to rub around the glue.  This made the raised glue bits further stand out.

Step 4:  I trimmed the aluminum foil and glued the excess bits onto the back.

Step 5:  I used a pencil to create texture by drawing different patterns and finer details.
 Step 6:  Using my Q-tip and paper towel, I dabbed craft paint onto small portions of the magnet.  Then I quickly wiped off some of the paint.  The black paint helped the patterns and raised bits to further stand out.  It also made the aluminum foil look less shiny. 

I repeated this dab and wipe off procedure until I got a look that I liked.  To further emphasize the details, I lightly traced portions of my design with the Sharpie marker. 

Step 7:  I glued the magnets onto the back of my cat images and voila, two finished magnets.
This was a pretty fun process.  I felt like I was making some counterfeit antique items.  Don't the finished products look a lot more substantial and expensive than they really are? 

Thanks for joining me on another crapting adventure.
Hope you have a great weekend!