Showing posts sorted by relevance for query halloween. Sort by date Show all posts

Thursday, September 23, 2021

DIY Mod Podge and Tissue Paper Spell Book Craft

I love Halloween crafts and I especially enjoy making Halloween crafts with kids In today's project, I'll show you how the boys and I transformed old books into spooky spell books using items from around the house. This upcycling process was fun and the results were creepy and perfect for Halloween!


How to Make a DIY Spell Book with Kids

How to Make a DIY Mod Podge and Tissue Paper Spell Book Craft Prop Decor with Kids for Halloween

This post contains affiliate links.  This means I make a small portion off of any purchases made through the links at no additional cost to you.  Thank you for the grocery money!  For my full disclosure policy, click here.

Tuesday, October 27, 2015

No-Carve Hardware Pumpkins

If you're not keen on carving a pumpkin this year, dig around the 'ol toolbox and try out this easy no-carve idea instead!

No-Carve Hardware Pumpkins!

Easy, No-Carve Hardware Pumpkins- Perfect Halloween craft for kids of all ages!

This post contains affiliate links.  Thank you for your support!

Sunday, September 28, 2014

Origami Jack-O-Lantern Pumpkin

Can you tell that I'm really digging Halloween origami?  Last week I shared how to fold a cute origami black cat.  Today I'm continuing the theme and sharing how to fold an origami Jack-O-Lantern pumpkin!  


Origami Pumpkin

How to fold an origami Jack-O-Lantern Pumpkin for Halloween

This post contains affiliate links.  Thank you for your support!

I'm still an origami novice and I found these pumpkins to be much easier to fold than the black cat.  I just followed the original tutorial here.  It was shown with very few words and lots of arrows.  So I took photos of my process in hopes that these photos and descriptions will make things clearer.  (Although if you run into trouble, definitely check the original source!)

Let's get folding!

Thursday, October 25, 2012

DIY Halloween window clings

I made these window clings on a whim because I still had left over black glue from my  DIY faux stained glass project

I doodled Halloween images onto a piece of paper.  Then, I traced the images in glue on a  piece of wax paper. Afterwards, I let them dry about 24 hours. (Yah, I was surprised it took that long for the glue to dry too!)

Just realized now that my bat looks like a black golden snitch with eyes


Tada!  Spooky!

As you can see, these clings aren't quite as nice as the ones from the store.  They are kind of bumpy and don't completely stick to the window.  But, they're one of a kind and fun to make.

Because I lay down the black and white glue at the same time, they mixed together as they dried.  (Now my ghosts a bit spookier than I intended.  Eek!)  When I make window clings again, I'm going to outline my images in black (or whatever color) first. Once that dries, I'll fill the images in with my other glue. 

Also, the clings didn't initially stick to the windows.  I had to wet the back of the cling with a bit of water and then stick it to the window.  (Tip learned here.) Somehow the water helps the clings to stick.  Water also dripped down the window as I stuck them up.  But not to worry! Once they were sufficiently stuck, I just wiped the smudges and dribbles up.

I think the Halloween decorations are helping Baby Chuck to get into the Halloween spirit.  He's so cute.  He keeps pointing to the clings and and pumpkin garland and growling. 

Monday, October 13, 2014

Black Cat Duck Tape Containers

Last Friday we hosted a grill out for some of hubby's work colleagues.  To make our place a bit more Halloween-y I turned some old cans into these cute black cat containers using duct tape!

Black Cat Duck Tape Containers

make a black cat container for Halloween using Duck Tape


Aren't they cute?  If you want to decorate containers of your own, head on over to DIY Candy for the full tutorial!


Here are some other fun Halloween Crafts!


Let's Keep in Contact!

Like this idea?  You can always find other fun ideas on my Pinterest, Facebook, Instagram, or Twitter accounts!


Have a wonderful weekend!

Monday, October 31, 2011

Spooky celebrations

Today we're celebrating two events:
(1)  It's finally Halloween, my favorite holiday of the year. 
(2)  It's the one year anniversary of my blog.  *Throws imaginary confetti in the air and blows noisemaker*

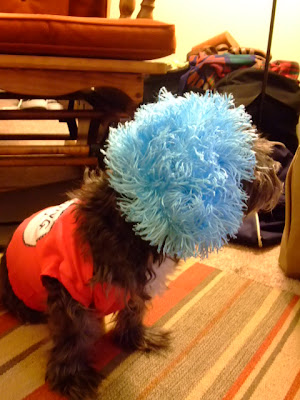
As we all know, Charlie just loves wearing costumes.  (As seen here and here.)  With the new addition to our family, Charlie was gracious enough to whip up two matching costumes, inspired by Dr. Seuss characters.   Although Baby Norris is still too young to fully appreciate this holiday, I do think he enjoyed dressing up. 

DIY baby thing 1 Halloween costume
Baby Norris- "So this is what it feels like to have hair.  I kind of like it."

DIY dog Halloween Costume Thing 1
Charlie- "Aw mom, I'm having a bad hair day."

Happy Halloween!

Wednesday, October 14, 2015

Sparkly and Lacy Yarn Spider Webs

Looking for an unusual Halloween Craft that'll please kids of all ages?  My son and I recently made this sparkly and lacy yarn spider web craft together.  The results were really, really beautiful and the process was really unique!

Sparkly and Lacy Yarn Spider Webs

how to make sparkly and lacy yarn spider webs with kids
This post contains affiliate links.  Thank you for your support!

Friday, October 19, 2012

Crapty Fridays- Make a Halloween garland out of an egg carton

Before we talk about today's crapt, let me just begin with this short poem about crapting: 

Crap is destined for the garbage
and therefore it is free.
When I use crap to make my crafts,
a-crapting I will be.

Today's crapting project is a Halloween inspired one.  Our apartment desperately needs Halloween-y decorations.  (We currently only have a pair of Day of the Dead candle holders)  So, I whipped up a super easy Halloween garland out of an egg carton and string.      

Materials:
- egg carton
- string
- craft paint
- paint brushes
- craft knife
- scissors
- newspaper/scrap paper/paper bag
- Sharpie marker


Directions:
1. I cut out all the little egg holders in my egg carton.  (Is there a name for those things?)


2. I painted the little egg holders orange and green.  
This is probably as close as I'll ever get to growing pumpkins


3.   Once my paint dried, I drew faces on my tiny pumpkins.
Doesn't this look like a school photo?  Can you spot the naughty pumpkins in the back row?


4.  I cut two slits on the top of my pumpkins.  Then I strung my pumpkins together.


Right now they're just smiling and dangling away above our table. Seeing their cute faces when I eat cereal in the morning makes me happy.

Happy crapting!

Tuesday, October 28, 2014

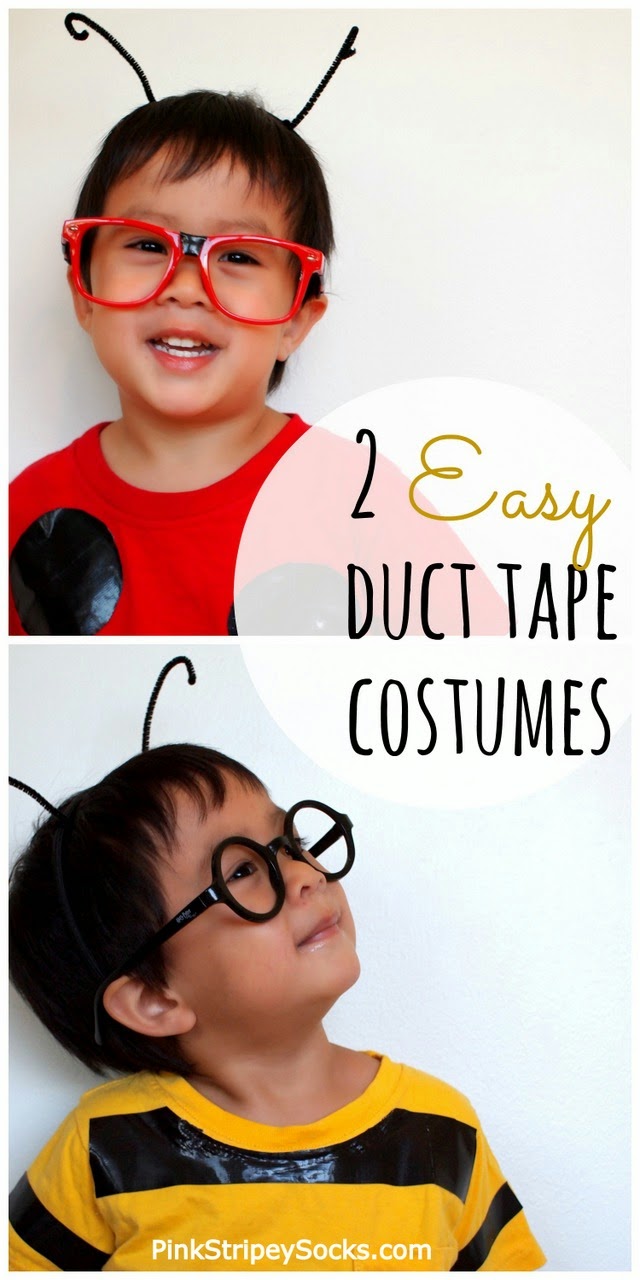
2 DIY Duct Tape Bug Costumes

Looking for some last minute ideas for DIY Halloween Costumes?  I've recently been embracing duct tape as a crafting material.  So I tried using it to make 2 really easy eleventh hour Halloween Costumes for Chuck.

2 Easy Bug Duct Tape Costumes


2 Super Easy Last Minute Bug Halloween Costumes made using Duct Tape!
This post contains affiliate links. Thank you for your support!


Why use duct tape instead of paint?

Before I got on this duct tape streak, I would have probably just painted these costumes.  You can get some really neat and clean designs painted using freezer paper stencils. But, I really like the idea of using duct tape because you don't have to wait for paint to dry, AND, you can use the shirts over again for something else (which is a big plus in my book!)

Ok.  Let's get making!

Thursday, September 29, 2016

Cute Kitty Gift Box

Who loves cats?  Who loves Halloween crafts?  Did you raise your hands for both?  If so, you'll love making this adorable kitty gift box craft!

Cute Kitty Gift Box Craft- Such a fun way to wrap gifts or decorate for Halloween!


Wednesday, October 10, 2012

Bunny Halloween coloring page

A couple of nights ago a bunny appeared magically on my piece of paper. 
He had a question and asked if I could help.


He certainly asked the right person.  I love Halloween!  So we spent the next hour doodling away....
Coloring page- Halloween bunny costumes 

Thursday, October 31, 2013

Happy Halloween from a little Lightening McQueen

Happy Halloween everybody!  

Hope you have a wonderful and magical day!  
As promised, here are some photos of Chuck in his Lightening McQueen costume at a church party.
(And if you want to see my matching Mack costume, click here.)


(Did you see shoes?  Click here to see how I painted his Lightening McQueen Shoes.)

And here are a couple of photos showing how I made it. 

Sunday, October 14, 2012

Bunny Halloween Coloring page 2

So my poor bunny still doesn't know what to wear for Halloween.  Perhaps he should wear one of these costumes?

(To see the previous coloring page, click here)
Halloween bunny coloring page 2


Tuesday, October 7, 2014

Easy Origami Vampire Lips!

The quest for cute Halloween themed origami continues!  First we folded ourselves an origami cat.  Then we folded these three origami jack-o-lantern pumpkins.  Today, I'm continuing the trend and showing you how I folded up these Origami vampire lips!

 Origami Vampire Lips


super easy way to hold origami vampire lips
This post contains affiliate links. Thank you for your support!


Now full disclosure here-  I'm NOT an origami expert. I'm a complete novice.  I first saw a tutorial for cute vampire lips from this fun Halloween origami book.  However, hubby and I tried and tried... but we just couldn't figure out how to fold the darn thing!  So I looked online and saw a bunch of other really hard directions.  

Since I really liked the way the vampire lips looked, I ended up making up my own way of folding them.  So I guess the post should really be titled "Faux-gami."

If you want to try this faux-gami tutorial, check out the directions below!  I promise you, it's super easy and the results are really cute.

Let's get faux-lding!

Tuesday, September 23, 2014

Cardboard "Bead" Necklaces

I recently saw this fabulous post on painted bead necklaces by fellow Rockin' Art Mom ArtBar Blog.  Her students painted such beautiful wooden bead and cardboard necklaces.  I was really intrigued by the idea of using corrugated cardboard to make "beads," so I thought I'd give it a try myself.  Last weekend our town held its annual Lemon Festival, so I painted myself a lemon necklace to wear there.  And since Halloween is always on my mind, I painted myself a skull and bones necklace too.  Here are the results!

Let's Make Some Cardboard Beaded Necklaces!


Make Cardboard Beaded Necklaces!

This post contains affiliate links.  Thank you for your support!


Aren't they cute?   Let's get making!


Wednesday, October 30, 2019

DIY Clip-In Hair Wraps for Kids

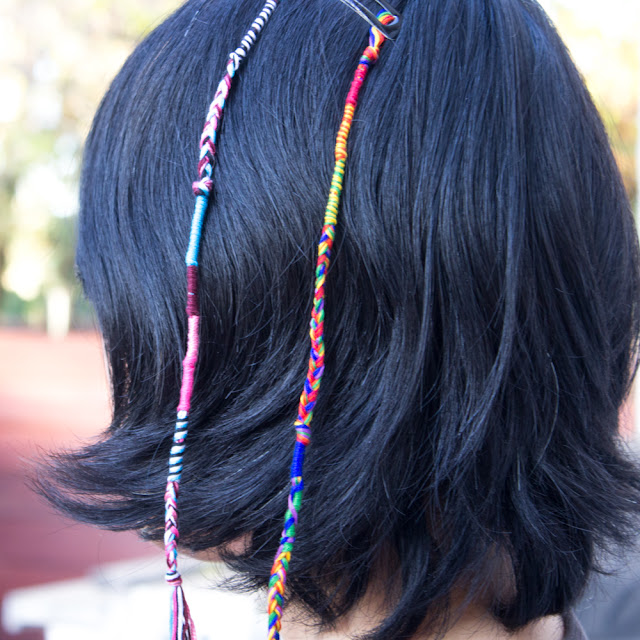
I've been doing a lot of DIY hair wraps. With Halloween coming up, a lot of little girls seem to want their hair wrapped up in Halloween colors. Recently, I've been toying around with the idea of making removable hair wraps. This way, kids could make a whole bunch of clip-in hair wraps and easily swap them out for different holidays or outfits.

Today I'm sharing my solution with you- Tada! These DIY clip-in wraps are simple to make and easy to swap out. Now your kids can change up their wraps whenever they want!

DIY Clip-In Removable Hair Wraps


DIY Clip In Hair Wrap Extensions- fun Craft for kids to make for themselves or other friends

This post contains affiliate links.  This means I make a small bit of money for any purchases made through the links at no additional cost to you.  Thank you for your support.  For my full disclosure policy, click here.

Sunday, October 27, 2013

Make Sugar Skull Sun Catchers and Crystallized Sugar Skull Ornaments

Alright everyone... the countdown is on.  It's just a couple of days till Halloween.  Are you excited?  Or, are you over all the orange and black?

I'm in the first group and still SUPER excited for Halloween.  I just finished Chuck's costume this past weekend, so he's ready to go.  I'm not sure if he'll appreciate the idea of trick-or-treating (plus his allergies prevent him from eating a lot of the candy out there), but I think he'll enjoy seeing other kids in costumes and all the spooky decorations.

I'll upload some photos of his costume later on this week... but today I just wanted to share the last of my sugar skull crafts.

So, we already made DIY sugar skull candle holders and DIY sugar skull luminaries and Allison shared her lovely tutorial for DIY sugar skull shoes.  Today's sugar skull crafts were designed with kids in mind.  They're easy to make and the resulting products look great.

1.  Sugar Skull Window Clings

Colorful and fun, these two skulls will float happily on your window.


Materials:
  • Contact Paper (Buy the cheap stuff from the Dollar Store)
  • Black paint pen (You could also use a Sharpie marker, but the lines won't be as dark.)
  • Scissors
  • Cellophane 
  • Tape

Thursday, October 17, 2013

Guest Post: DIY Sugar Skull Shoes


Earlier this week I shared that Allison from Dream A Little Bigger and I were doing post swaps.  On Monday I visited her blog and showed how I made these cute and colorful perler bead bracelets.  Surprise!  Today Allison's over here, presenting this super cool sugar skull shoe tutorial.  With Halloween and Dia de los Muertos coming up, this craft is a great one to do.   It'll certainly get you into the spooky spirit!


Sugar Skull Sneakers Tutorial by DreamALittleBigger.com Hello! My name is Allison and I'm a crafty cat lady that blogs over at Dream a Little Bigger. Crafting and creating is what I love to do and I'm so happy that I'm able to share that with all the sweet readers at Pink Stripey Socks! I'm a huge fan of Leslie and I'm so excited to be guesting here today! I've kind of sort of got this huge thing for shoes. Not fancy or designer shoes or anything but shoes I've made up and crafted on. It's a pretty big deal and so far I've made almost 60 DIY shoe tutorials. Don't believe me? Check this gallery 
out.


Wednesday, September 11, 2013

Temporary Contact Paper Kitchen Cabinet Decorations

So, this is apparently what happens when you give me some paint pens and contact paper.


Yup.  Those are flamingos.  And yes, they're all over our kitchen cabinets.

I know it's September, and officially autumn, but I refuse to cave in to the cold weather just yet.  Oh no.  This gal is holding onto every last drop of sunny, warm weather fun.  And seriously, what's more fun than pink flamingos?

Exactly.

Here's how I made my temporary pink cabinet decorations. 

Materials
  • Contact paper (No need for the fancy stuff, I just got cheap rolls from the Dollar Store)
  • Paper
  • Scissors
  • Exacto knife 
  • Cutting mat
  • Paint pens
  • Masking tape  
  • Ruler (optional)
Directions
1.  Make paper templates of your cabinet doors.  (I simply placed sheets of paper on top of cabinets and traced.  I was too lazy to pull out a ruler.  So, my lines came out a bit crooked.  Not a big deal for me.  If you want lovely, clean, straight lines, pull out your ruler and measure away.)

2.  Then, doodle your design on your paper.  Cut out your design and make yourself a stencil.


3.  Cut out sheets of contact paper that are the same size as your paper templates.  Tape the paper template on top of the contact paper.  Use your paint pens to decorate your contact paper.


4.  Attach your decorated contact paper to the cabinets.  (You'll probably want to make sure the cabinet doors are clean.  And, you'll probably want to go slowly.  Attach a bit of contact paper and then remove a bit of the backing.   Then continue until your entire sheet of contact paper is securely attached.)


Enjoy your new flamingo kitchen cabinet decorations.

Just realized, this would be a really easy and cute way to decorate for Halloween too.  Give the kids the paint pens and have them doodle monsters or spiderwebs... or whatever they want onto the contact paper.   Then, stick their scary decorations to your cabinets (or windows... or walls...) and boom, instant, personalized Halloween decorations.

(Special thanks to hubby for supporting his kooky wife's pink flamingo dream... and for photographing the tough kitchen shots.  We get such little light in there and I'm amazed that his shots look as good as they do.)

Happy crafting!

Sunday, August 18, 2019

50+ Super Cute and Easy Origami and Kirigami Projects for Kids

Looking for origami projects that are unique, cute, and easy-to-fold? Or, do you feel the need to grab a pair of scissors and cut some beautiful kirigami designs?  If you're on the hunt for kid-friendly paper folding projects for spring, summer, fall, and winter, then I've got the ultimate post for you. Here's a growing list of over 50 super cute origami and kirigami ideas for kids!

50+ Easy and Kid-Friendly Origami and Kirigami Projects


50+ cute and Easy Origami and Kirigami Projects for Kids for all seasons!

This post contains affiliate links. This means I make a tiny bit of grocery money from each purchase made.  Thank you for your support!  For my full disclosure policy, click here.